
TDSI_Immersive_collect 3
Homework:
For our next meeting, please create a storyboard based on your concept and today’s feedback. The storyboard should include a description of every shot in the sequence of events, detailing how the elements change throughout each shot. This is best expressed through “pencil on paper” sketches.
Additionally, the storyboard should indicate the approximate duration of each shot, ideally in seconds. These durations can change, and it’s practical to render shots with extra footage at the beginning and end to allow flexibility during editing and final compositing.
I find it useful to start a timeline in the software of your choice, incorporating the sketches of each shot while adding a rough soundtrack. I typically do this in Premiere, and if I don’t have images yet, I use markers that can hold text descriptions of the shots. This approach will give you an early sense of the timing. An added benefit is that these markers can be exported to a CSV file, which can then be used in TD to drive timers.
Consider how each scene should be created, as they may come from different software and use various techniques. The storyboard will be the primary source for breaking down the production process, helping us determine which approaches to take to achieve the desired scenes and images. It will also guide us in identifying the techniques to research and the scope of work involved.
Tip: Try to minimize the variety of different techniques used, as each one may present challenges and take longer than expected.
Please share the storyboard (ideally as as PDF) on Discord.
Inspiration
Here are some of the links that have been mentioned in the chat during the live lesson:
https://www.miraruido.com/
https://www.teamlab.art/
https://ephemeraltomorrow.com/
https://www.tamschick.com/project/invisible-worlds
https://en.wikipedia.org/wiki/Koyaanisqatsi
https://en.wikipedia.org/wiki/Baraka_(film)
https://www.instagram.com/bb.dere
https://www.gafferhq.org/index.html
Ephemeral Tomorrow talk at TNI Roundtable – dealing with scientific data in a poetic way:
https://www.youtube.com/live/ur5gx7N0gI8?t=3570&si=OxbkOugdprbbxDFM
FIELD.IO talk at TNI Roundtable, especially the IBM project – dealing with scientific data in an abstract way:
https://www.youtube.com/watch?v=5nWcVr-t5JE&t=249s
TouchDesigner Techniques
These are some example components from my archive that I felt might be useful for some of your ideas.
Most of them are uncommented, please let me know if any questions come up! We can always meet on a quick zoom….
https://drive.google.com/file/d/1HXJWEHqr-MlWLJs_wdVrvnsyLknDOuQm/view?usp=sharing
Heightmaps of the world – Tangram
Downloads
Template 1
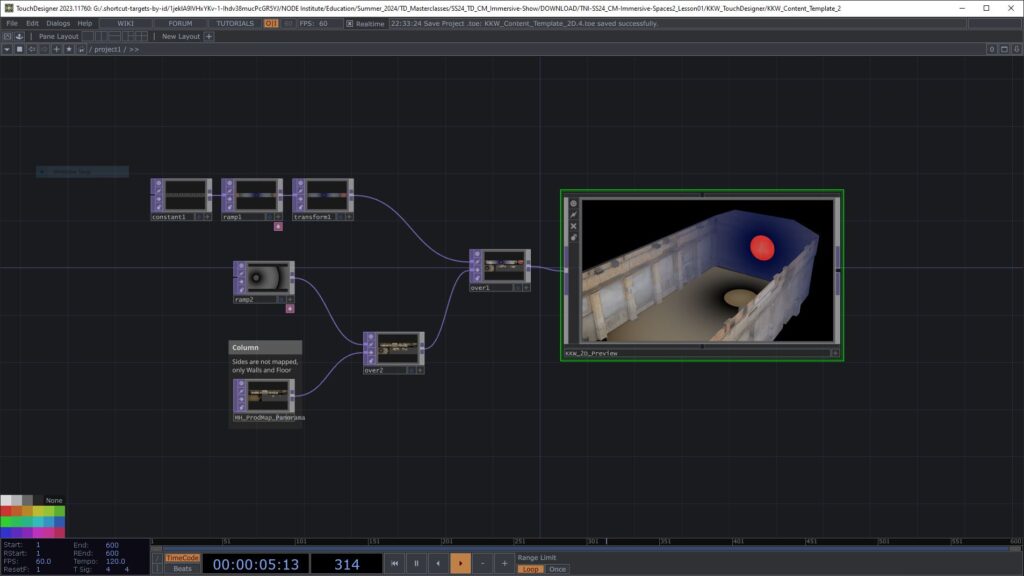

https://drive.google.com/file/d/1Jcxq4qF5LjZ9X7SYY6uWfD2GQ1BMLG3l/view?usp=sharing
I have mapped MH_ProdMap_Panorama.png to the Walls and Floor.
The “Rest” Geometry is mapped with the UV Map.
All necessary files should be in the downloaded folder structure and links should work if you place this toe in the “KKW_TouchDesigner” folder. It is not the most precise mapping and it is orthographic, so not always as perfect as a UV Mapping, but it should work for preview purposes.
The toe file will also need this fbx file:
https://drive.google.com/open?id=1JkbPokU8lN32z6XZJqVhEWjiyByh9HiT&usp=drive_fs
The according Blender file is here: https://drive.google.com/file/d/1JhsOE6NUsQpuNhDGGv3l4HY9o49JtZ8o/view?usp=sharing
and here is a version, where the walls are mapped with the individual wall Production Maps: https://drive.google.com/open?id=1Jg3UpmxtB_Y19dN2i4yXHrwH-8_5O1fC&usp=drive_fs
The Blender models should live in the “KKW_3D_Scan” folder for the links to work (actually not sure how Blender saves the paths, you may have to relink)
Template 2
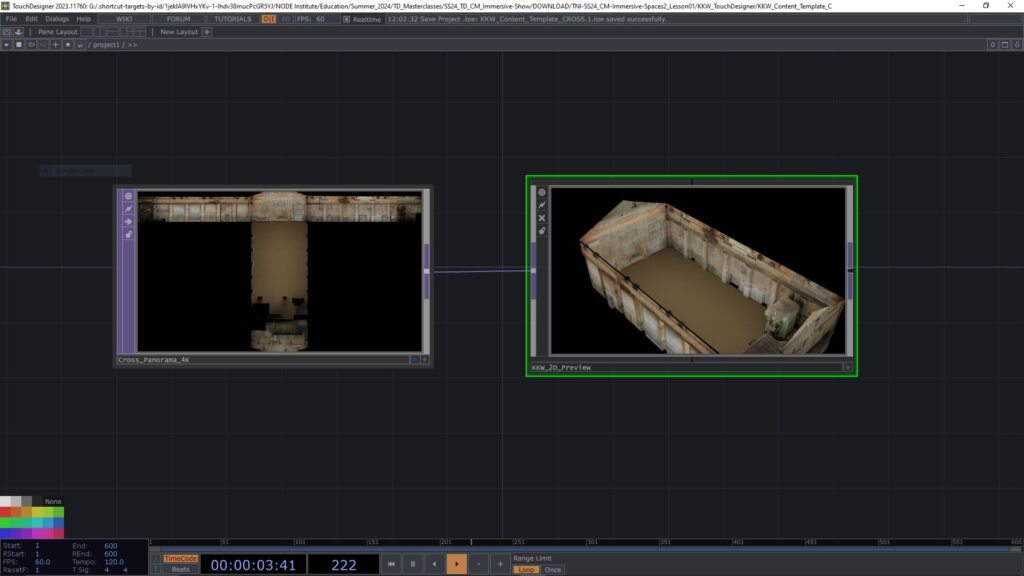
I made an additional Template, inspired by Onionlabs way to present previews in a project we have been working on together. Its very space hungry, but gives a good feeling for directions and the empty space can be used for other info, perspectives etc. Please find the TD file here: https://drive.google.com/file/d/1K5KcKFR0TRSlEfMoIAcIappd_fVS2v7I/view?usp=sharing
The maps are here (3 different sizes):
https://drive.google.com/drive/folders/1JzNA_UBAIE9ii_-Eai9AHHZ4o-_Slkw1?usp=sharing
The 3D Model / FBX is here:
https://drive.google.com/file/d/1K5B-6xUTEW9xAUirBacqx_OiqkfzaKa_/view?usp=sharing
The Blender FIle is here:
https://drive.google.com/open?id=1K2qxR5UoL0o9GlrZJASr5nLoavLm5sG_&usp=drive_fs
fbx & blender files go to “KKW_3D_Scan” Maps go to “KKW_TouchDesigner/Templates”
Toe file goes to “KKW_TouchDesigner”
Inspirational Links from the lesson
Paketa12 – Tentacles in TD Tutorial
Paketa12 – Trees with particles in TD
L-Systems in TD
Procedural Plants in TD
chainGPU – Physics Simulation
Upcoming chainGPU course by Mickey
Past chainGPU course 1 by Mickey
Past chainGPU course 2 by Mickey (GLSL heavy)
Realtime Weather API Tutorial by Lake Heckaman
3DScans and Gaussian Splatting
3D Assets Market
https://www.cgtrader.com
Animate 3D Models with AI
https://app.anything.world/animation-rigging
Normal Baking explained
https://www.youtube.com/watch?v=kHK0knYd-XI
Technical Preview : Deadline : 21st of July 2024
Technical preview means, that you have to render out all the files necessary to make your project part of the reel. This doesn’t mean that the content and music have to be final, but it means that I need to receive 5 movies, one for each surface and 6 audio files in the right resolution, codec and naming.
As we we have to treat every work technically the same to be able to show it in one reel and we have setup the whole remapping last year to fit the warped masks, this is what I will need in the end.

Download the relevant Masks here:
https://drive.google.com/drive/folders/1DwrJcD9c5yHQD74SXfoN03ztTfRZBEHg?usp=sharing
Video – 5 files
Codec: ProRes 422 LT, 30 FPS, color space Rec.709
Wall left : 6048 x 1752 px / Wall right : 6068 x 1632 px
Wall front : 2900 x 1808 px / Wall back : 2852 x 1860 px
Floor : 3840 x 1920 px
Audio – 6 files
Audio format: WAV, 24 bit, 48 KHz, Mixed and mastered in 0dbu, 0.755V eff.
The soundtrack can be mono, stereo or 6 channel.
Speaker 1-6, each as mono file
Order and Naming:
1 – Left back – LB
2 – Right back – RB
3 – Left center – LC
4 – Right center – RC
5 – Left front – LF
6 – Right front – RF
NAMING FILES AND FOLDER – UPDATE!
While working out how I can batch-process your submissions, I got a clearer image of what I need the final submission (and any update in between to look like.
THE FOLDER
Must have your name
Example:
AndresM
THE VIDEO FILES
Need to have your name in them as well and need to contain the words
“Front” “Back” “Left” “Right” “Floor” (Capitalized as in the example and separated by underscores)
as well as the version number of that file.
Example:
AndresM_Front_001.mov
THE AUDIO FILES
Need to have your name in them as well and must have the names as in the example below.
Audio files don’t need version numbers in the file name, I will always replace all of them.
The Speaker number has to be the first thing in the name.
PLease provide 6 mono tracks with that naming, independent of the content!
If you want to use one channel only, make six copies of that mono channel and name it accordingly.
If you want to use left and right, still proivde the same amount of mono files. This allows me to treat all submissions the same (automate)
Example:
1_AndresM_Audio_LB.wav
2_AndresM_Audio_RB.wav
3_AndresM_Audio_LC.wav
4_AndresM_Audio_RC.wav
5_AndresM_Audio_LF.wav
6_AndresM_Audio_RF.wav

Ideally you create downloads, that will unpack in exactly that form.
If you have used any of the template files that I have proposed, or your show runs on the 3D model in general, you can use this file to render, warp, spatialise and store all the output clips in one go.

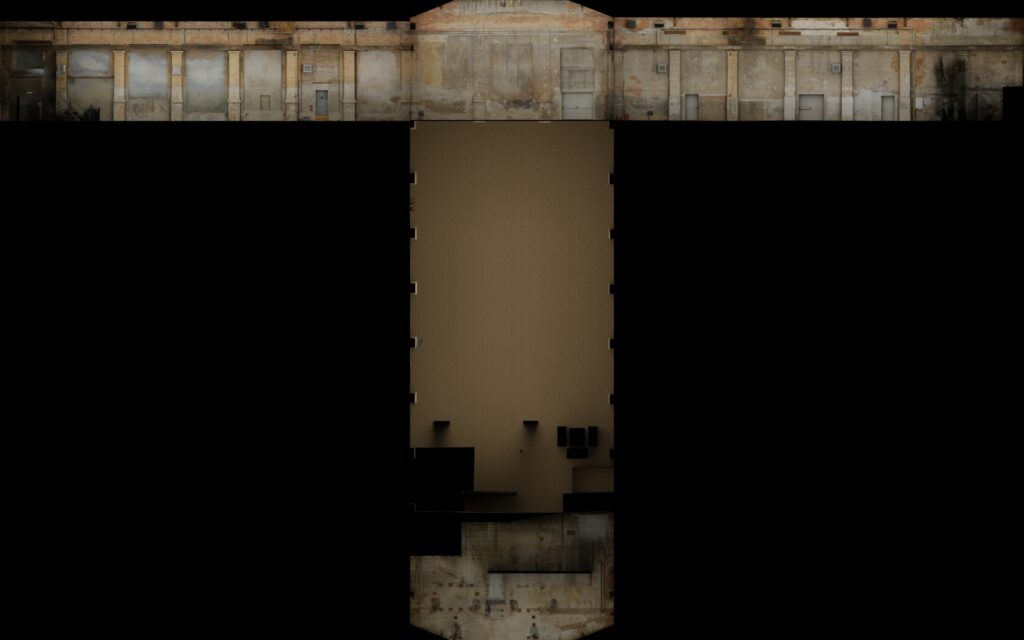
Please note, that the Back Wall was flipped horizontally in the initial Cross Template,
these are the corrected files:
Full Size (15672×10254) : Download
4K Size (3840×2160) : Download
HD Size (1920×1200) : Download

Final Delivery : Deadline : 12th of August 2024
For the final delivery, you have to upload exactly the same files as for the technical preview, just that now all the video and audio content has to be finished.
Resources
KKW Production Manual / Technical Rider
Lesson 02 – Examples.zip (Data Viz & Texture3D)
Lesson 04 – Example.zip (Multi Cam Render and Compression)
Lesson 06 – Example.zip (Quad