9 – Interactive 3D Animation / Recording of December 17th, 2024
Course Files
Lesson Overview
Today our objective is to build an Instancing using TOPs images or videos and using the pixels’ information to deform a Grid of points.
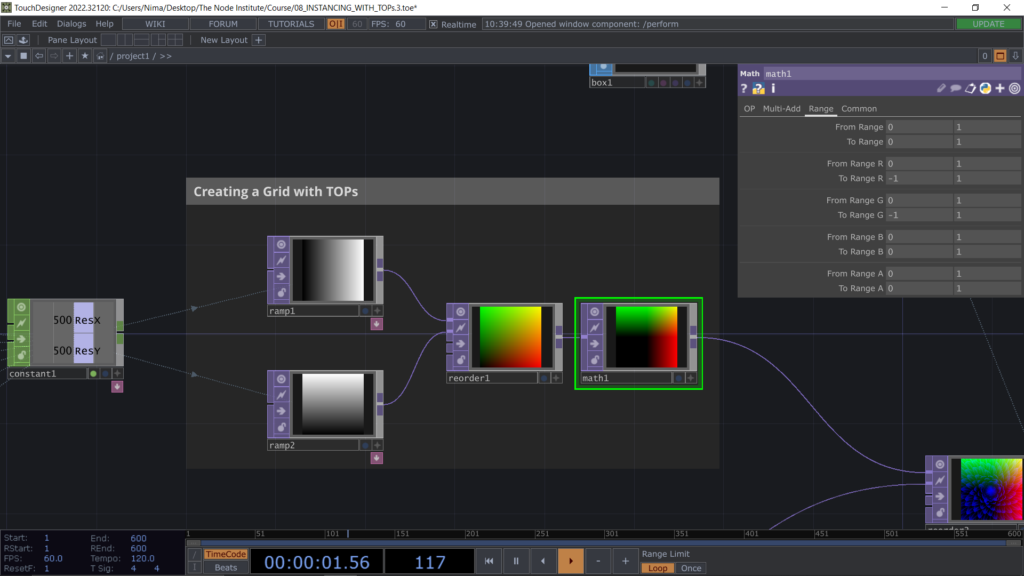
We start by building a Grid of points using 2 different Ramp TOPs (one horizontal and one vertical). Then we will use Reorder TOP to create a single image where the horizontal Ramp will be converted into Red channel and the vertical Ramp into green channel. Math TOP is needed in order to adjust the minimum values of the red and green channels from 0 to -1 so that in the Grid will expand towards the negative axes
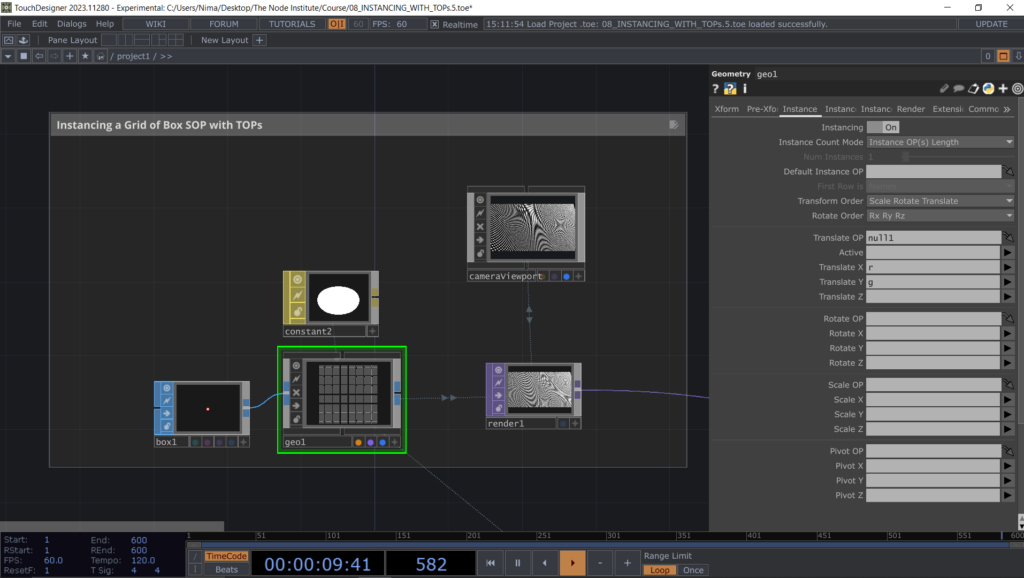
After creating with Reorder TOP the grid of points we can now setup the Instancing process with a Box SOP and render the Geo COMP by adding Camera COMP and Render TOP.
Let’s now import some images from our hard drive and use Fit TOP to set the same number of pixels that we used to create the Ramp TOPs. These images will later define the blue channel that will be used to move the points of the Grid on the Z axes. Feel free to use any image, suggestion is to find images that could create a pattern
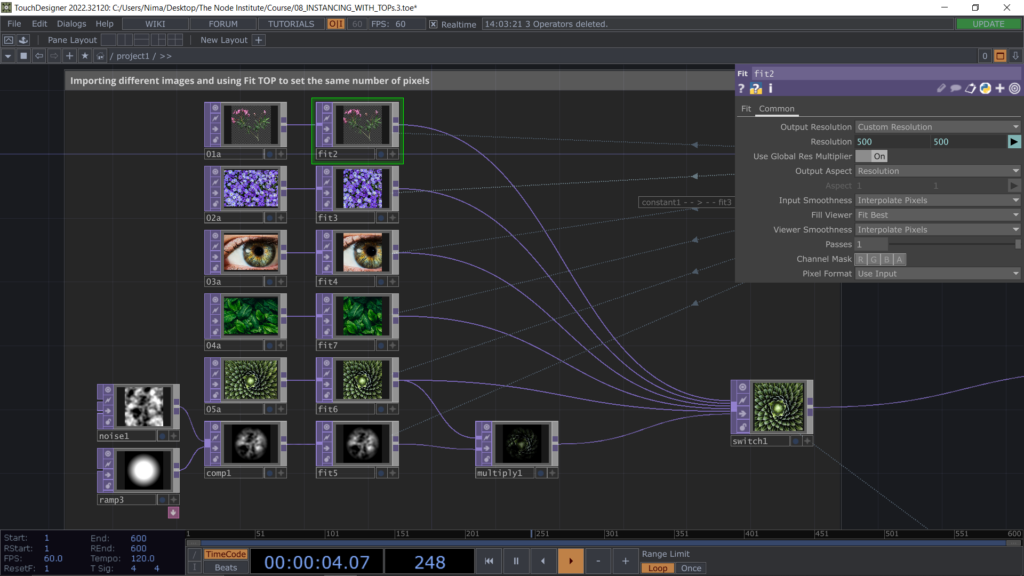
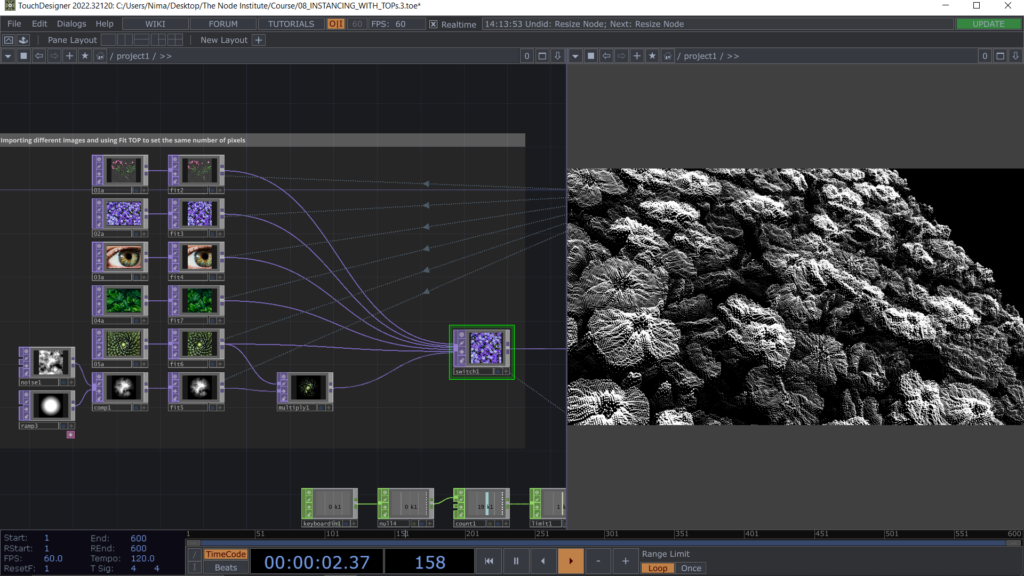
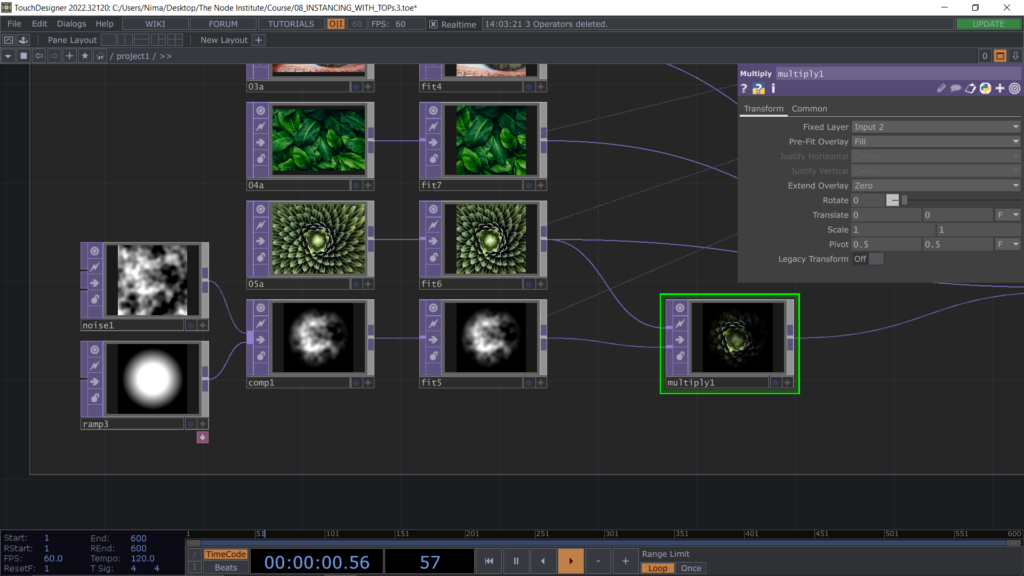
The last image could be mixed with some Noise TOP using the Multiply TOP to produce an animated image. This animated image once we transform it in a 3D Instancing will move the points in Z creating an interesting effect which could trigger some ideas in your way of thinking instancing with TOPs.
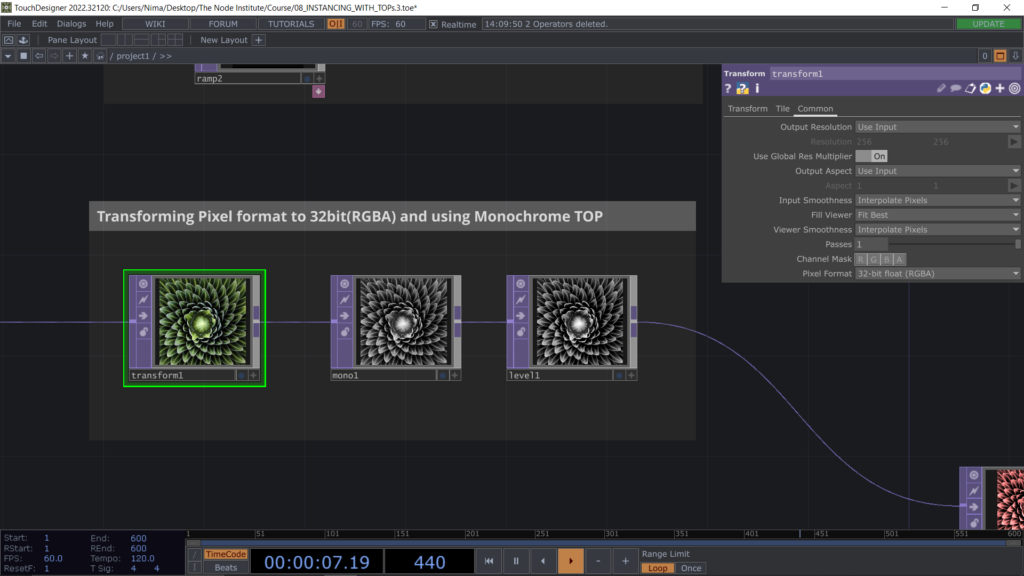
After placing a Switch TOP, which we will use later to switch between different images, we need to change the Pixel format from 8bit(RGBA) to 32bit(RGBA). This is a very important conversion to do or else the Instancing won’t work correctly. As we are using only the red channel we might want to convert any texture in a black and white texture using Monochrome TOP, so that the color won’t influence the Instancing result. Something else we can add is a Level TOP to change the Contrast of the texture.
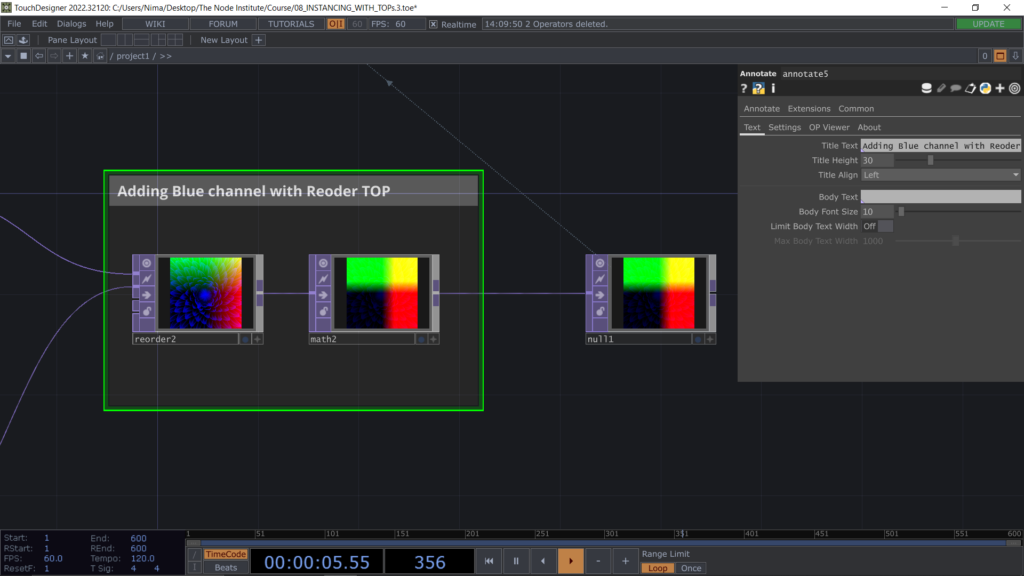
Next we need to include our images in the grid converting the Luminance of the image to the blue channel that we can add to our already existing grid (created with TOPs). To merge this image to the already existing texture that defines the coordinates in x and y we can use Reorder TOP and feed the image to the second input of this operator. We will then add a Math TOP to adjust the blue channel range so that we can move the points in Z properly, creating a sort of bas-relief.
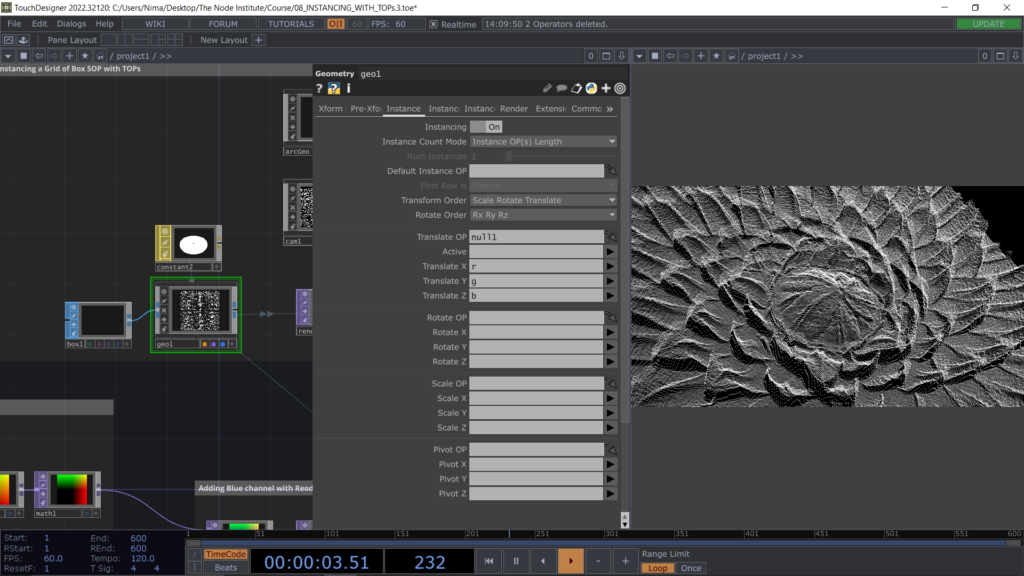
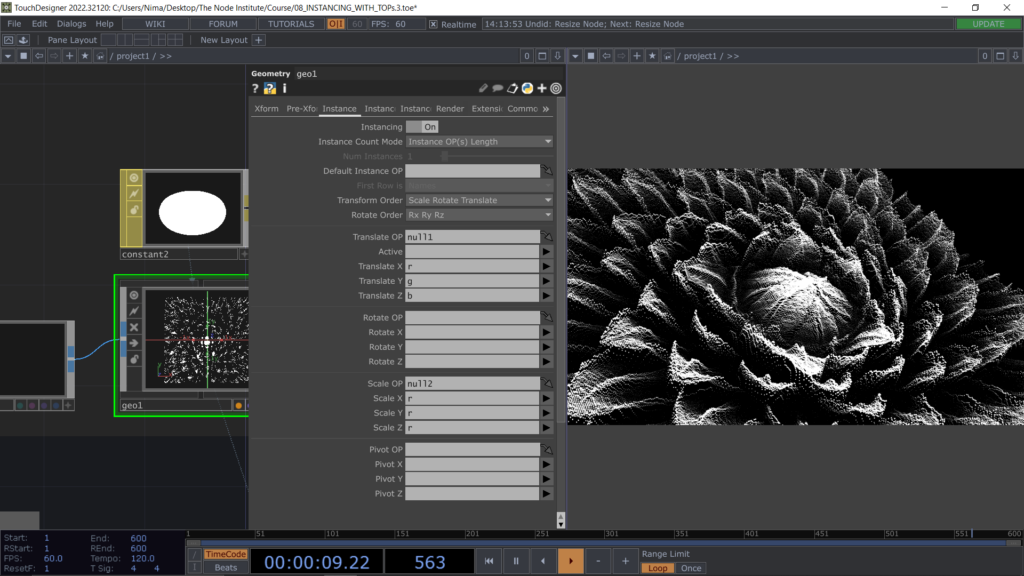
Now we can add the “b” channel (blue) to the Attributes of the Instancing by simply adding the channel to the Translate Z attribute.
We can now refine the Instancing result by scaling the Boxes using the same image we are using for the blue channel. To do so let’s create another branch that needs only a Math TOP to define the range for the future scale attribute.
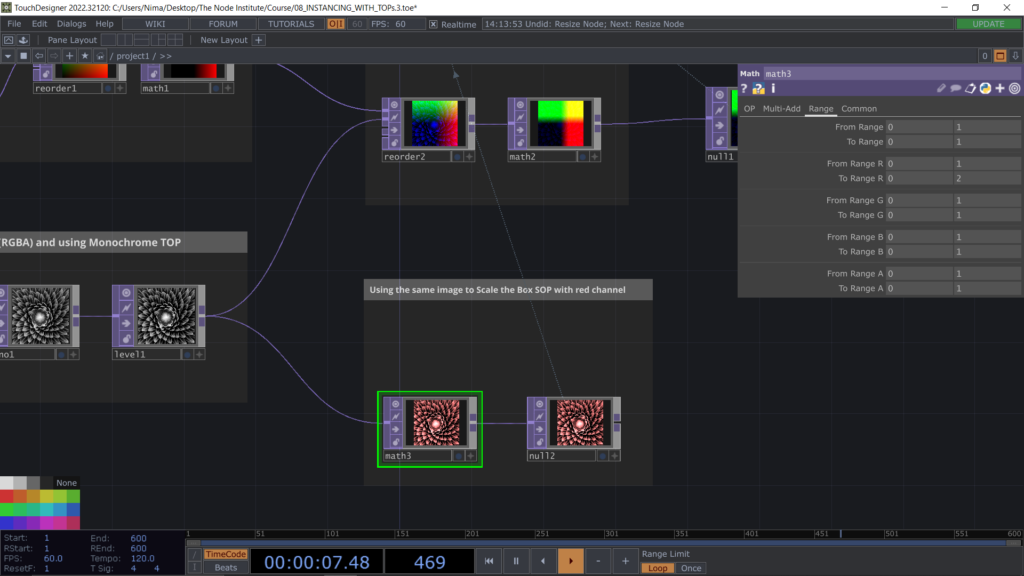
Now we can go back to our Geo COMP adding to the Instancing parameters the Scaling Attribute and drag the texture we want to use to scale the Boxes. The result will look much better than before.
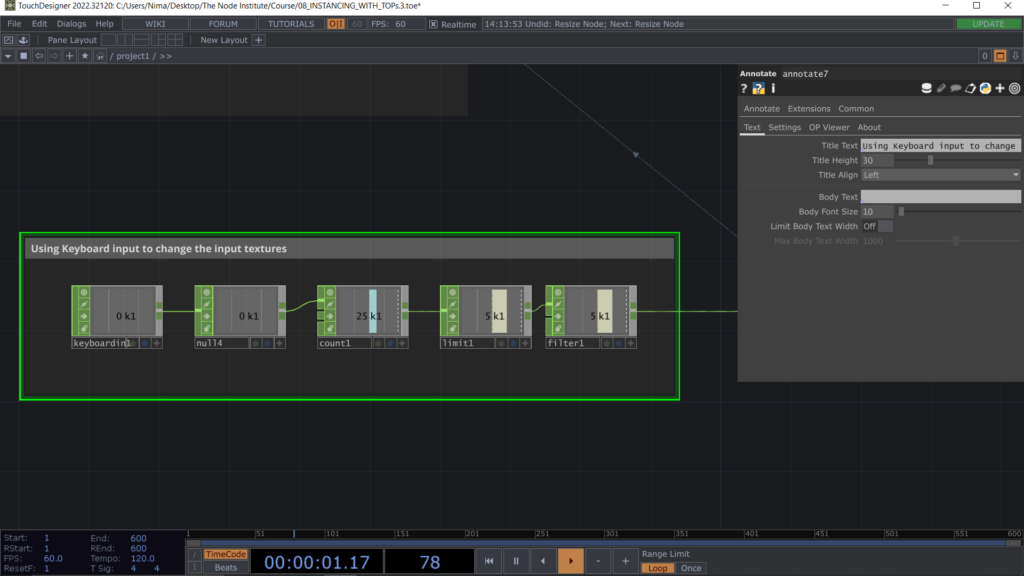
Now we can focus on the interactivity starting by adding a Keyboard input to change the textures. To do so we will use a Count CHOP which will count based on Off to On, then a Limit CHOP to Zig Zag between the textures setting the minimum and maximum value and finally a Filter TOP to create a smooth transition between the textures, the final Null CHOP channel will be exported to Switch TOP index.
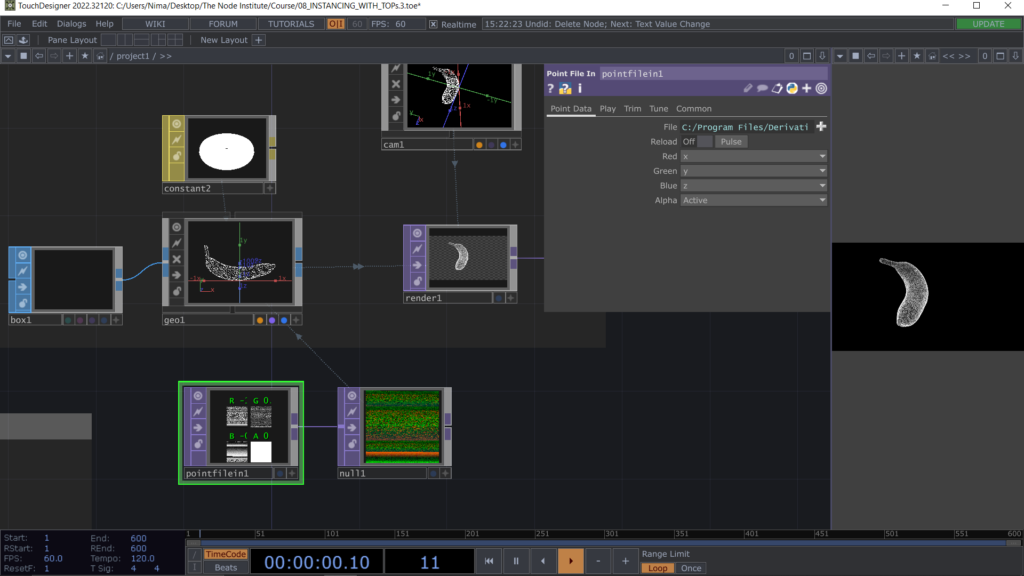
Point File In TOP is an operator that enables you to import .PLY files in form of texture. The method is the same use above but the RGB channels are designed to create 3D shapes. We can use this project file and our Instancing process to create a 3D shape in point cloud by using some sample in the Touchdesigner folders, like the banana or the sphere. You can also download .ply files from the web or create your own 3d model and export it in .ply
Learning Outcomes
- Understand the possibility to create Instancing with TOPs
- The advantages of using TOPs operator for animating 3D point clouds
- Knowing how to convert images into point position and point scaling
- Mixing images with interactive inputs in real-time
- Getting familiar with Reorder TOP and the RGBA channels
- Using .PLY file format to recreate a point cloud in 3D
List of Nodes
- Moviefilein, Fit, Math, Reorder, Monochrome, Switch, Ramp, Pointfilein TOP
- Keyboardin, Count, Limit, Filter, Constant CHOP
- Geo, Cam, ArcGeo COMP
Get Support
To get support outside of the live session, please join our discord server with this invite:
https://discord.gg/F7cXRMYUK7
