8 – The Power of Instancing / Recording of December 10th, 2024
Course Files
Lesson Overview
Today’s lesson is about mixing Instancing and what you learned in the previous modules, such as Feedback loop or converting CHOPs into TOPs. Different techniques to produce a sound reactive visual.
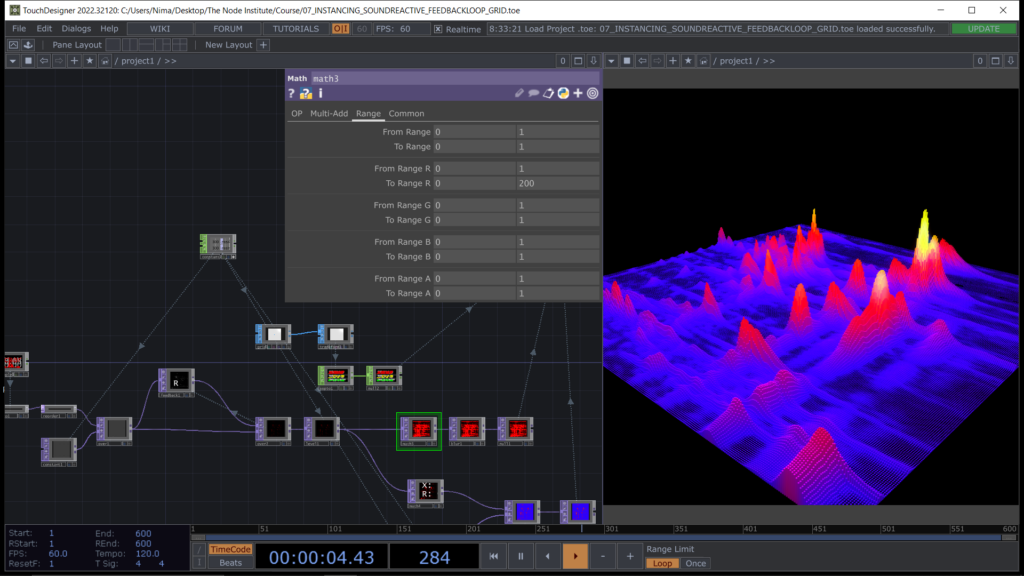
We start by importing our favourite track song with the operator Audio File In CHOP and use the Audio Spectrum CHOP to analyse the entire spectrum of frequency. The result of the Audio Spectrum will produce a channel with a very high number of indexes (around 24.000 depending on the quality of the audio file). So, before converting the channel into pixels, or better before using Chopto TOP we will have to reduce the number of index in the channel, time to use Resample CHOP or Lookup CHOP.
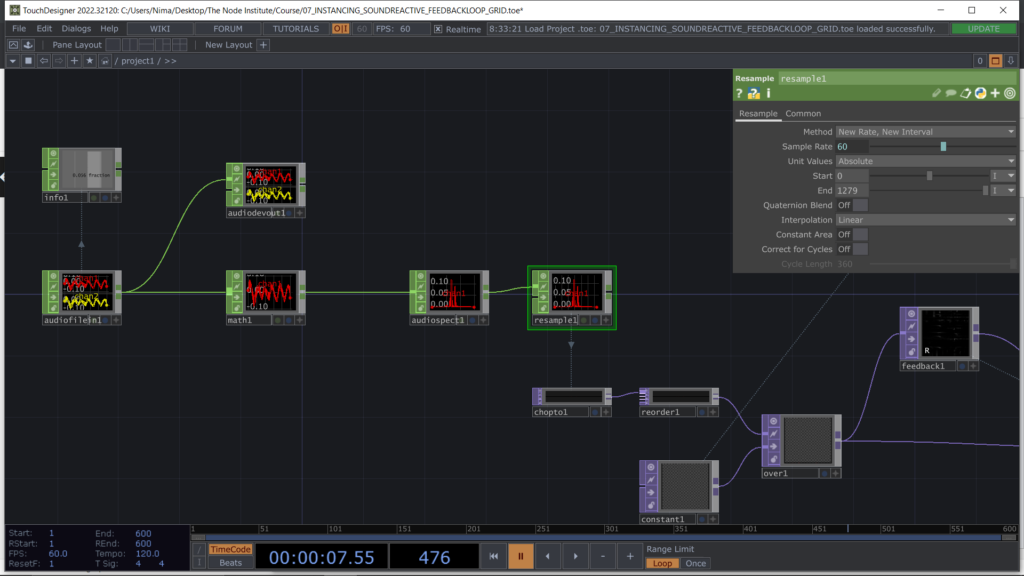
A tricky passage before entering the Feedback loop process is linked to the fact that when we convert the channel coming from the Audio Spectrum resampled to the texture with Chopto TOP we get 1 data represented by a color, in our case the red. The data format needs also the Alpha channel so that we can use the feedback loop process correctly, to do so we can change the data format from the Common Page of the Chopto TOP operator. Or in some case you might want to get familiar with Reorder TOP.
Get used to check the Information details by clicking with the middle button of the mouse over the operator, in case of TOPs what you mainly need to check is the format and size.
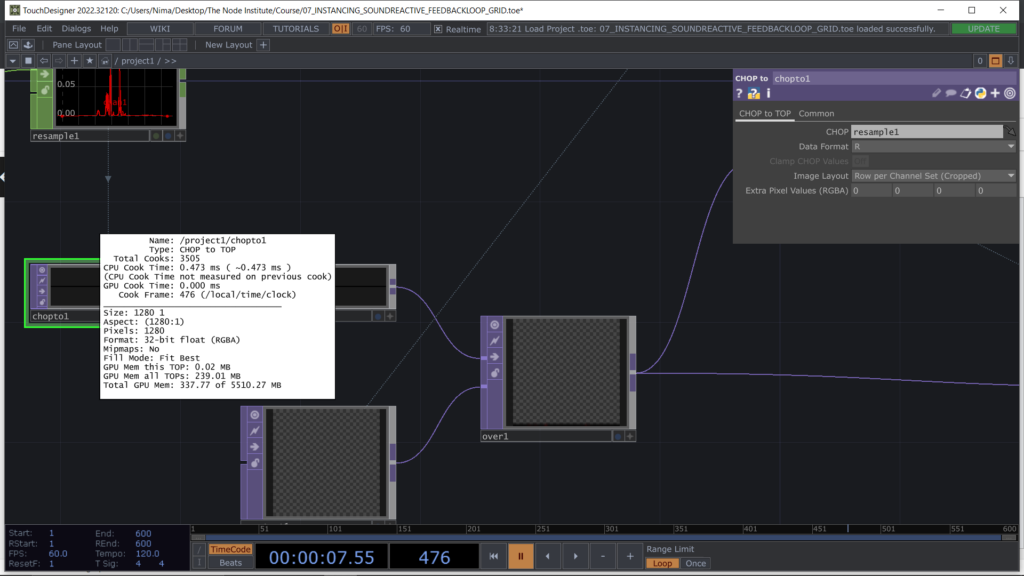
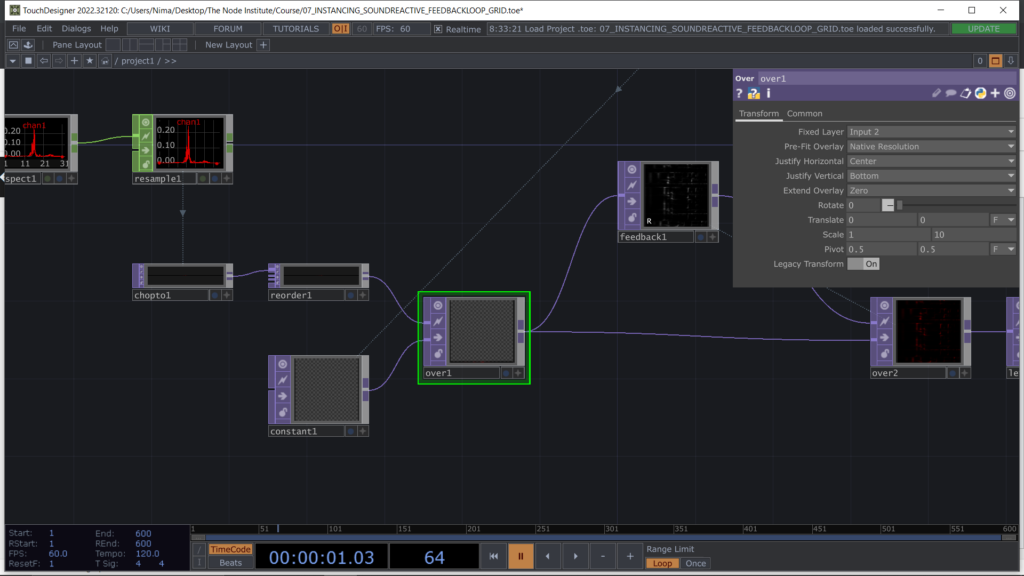
So now the line of 1280 pixels is showing the real time sound spectrum and what we want to do is to use the Feedback loop techniques to draw a trail of this horizontal line of pixels. That’s why we are first layouting the line of pixel in a squared size format using Constant TOP and Over TOP.
Also scaling up the 1 horizontal line of pixels and making it thicker will help the feedback loop to visualize better the trail.
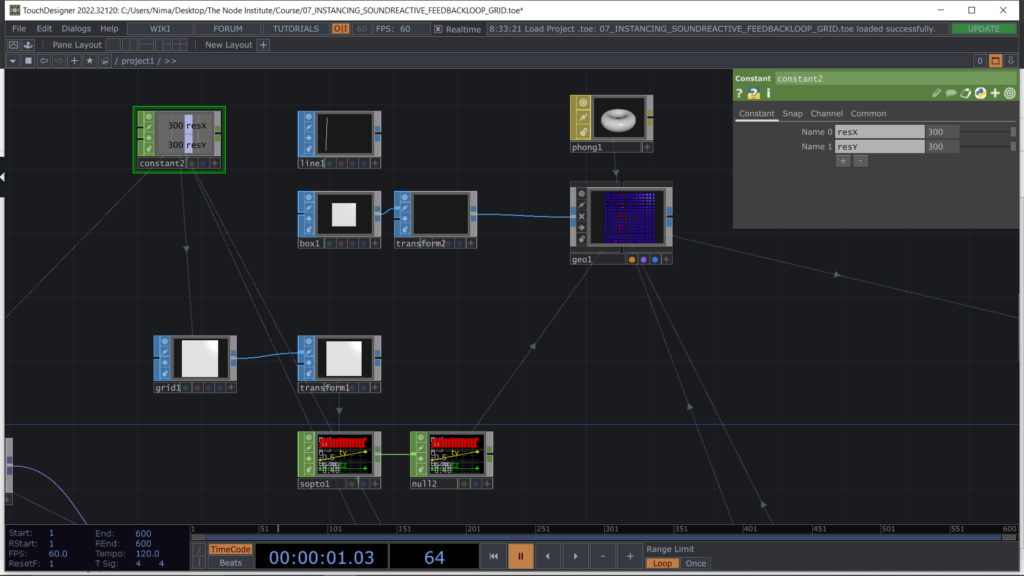
Before continuing with the feedback loop let’s take a moment to setup our future Instancing structure, which can be remodeled and redesigned with other shapes and forms.
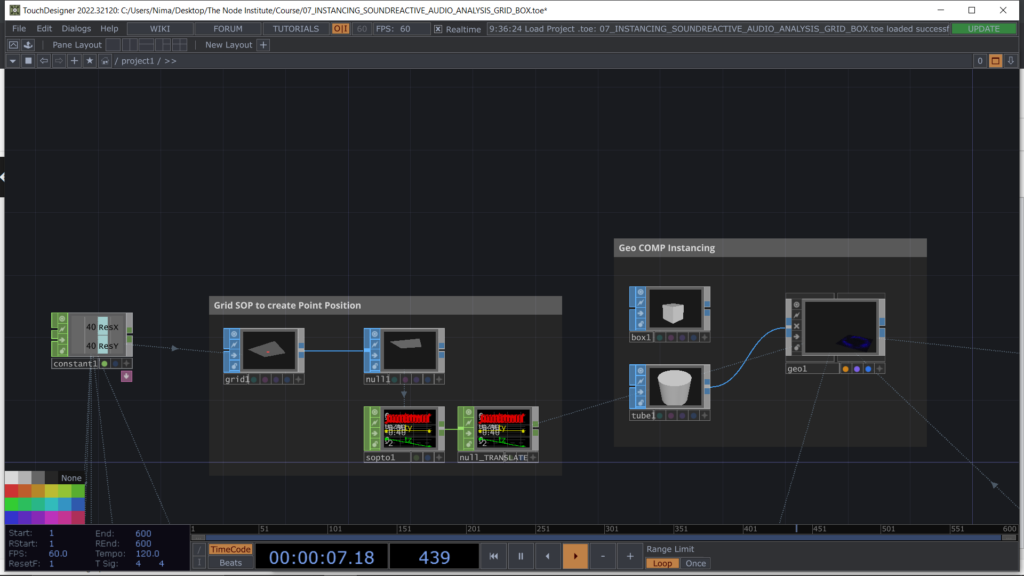
We will start with a Constant CHOP defining ResX and ResY so to assign it to the rows and columns of the the Grid SOP, but also to the texture we are creating for the feedback loop.
Let’s also choose an 3d element to instance, I suggest that we can start with a Box SOP to understand the scaling and rotation is a good choice.
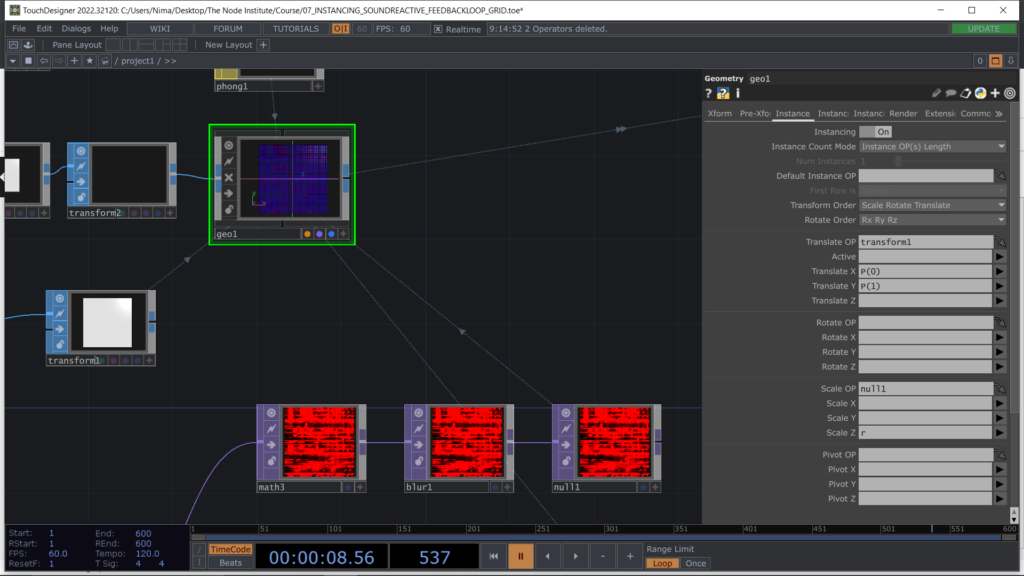
Is good to take a moment to remind you that you can also use directly a SOP in the instancing process. In the screenshot below you will see that I removed the CHOPs and the Instance is pointing to the SOP and using the Attributes Point Position with P(0) and P(1) representing respectively tx and ty.
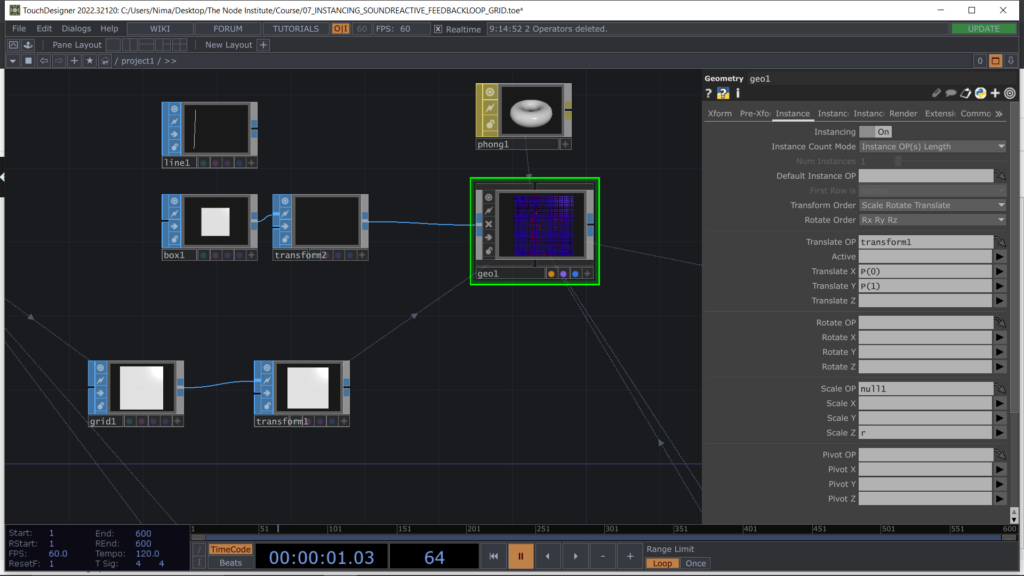
The same number of rows and columns we used for the grid we can use it for our Constant CHOP so to set the exact same amount of pixels as well as points.
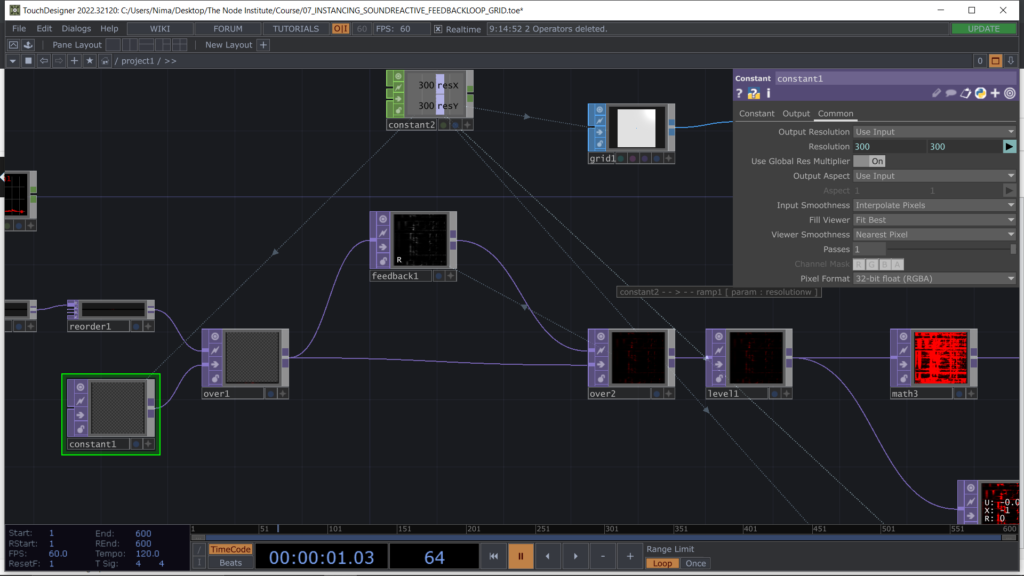
The feedback loop is just using Over TOP and moving up 1 pixel the texture in vertical. The line of pixel starts from the bottom of Constant TOP and goes up creating the trail of the audio spectrum.
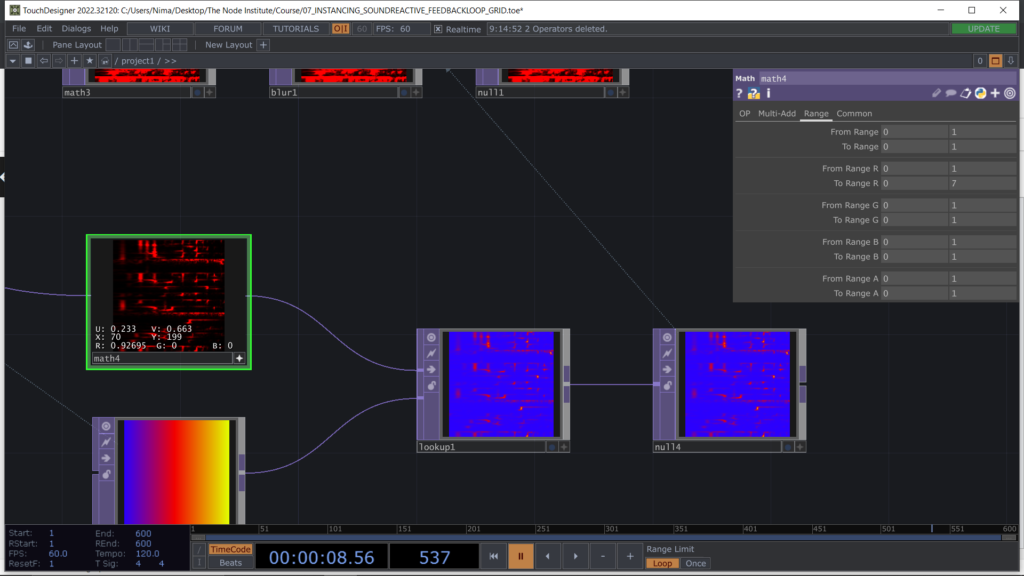
Using a Math TOP will enable us to play and amplify the range of that channel “R” red to obtain higher scaling effect for the Box SOP instancing we are setting up.
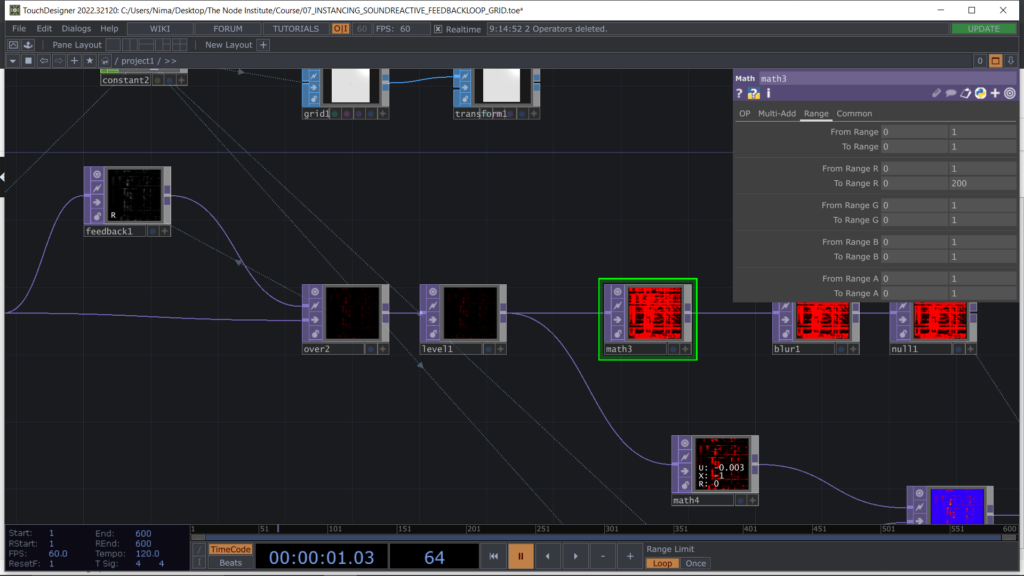
So at the end we use the texture result to sale the Boxes we created with Instancing. To do so we just drag and drop the last operator of our TOPs, the Null, in the parameter Scale OP and use the r channel for scaling the boxes into one of those axes (x,y,z) based on your Grid orientation. We use a Blur TOP to reduce the high peaks visible when you scale the boxes with Instancing.
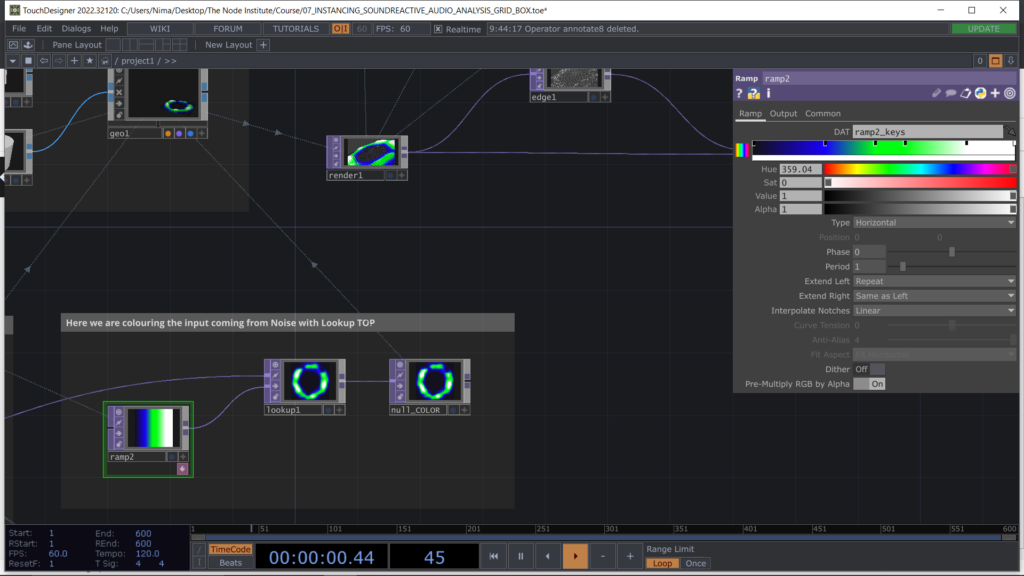
To color the Instancing following the peaks of the trail created by the feedback we can use a Lookup TOP which replace colours based on a second input Ramp type of texture. These colours are representing the high and low peaks coming from the sound reactive feedback loop analysis. You can use the Active Viewer button to interact with the texture, by pressing “d” you can visualize the information RGB for each individual pixel you rollover.
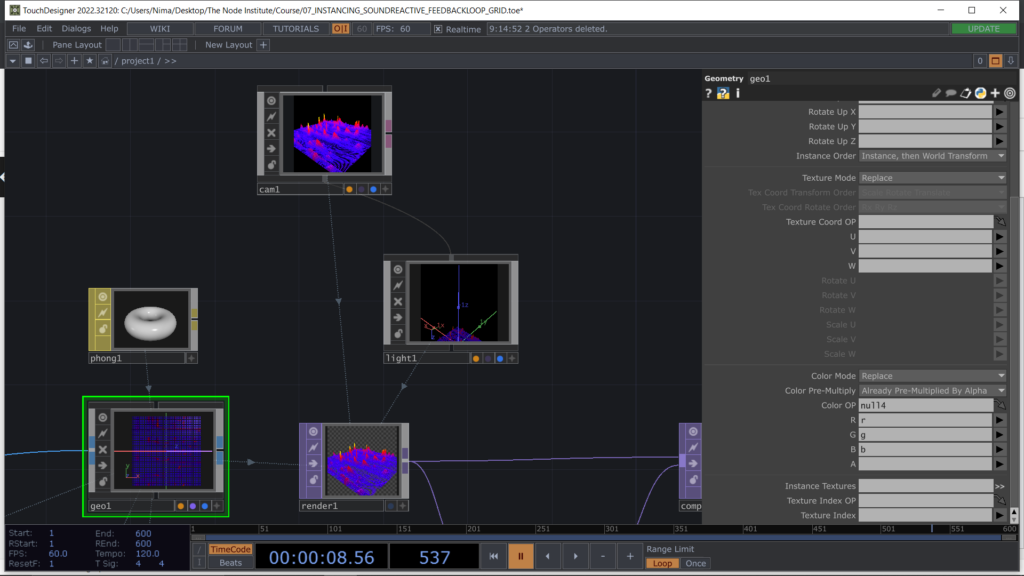
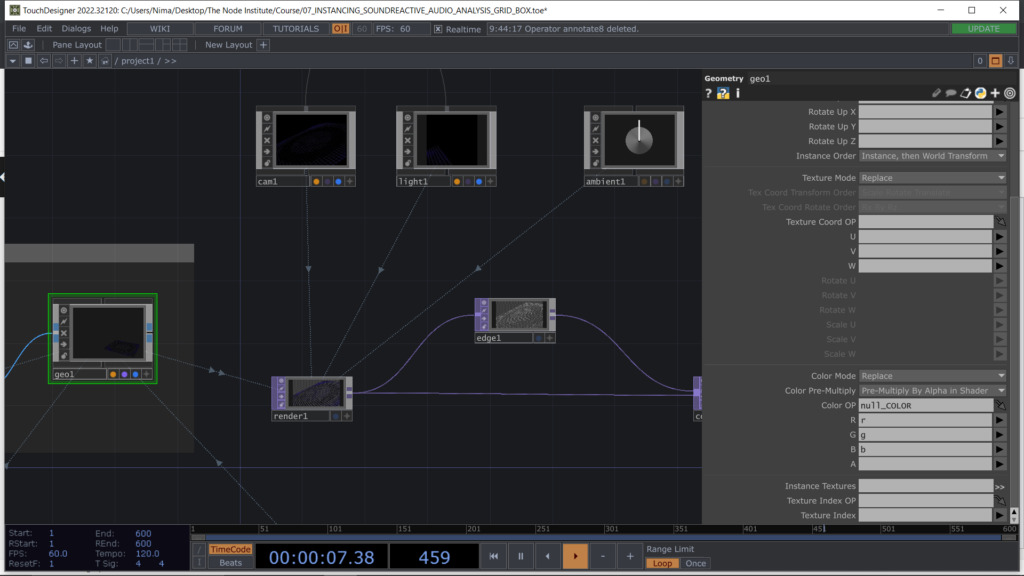
Finally rendering the scene, assigning the colours to the Attribute for Instancing and playing a bit with Camera and Light to get the perspective.
The second exercise is quite easier and it uses the same process of creating an instancing based on a grid object shape. In this case instead of using the audio spectrum, we will use the Analysis of the frequency with the tool from the Palette called Audio Analysis.
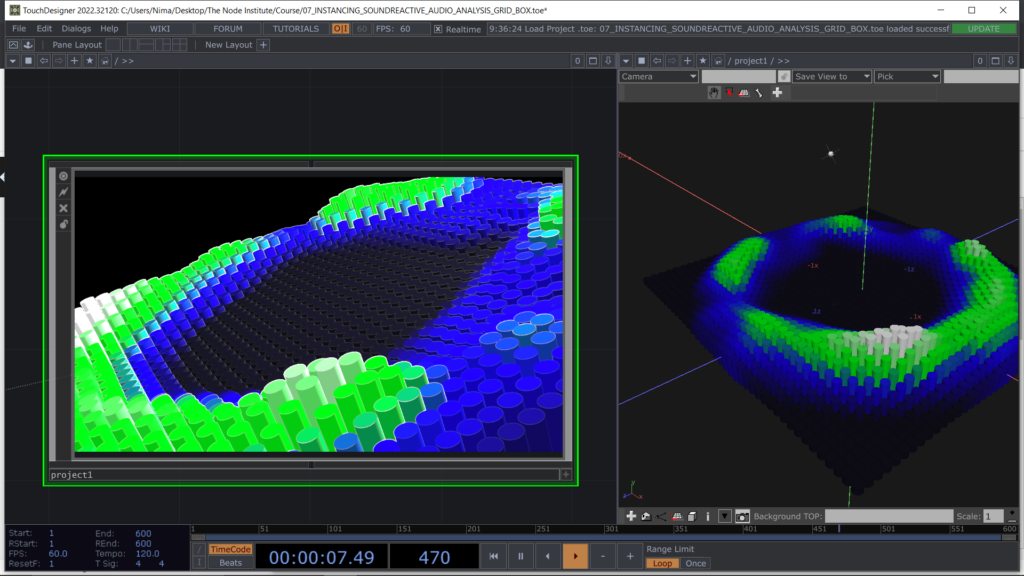
To create the Grid we can use the Constant CHOP to start, so that we can define ResX and ResY. At the same time we can try to use another 3d object to scale, Tube SOP.
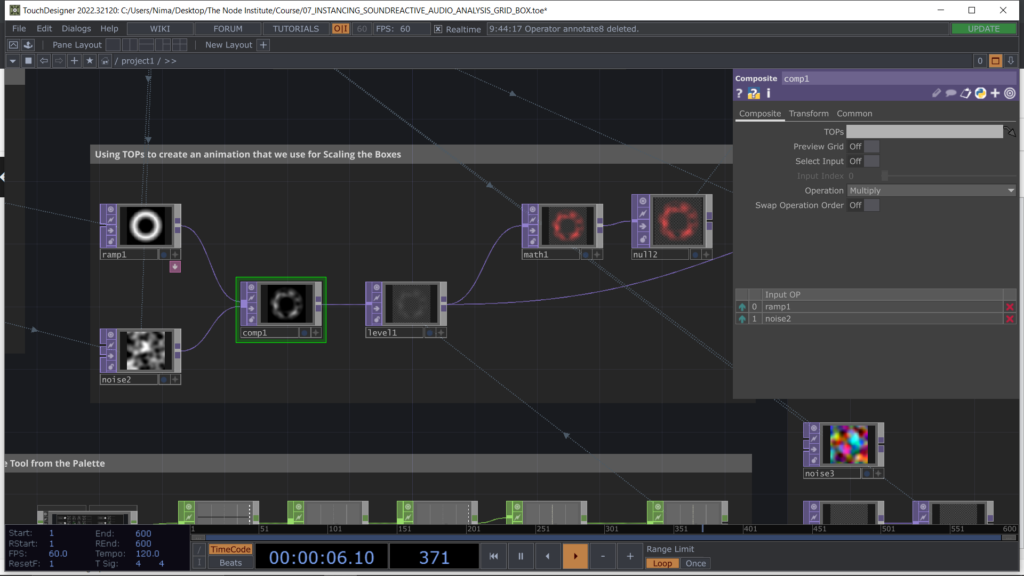
To create the scaling channel we will take advantage of the TOP texture possibilities to create animations with few operators, like Noise TOP mixed with Ramp TOP.
Using the same method of colouring that we used before, which is based on Lookup TOP. Is good to see see it applied in more than one example to observe it and understand better how it works.
Assigning Colour Attributes and rendering the scene, plus a couple of post render TOP nodes to create some effect, I’m using here an Edge TOP and a Composite TOP, but you can try out other effects. Explore the Snippets to discover more TOPs and browse the Palette in the category Image Filters.
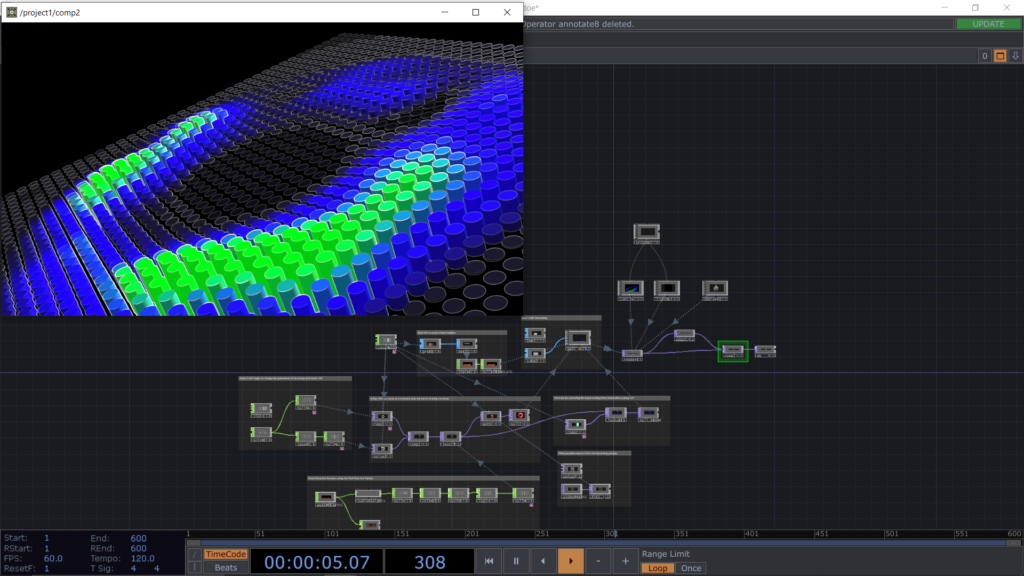
Overview of the network with the final result in preview mode. Check out how to obtain other simple 3d structure and make them sound reactive, you can scale, rotate and translate the points. Think before designing you visual, sketch your visual on paper, see if you can deconstruct it and start developing a new Instancing structure. Use simple geometry type like: Circle, Grid, Box, Tube, Line.
Learning Outcomes
- Knowing how to convert Audio Spectrum into texture and what is resampling
- Using the feedback loop technique to modify a 3D structure
- Converting channels into texture and the importance of data format
- Understanding of the Attributes of an Instancing: Translate, Scale, Rotate, Color
- Using Lookup TOP to assign colors to the high and low peaks
List of Nodes
- Resample, Audio Spectrum, Speed, Noise, LFO CHOP
- Reorder, Feedback, Math, Blur, Lookup, Noise TOP
- Geo, Cam, Light COMP
Get Support
To get support outside of the live session, please join our discord server with this invite:
https://discord.gg/F7cXRMYUK7
