7 – Simple Instancing / Recording of December 3rd, 2024
Course Files
Lesson Overview
Today we will start playing with a technique called “Instancing”. The goal is introducing you a new method to build complex 3d structures taking advantage of the benefits of using TOPs and CHOPs in order to control different attributes of the 3d model.
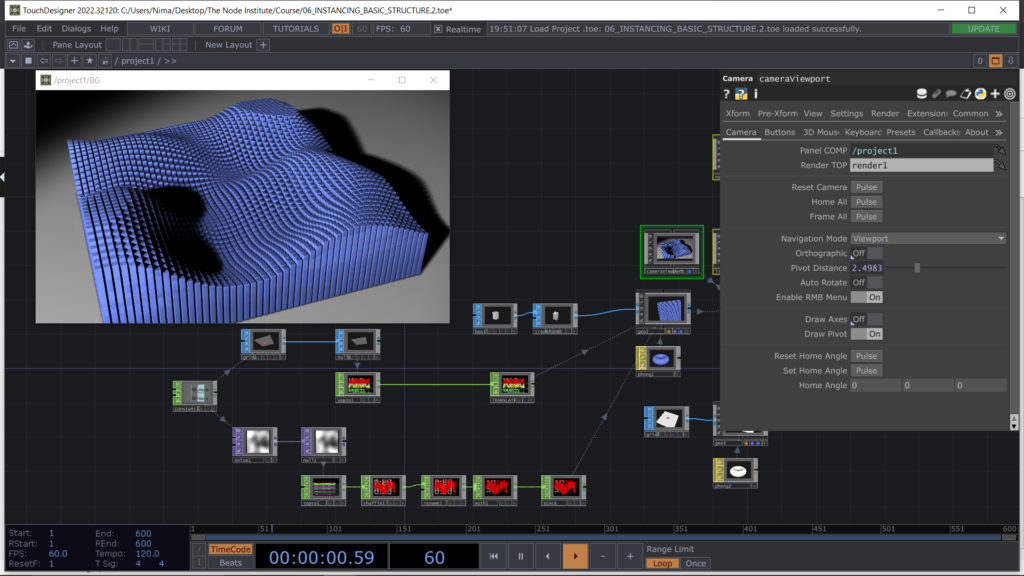
We start by building a Grid SOP using a Constant CHOP to define its Rows and Columns. Start converting it in CHOPs, so that later we can export its point position values for our future Instancing process.
Note that you can also skip this conversion to CHOPs and use the point position attributes, exporting the attributes directly from the SOP to the Instancing using P(1) P(2) P(3) instead of tx, ty, tz.
For the moment is good practice to convert the channels so that you can get use to it.
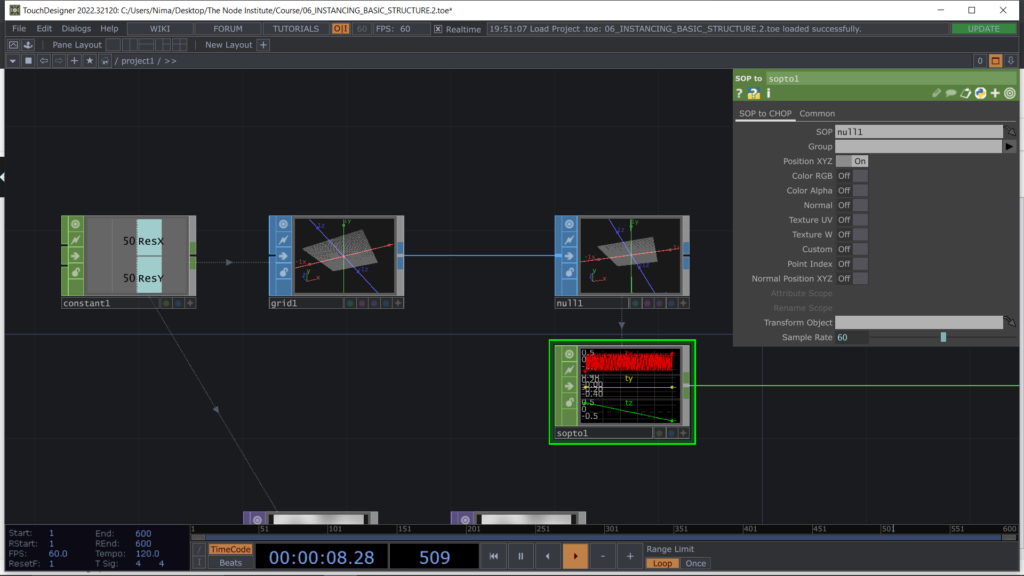
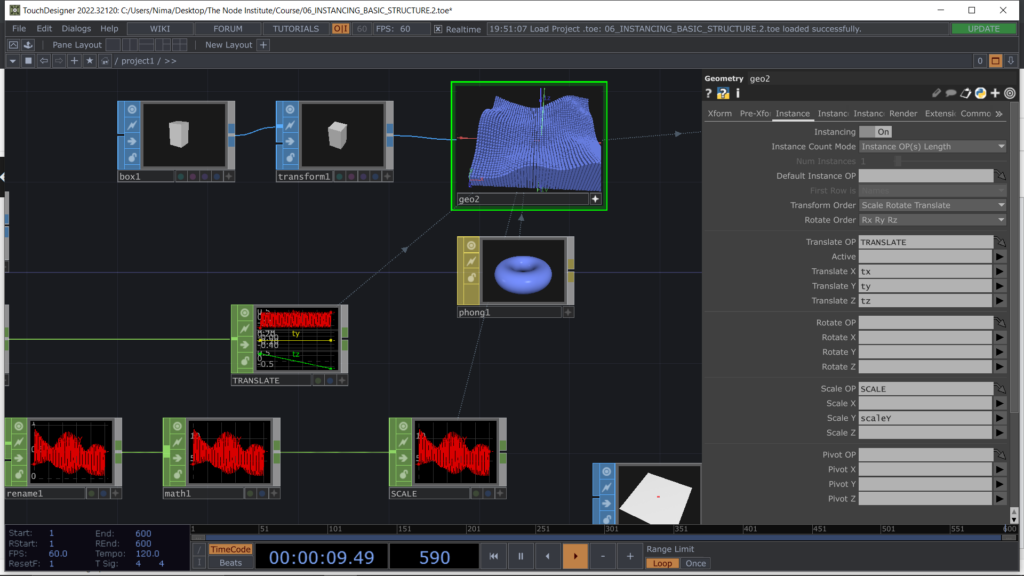
We can now start setting up the 3d Scene using a Box SOP as the main object to instance multiple times. To do so the Box SOP enters in a Geo COMP and from there, the process of Instancing can start.
In order to set up an Instancing process, we can go in the Page of the Geo COMP named Instancing and turn On the Active toggle button at the top of the parameters’ list.
We can now export the Operator Null CHOP which holds the 3 channels to be assigned to the point positions, just by dragging the operator in the field Translate OP. Once the operator is connected, the 3 channels will be appearing in the drop down list, named: Translate X, Translate Y, Translate Z.
The result will appear as a Grid of boxes where the position for each box comes from the Grid SOP that we previously created and converted into CHOPs.
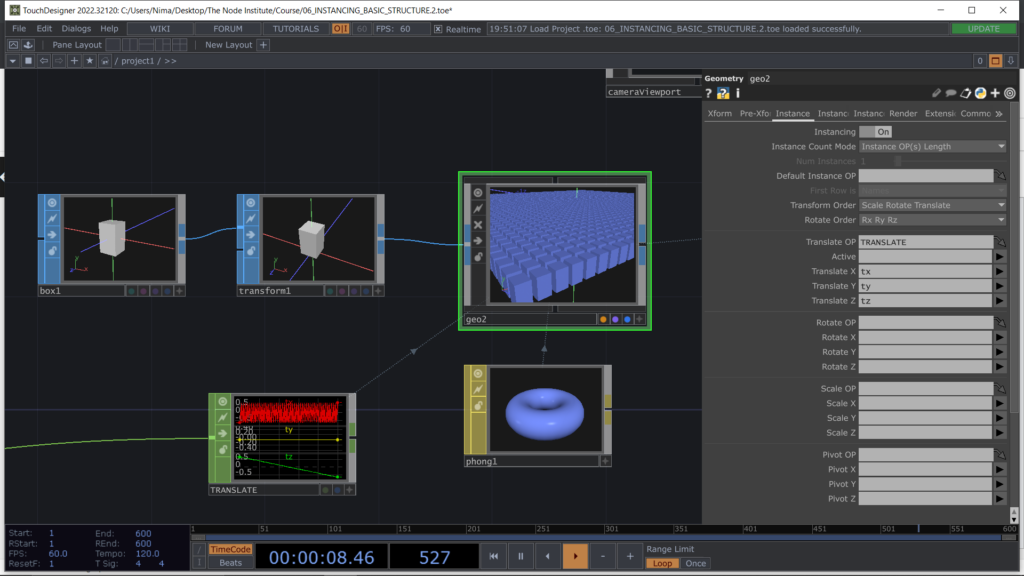
Now we can start playing with the other Attributes. For example we could create a logic to control and modify the Scale attribute of this Instancing process.
Using TOPs will enable us to create simple textures such a Noise TOP and as you know from the previous lesson we can use those pixel values and convert them in numbers using Topto CHOP.
We are now able to observe those values in the CHOP family which is much easier to analyse and modify for our needs and purpose. Note that you can also skip this conversion and export directly these pixel values directly from TOPs to the Instancing process.
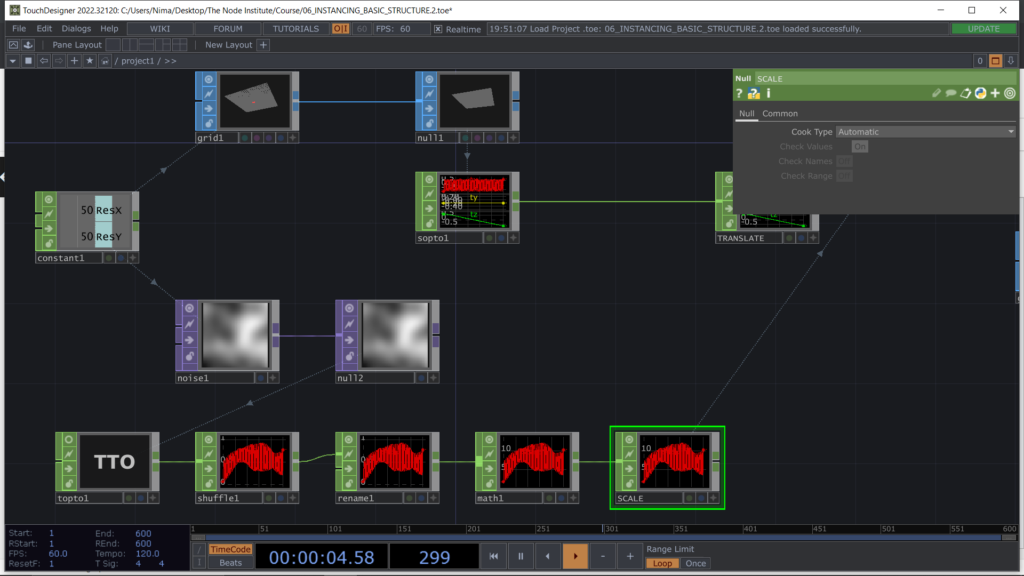
The result in the Instancing process is visible and can be modified accordingly to your needs and goals.
Just remember that you can use the simplicity of creating animated textures in Tops and use those pixel values to modify 3D attributes such as: Translate, Rotate, Scale.
For our need today we will use those pixel values to control the Scale attributes of the boxes.
Working with a Grid SOP helps understanding the Instancing process better. The points in fact are distributed in a sequence, starting from the bottom left and going up to top right of the Grid, exactly like it happens in a UV map, where the texture can provide the informations to build a 3d environment.
The Grid SOP matches the texture coordinates creating a direct relation between the point position in the 3d space and the pixel position in the 2D texture. This concept will become even more clear once you start playing with Instancing and with Tops textures such as a Ramp TOP.
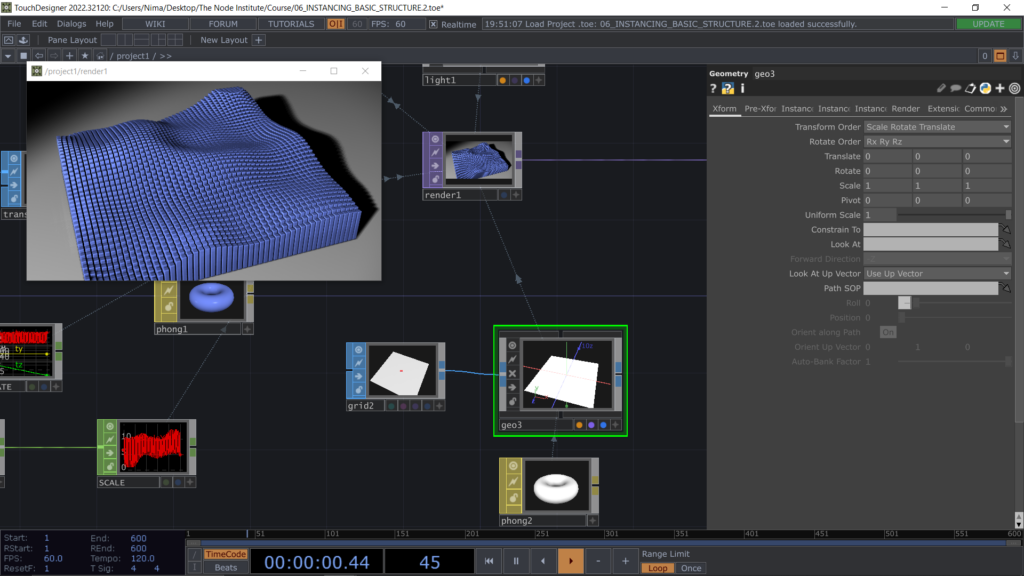
Once we have completed the 3D structure it’s time to setup the render scene. Today we will be using a Light COMP Cone type and activate Shadows. To set correct shadows we will also need to move and position and to change the rotation of the source Light COMP.
To do so we can take advantage of the Geometry Viewer mode in one of the Pane, controlling the values from the parameters and checking the actual position in the 3d environment.
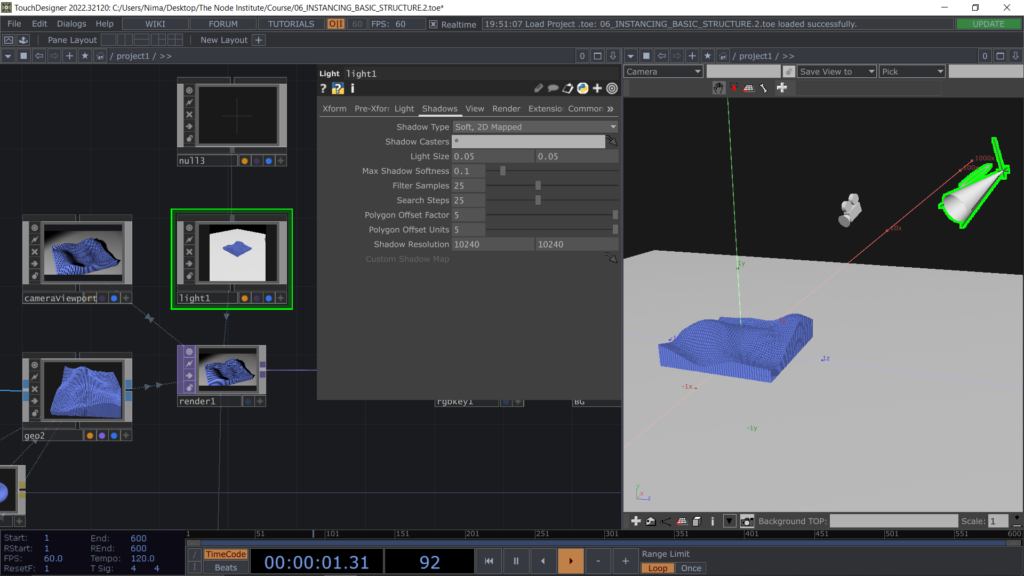
We will also need to build a floor by using a Grid SOP or a Rect SOP so that the shadows of our Boxes can be visualized on the geometry which simulates the floor.
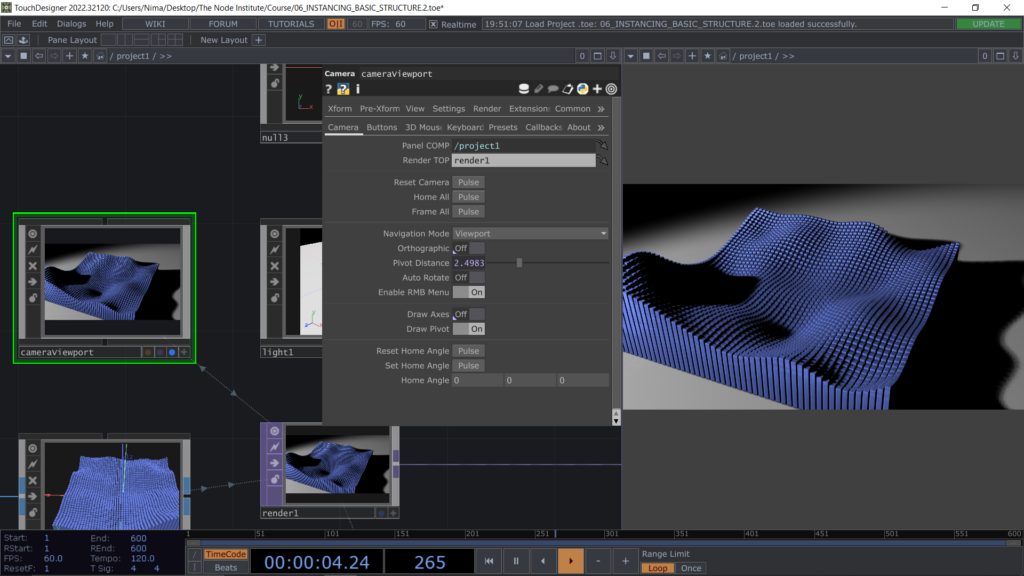
Finally we can use the Camera Viewport COMP that you can find in the Palette of examples and orbit around our 3d scene using the interactive Pane /project1. Just remember to also connect your final render result to the background of the Project1 COMP.
The second exercise of today is an Instancing process that looks like a 2D visual, but it takes advantage of the 3D environment to build up the scene. In this process we will modify both the attributes Position and Rotation, using TOPs that can be mixed with original source coming from SOPs.
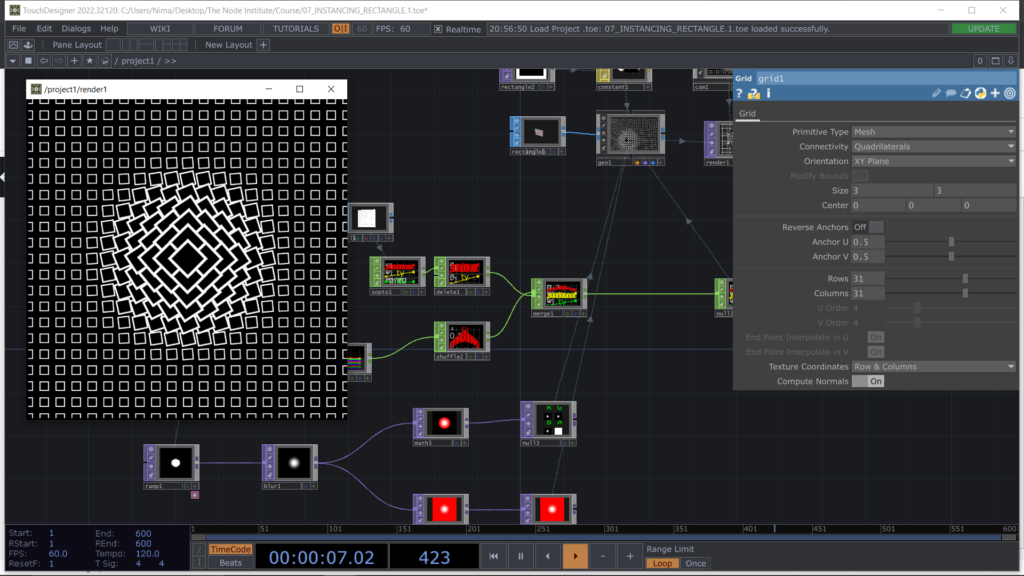
We start by building a Grid SOP and modify the Tz position using a Ramp TOP, so to generate a pyramid type structure of rectangles, built through an instancing process.
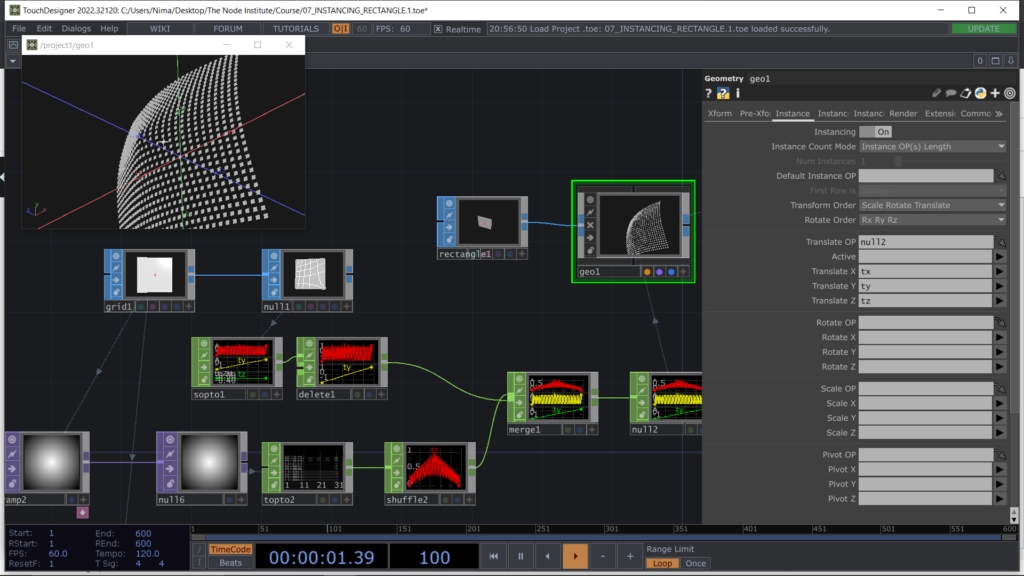
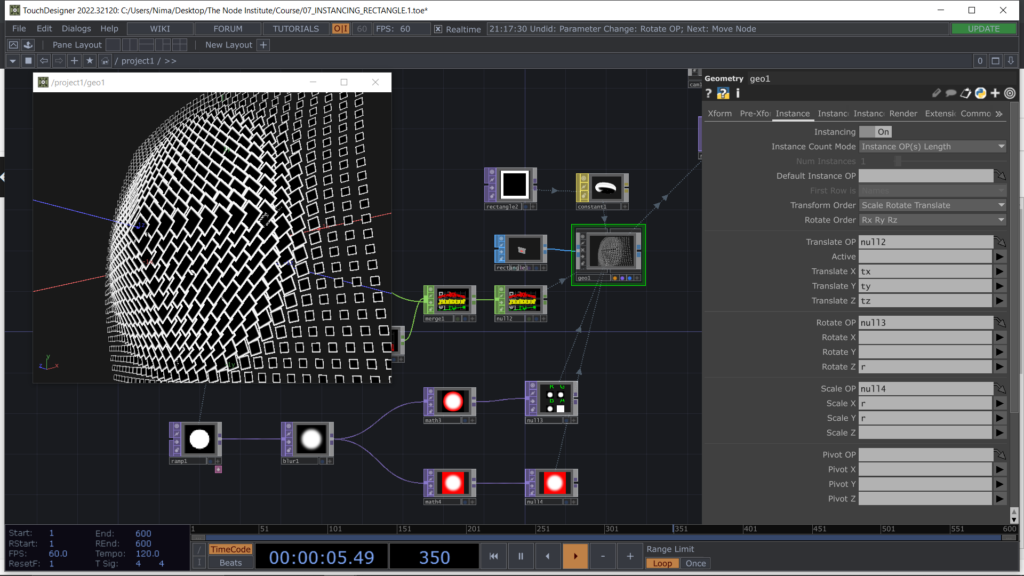
After this we can simulate the rotation of the rectangles using a Ramp TOP that starts from the center and expands to the borders of the texture. During this process we won’t be converting TOPs into CHOPs, but we will directly modify the pixel values using Math TOP and feeding then the instancing process directly from the texture using the “r” channel.
Learning Outcomes
List of Nodes
Get Support
To get support outside of the live session, please join our discord server with this invite:
https://discord.gg/F7cXRMYUK7
