TOUCHDESIgNER Beginner Class
SUMMER 2025
Recorded from April 29 to August 5, 2025
12 modules in English language at 3 hours each
Join us for a transformative semester-long course designed for both students and professionals alike. This add-on to your studies or work is specifically designed to teach you a new creative coding tool that can be leveraged in your career. You’ll be part of a diverse group of learners hailing from various countries and backgrounds, united in the pursuit of mastering this new skill.
Regardless of whether you’re an artist, musician, architect, programmer, event technician, or simply a curious mind, this course is ideal for anyone seeking a creative learning experience.
In 12 sessions you will gain a comprehensive understanding of visual programming in TouchDesigner. Each module is structured around creating small, playful interactive example programs, which will enable you to explore the full range of TouchDesigner’s capabilities.
This session is led by interaction designer and visual artist Nima Gazestani, who previously served as Course Leader of the MA in Interaction Design at Domus Academy. He continues to lecture at some of the most prestigious design academies across Italy and Europe., you’ll have the opportunity to connect with your instructor and peers in weekly Zoom sessions. If you can’t make it to the live sessions, join us at any time! All participants will have access to the recordings, files, and a Discord support group.
YOUR Instructor

Nima Gazestani is an interaction designer, visual artist and creative tech expert. He has worked for brands and companies such as Flos, Ferrari, Tod’s, Moleskine, SkyArte, Netflix, Toyota and many others. Developing digital physical projects for interactive exhibitions and set design solutions addressed to augment customers experiences with digital media. His keen interest in new technologies intertwined with a well rounded knowledge on design, enables him to generate interesting and unique experience design solutions.
Lessons Overview
Our TouchDesigner Beginner Program is developed for curious minds looking to build a comprehensive understanding of this visual programming software. Each module is structured around creating small, playful interactive example programs, which will enable you to explore the full range of TouchDesigner’s capabilities.
1 – Kick Off & Introduction
In this lesson, you’ll get comfortable with TouchDesigner’s user interface and learn how to navigate the OP Create Dialog to explore different operator families. You’ll work with UI components like Buttons, Sliders, and OP Viewers while diving into Panels and Container COMPs. The lesson wraps up with a hands-on exercise—creating a simple black-and-white optical effect using TOPs, setting the stage for the next session.
2 – Interactive CHOPs and TOPs
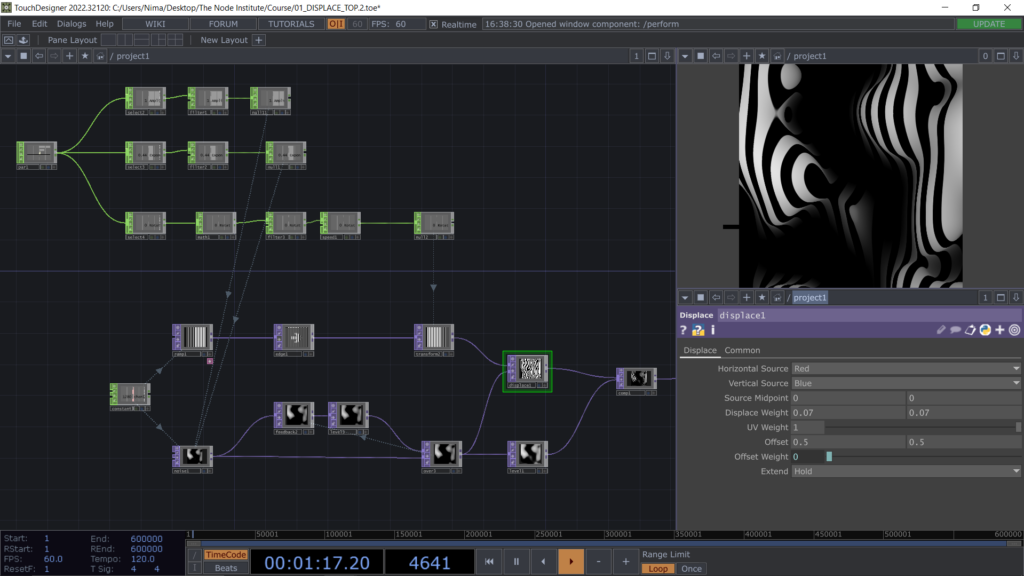
This lesson focuses on organizing and reusing your work efficiently by collapsing selected nodes into a Base COMP and saving it as a .tox file for easy reuse. You’ll explore different ways to edit visuals, experiment with layout compositions using Layout TOP and Tile TOP, and learn how TouchDesigner offers multiple paths to the same result. Additionally, you’ll dive into CHOPs to build Custom Parameters for better control over motion effects and create new visuals using key TOPs like Noise, Displace, Edge, Blur, and Lookup to refine your designs.
3 – Feedback Loops
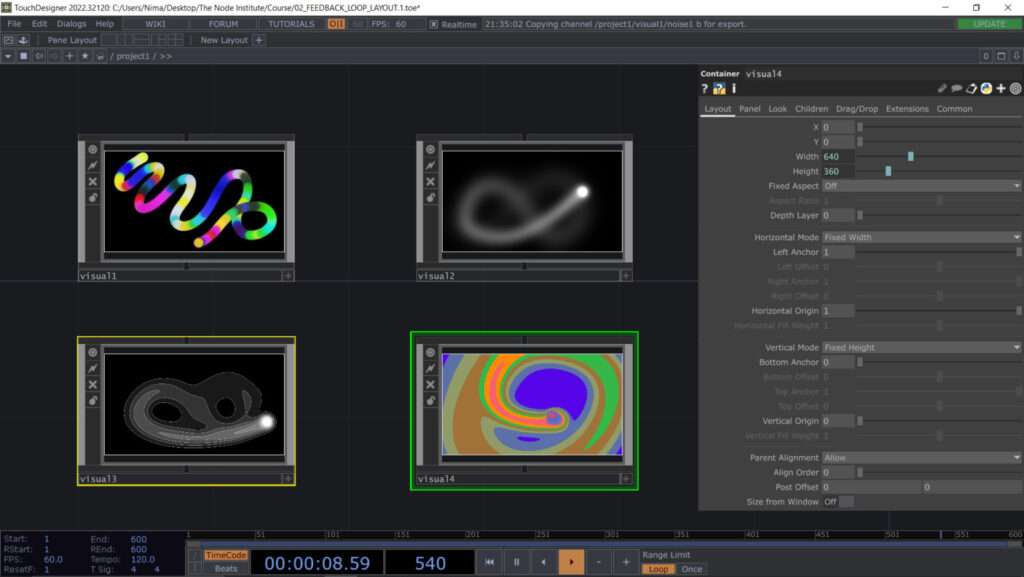
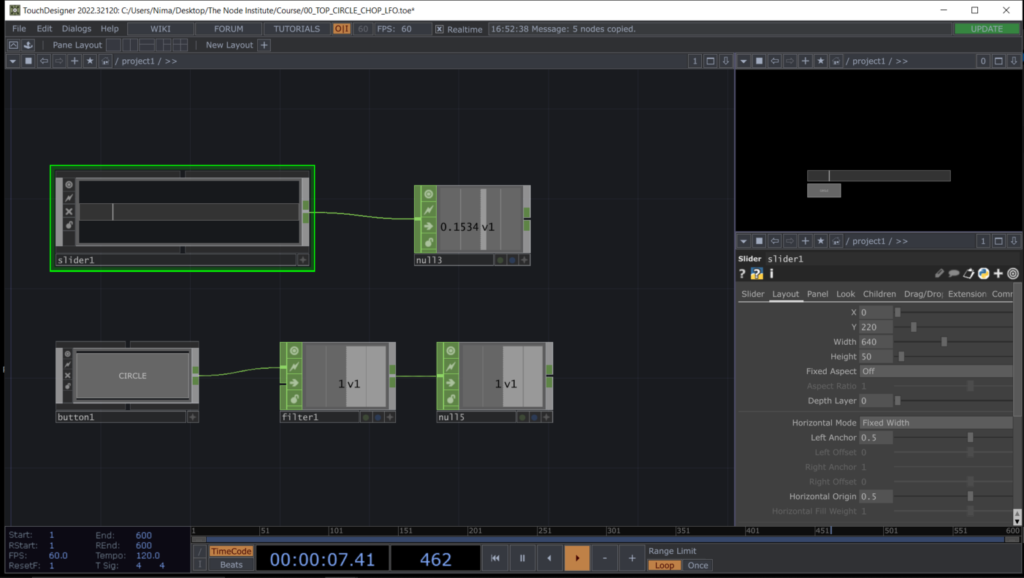
This lesson introduces the power of interactive visuals using mouse input and the Panel CHOP to control a Circle TOP. You’ll take your first steps into Feedback Loops, exploring their potential to create dynamic and mesmerizing effects. By experimenting with techniques like coloring with Noise CHOP, adjusting opacity with Level TOP, and refining visuals with Blur and Limit TOPs, you’ll see how small changes dramatically alter results. Finally, you’ll structure multiple feedback loops into a unified composition, using Container COMPs and Panel CHOP to create independent yet interconnected visuals—laying the foundation for more complex interactive designs.
4 – Enter 3D Space
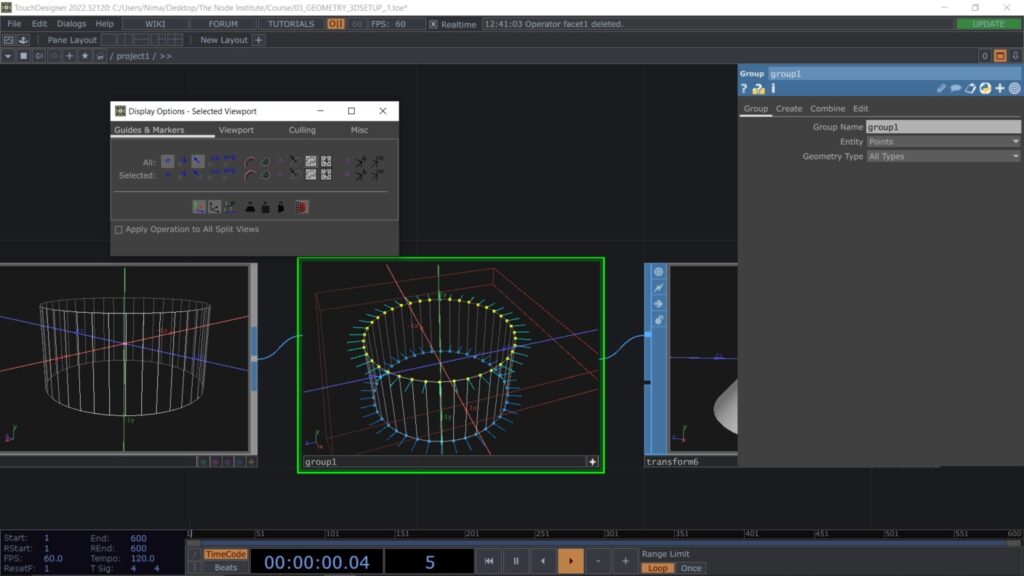
This lesson introduces the fundamentals of working in 3D within TouchDesigner, setting up a simple environment using Geometry, Camera, and Light COMPs. You’ll explore how to navigate and manipulate 3D objects using the Geometry Viewer, while learning the key differences between MAT operators for shading and rendering. By combining basic SOPs like Circle, Sphere, and Copy, you’ll create abstract 3D models and animate them using Python expressions. Additionally, you’ll experiment with Transform SOP sequencing, Merge SOP, and Display Options to refine your workflow. The lesson wraps up with interactive camera control techniques and best practices for organizing and sharing your projects.
5 – Interactive Particle Systems
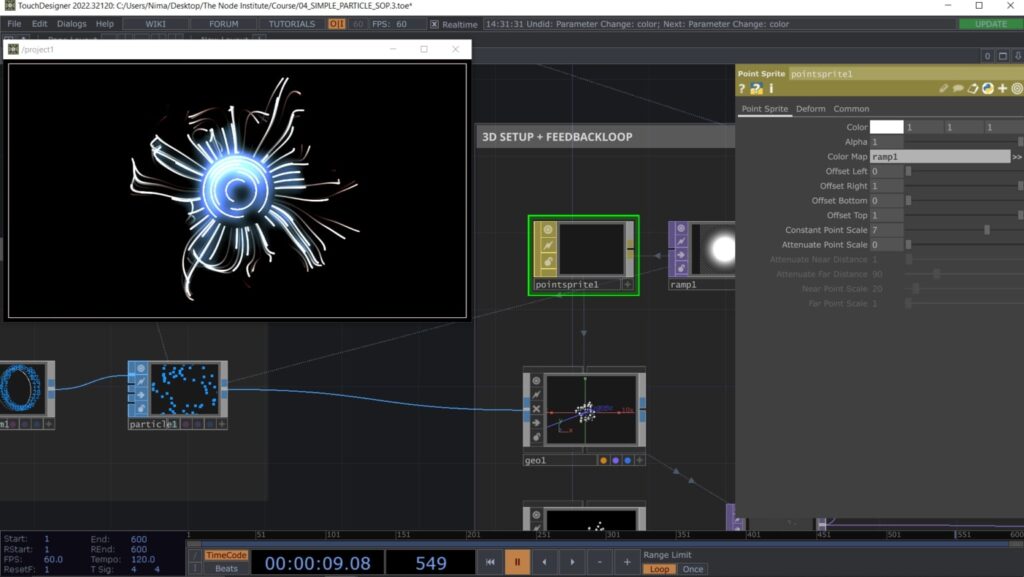
This lesson dives into the fundamentals of setting up a particle system in TouchDesigner, with both sound-reactive and interactive elements. You’ll explore how to manipulate particle emitters using point attributes like ID and normal directions, and apply techniques such as feedback loops and Trail SOP for motion effects. The session also covers using the Audio Analysis tool to create dynamic, sound-driven visuals, as well as integrating mouse interactions with Panel CHOP to control particle behavior in real time. By the end, you’ll have a solid grasp of Particle SOP, interactive forces, and how to refine your visuals using materials and transparency settings.
6 – From Data to Form
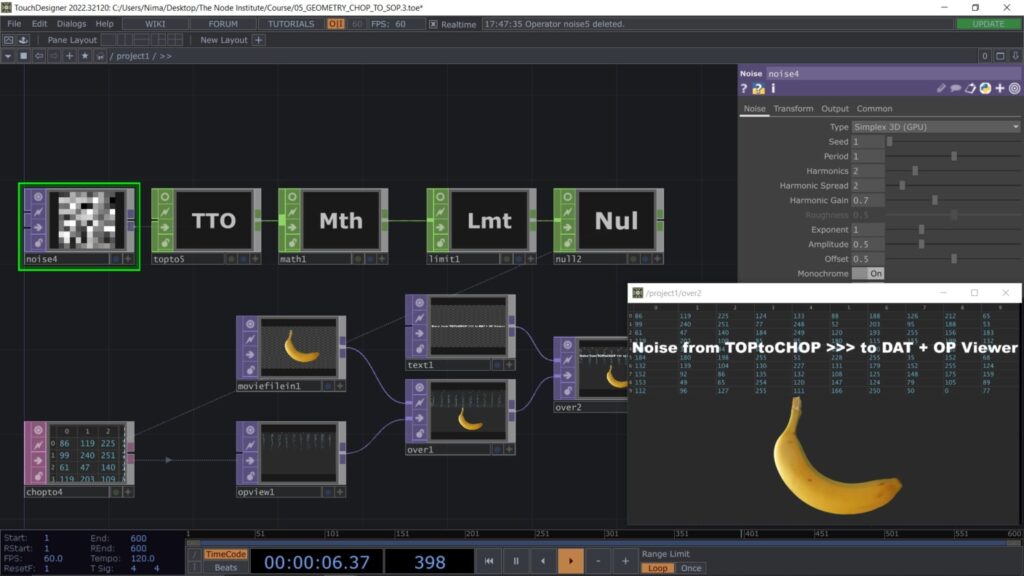
This lesson explores how TouchDesigner’s operator families—TOPs, CHOPs, SOPs, and DATs—are all interconnected through numerical data. We’ll start by converting images into numbers and vice versa, using tools like Ramp TOP, Noise CHOP, and CHOPto TOP.
By manipulating point positions with SOPto CHOP and blending 3D shapes, we’ll create dynamic, data-driven visuals. We’ll also dive into CHOP logic, introducing Trigger and Speed CHOPs for real-time control. Finally, we’ll apply these concepts to an audio-reactive visualization, reinforcing how data transforms into form.
7 – Simple Instancing
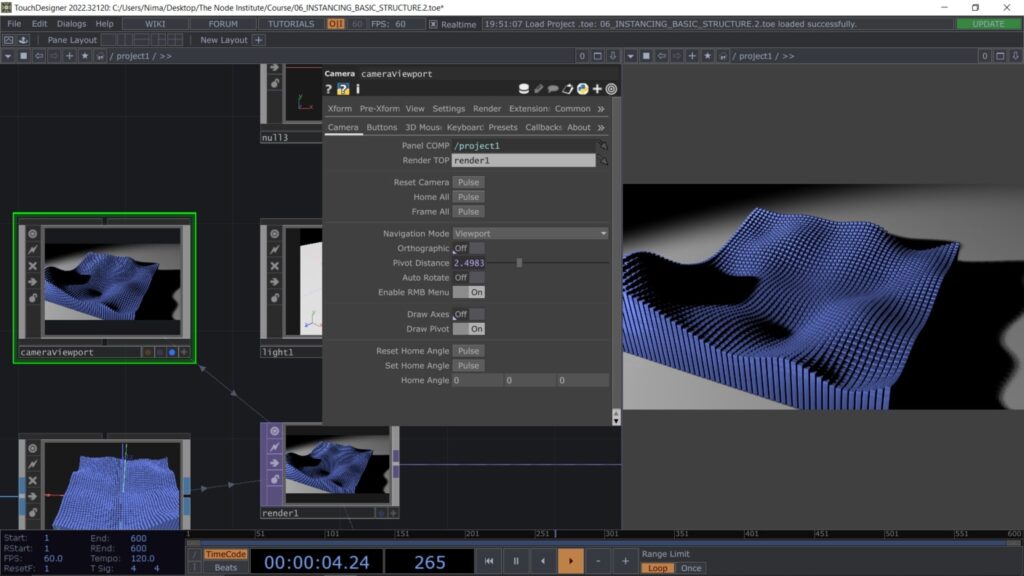
This lesson covers Instancing in TouchDesigner, using TOPs and CHOPs to control 3D attributes. You’ll convert a Grid SOP into CHOPs to define point positions and use animated textures (like Noise TOP) to modify attributes such as Scale and Rotation. The second exercise demonstrates creating a pyramid structure by directly manipulating Ramp TOP values for position and rotation. By the end, you’ll learn how to efficiently create complex 3D structures and control them dynamically.
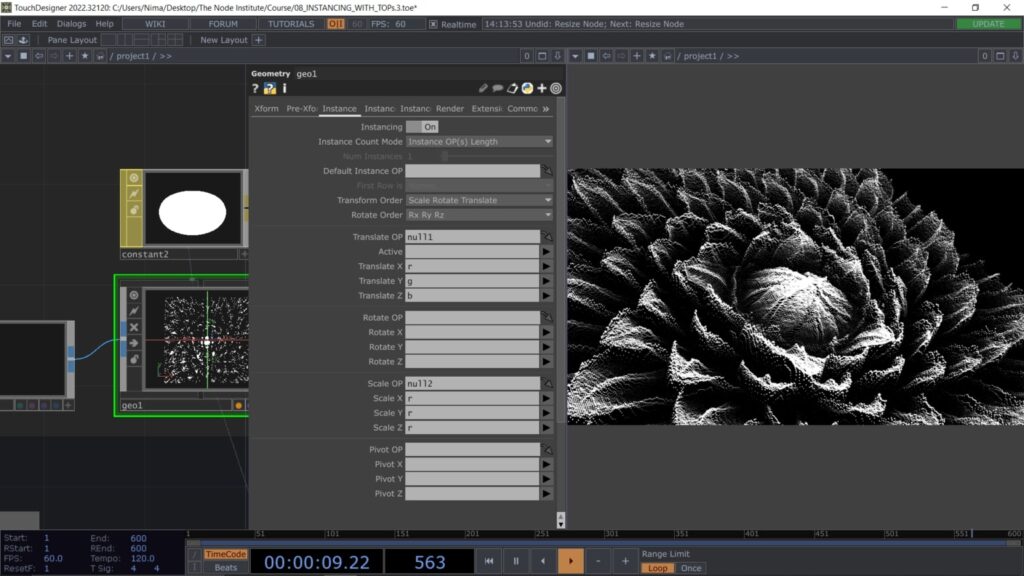
8 – The Power of Instancing

This lesson focuses on creating sound-reactive visuals using Instancing and feedback loops. You’ll learn to convert Audio Spectrum into texture, use the Resample CHOP for data reduction, and apply the feedback loop technique to create a trail effect. By manipulating TOPs and CHOPs, you’ll control 3D attributes like Translate, Scale, Rotate, and Color for sound-responsive Instancing. Finally, you’ll explore using Lookup TOP for color mapping based on audio peaks.
9 – Interactive 3D Animation
This lesson focuses on Instancing using TOPs to animate and deform a Grid of points with image data. You’ll learn how to manipulate Ramp TOPs for positioning, adjust image textures for Z-axis movement and scaling, and use interactive inputs for real-time texture switching. Additionally, the lesson covers working with .PLY files to create point clouds and 3D shapes in your Instancing process.
10 – Point Cloud & 3D Scanning
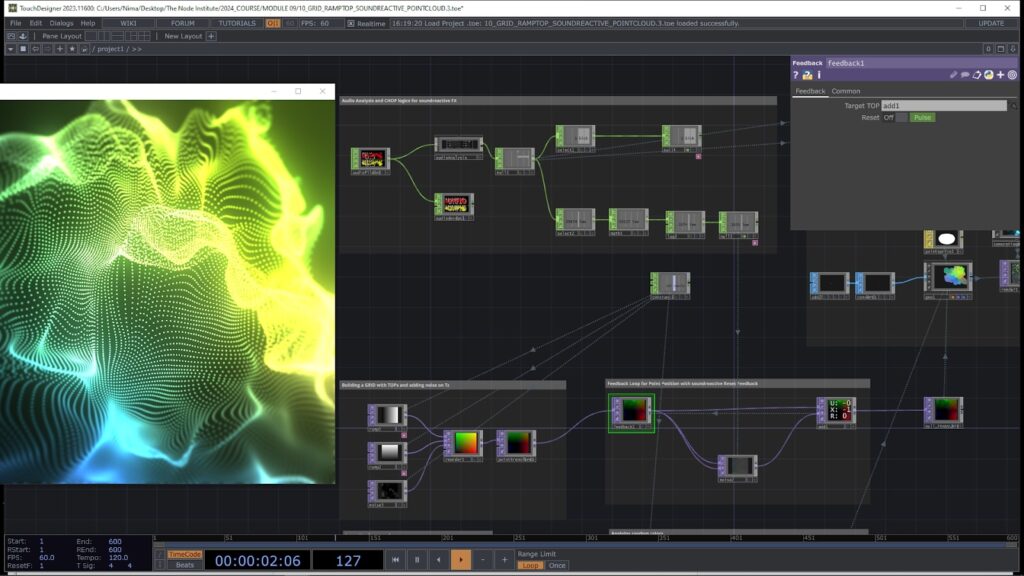
This lesson explores manipulating point clouds in TouchDesigner, focusing on masking, colouring, and transforming points using Noise TOP and Feedback Loops. You’ll learn how to modify point positions, apply random transformations, and implement a proximity-based selection technique for dynamic interactions. The lesson also covers creating interactive point cloud manipulation using mouse input and explores .PLY files to work with 3D models like the banana.
11 – Texture Instancing
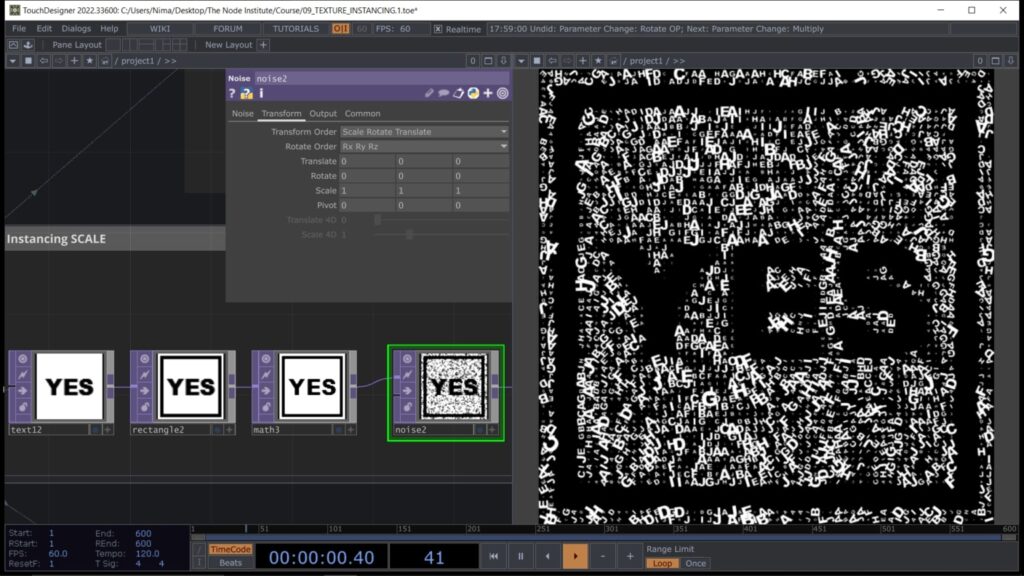
This lesson covers Texture Instancing in TouchDesigner, focusing on manipulating textures using attributes like Translate, Scale, Rotate, and Texture. You’ll create a 2D Texture Array with the 3D Texture TOP and apply it dynamically to instanced points. The lesson includes creating a Matrix rain effect using Feedback Loops and Texture Manipulation. Finally, you’ll learn to control textures through Python expressions and combine techniques for creative visual effects.
12 – Modular System Architecture
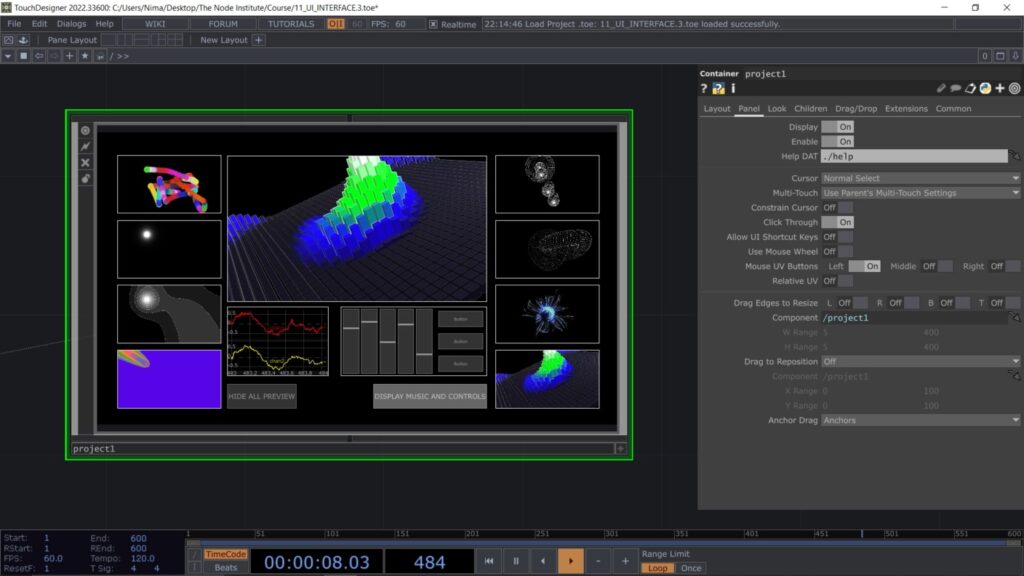
Today’s lesson focuses on creating a complex interactive system by merging multiple visuals, using Python scripting to control parameters across different containers. You’ll learn to use Panel CHOP, Switch TOP, and Chopexec DAT for seamless interaction. We also cover creating reusable UI modules and managing music channels with OPViewer COMP. The outcome is a functional system with sliders, buttons, and dynamic visual switching.
By the end of this program, you’ll have a strong foundation in TouchDesigner, from basic concepts to advanced techniques. You’ll be able to create interactive visuals, manipulate 3D objects, work with particle systems, and integrate sound-responsive elements into your projects. Additionally, you’ll have developed skills in Python scripting to streamline workflows and enhance interactivity. This comprehensive training prepares you to build creative, dynamic experiences and gives you the confidence to explore even more advanced possibilities within TouchDesigner.
If you have any questions or are curious to learn more, feel free to reach out to us at info@thenodeinstitute.org. We’re happy to help!
Good to know
Whether you join us at the start of the semester or at the end, you’ll receive access to the recordings and comprehensive workshop files, which you can refer to for at least one year.
⇒ There is no prior knowledge of TouchDesigner needed.
⇒ We will meet online via Zoom. The URLs will be shared within the lessons of this course.
⇒ Make sure you have a 3 button mouse attached.
⇒ Recordings of the live sessions will be accessible only for the participants for their personal review.
⇒ We recommend connecting to a second screen (if possible).
Any Questions? – Get in contact!
Email: info@thenodeinstitute.org