5 – Interactive Particle Systems / Recording of November 12th, 2024
Course Files
Lesson Overview
Today we are introducing how to setup a particle system using Particle SOP. Sound reactive in the first project example and interactive in the second exercise of the day.
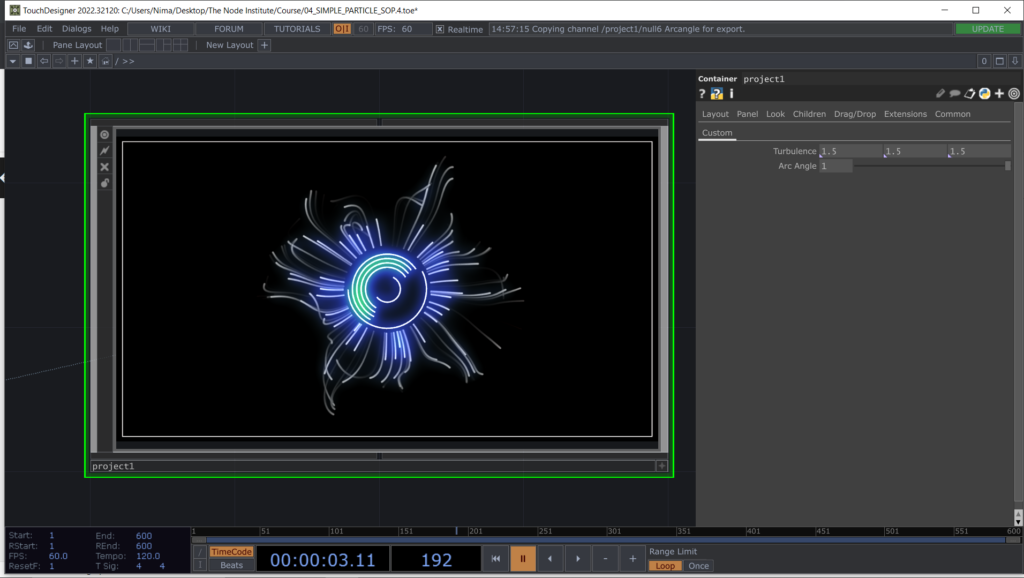
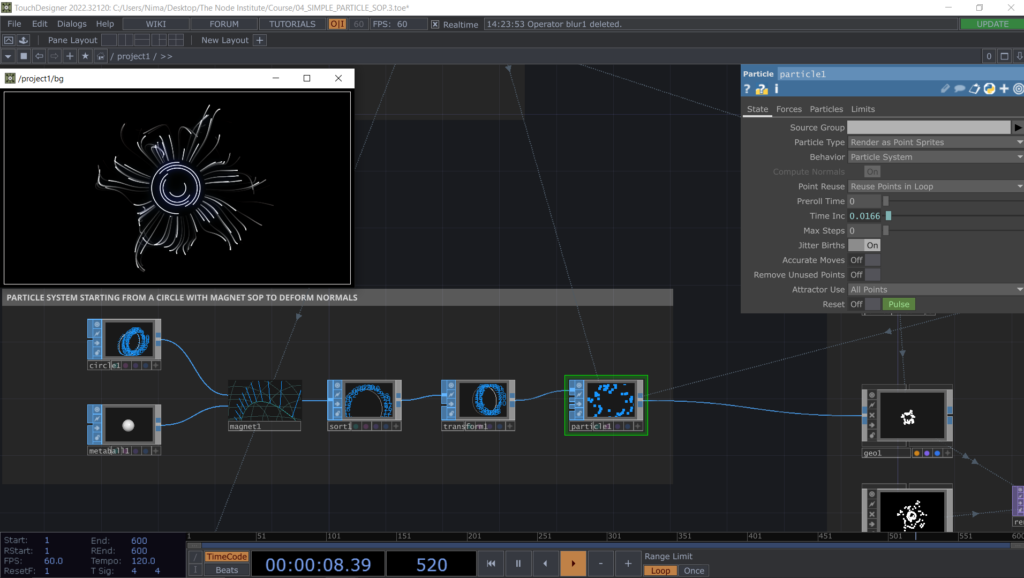
Starting by building the source emitter for the particles, we will focus our attention on the importance of the points attributes, such as Point ID + normals directions. In order to have a very simple emitter for our particles, we are using a Circle SOP and to modify its normals we are going to use a Magnet SOP.
To work with the Magnet SOP we will need to use a Metaball SOP in its second input, so to select the points that will be affected by the deformation. We are going to deform the point normals direction so to simulate the rays of a star, going radially from the center out.
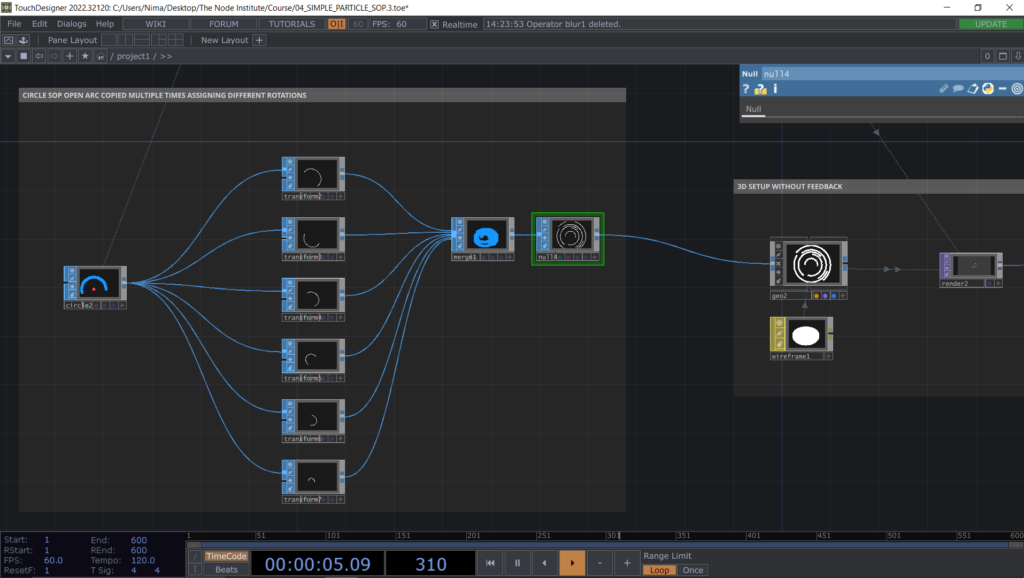
The central part of the visual is made of a series of concentric circles that we can easily build with one Circle SOP passing in several Transform SOP (to set different rotations) and finally entering in a Merge SOP to combine them together in one singular Geometry to render.
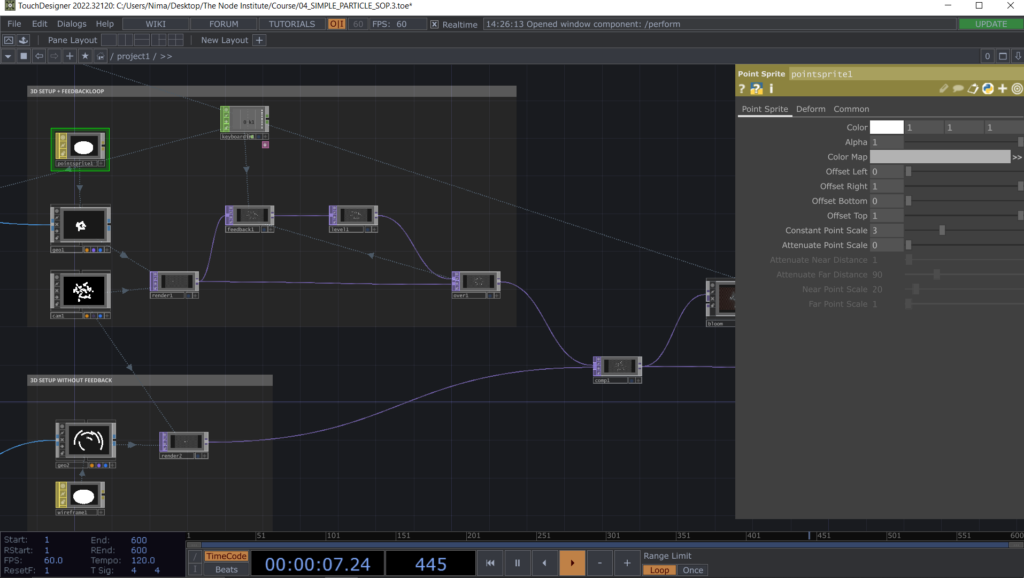
In order to keep a trail only for the particles using the feedback loop technique, but not applied to our concentric circles, we will create 2 separate and parallel Render TOP (the first one for the particles only and the second one for the circles).
Now we can apply the feedback loop technique only to one stream, so to create in post-render the particles’ trails. This way of creating trails won’t affect memory usage.
I will show you during this part of the lesson how to use Trail SOP instead of Feedback TOP to create the trails of the particles, but keep in mind that Trail SOP uses a lot of CPU memory.
Now it’s time to animate in sound reactive mode some of the parameters by using a tool from the Palette, under the category Tools, called Audio Analysis.
Before using the tool we will dedicate some minutes to understand what happens behind the scenes of an audio analysis process, starting with a simple introduction of the operators Audio Spectrum, Audio Filter and Analyze CHOP.
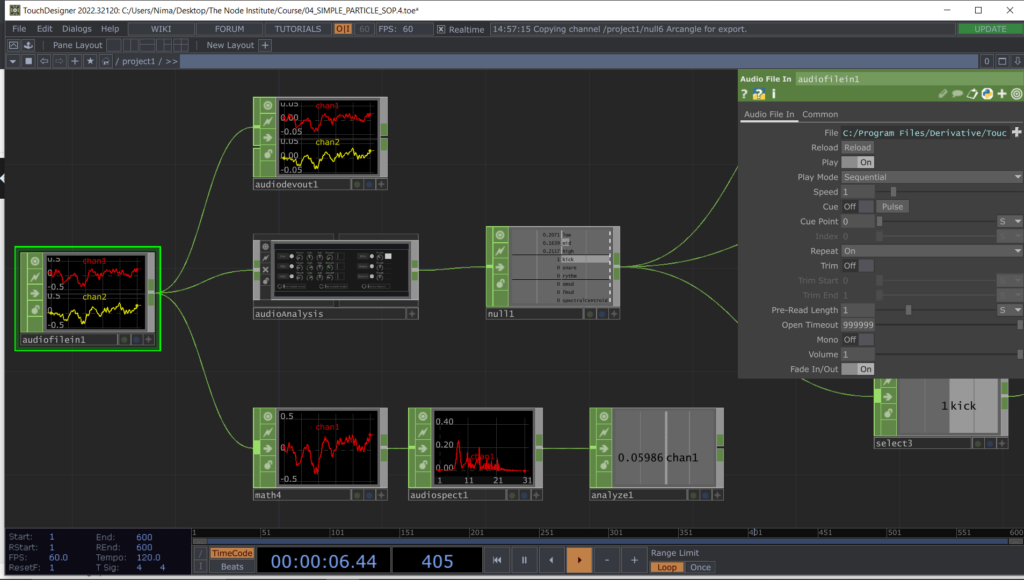
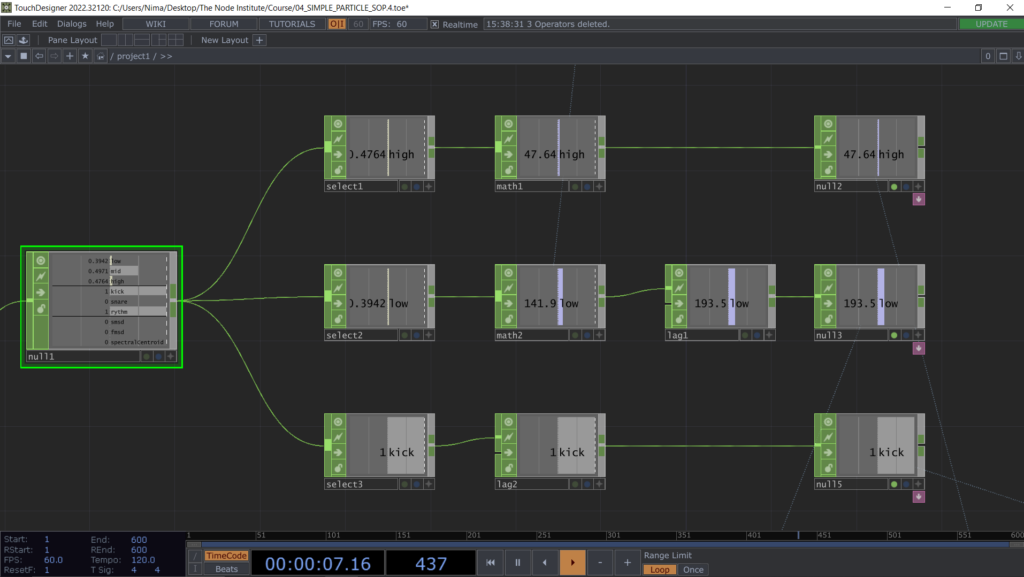
Then we will focus our attention on how to use the channels provided by the Audio Analysis tool and funnel each individual channel to a different parameter. We can now control the visual effects with sound reactive channels (low, mid, high, kick, snare, rhythm) coming from the analysis of the sound in real-time.
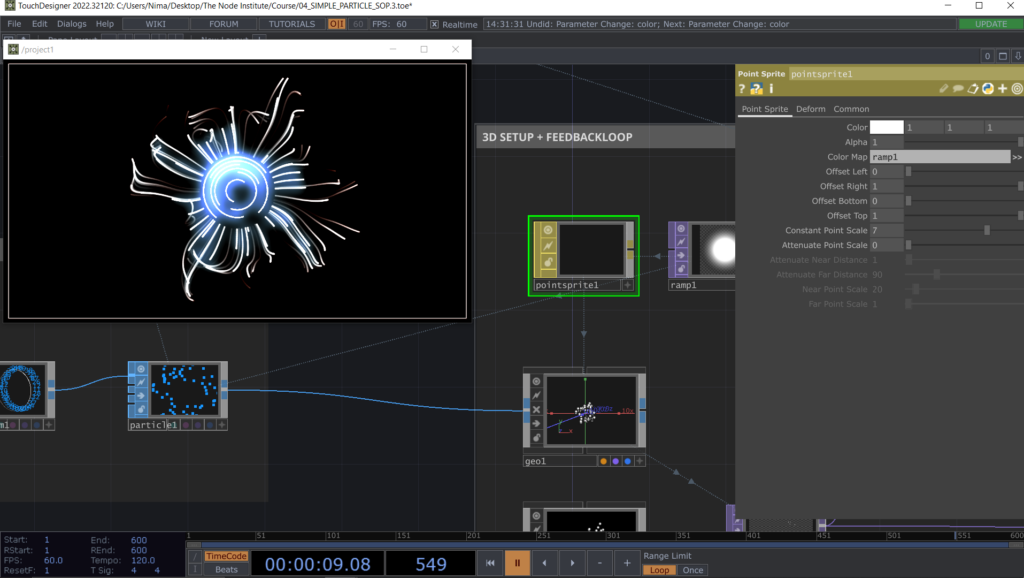
Before jumping to the next exercise, we can rapidly take a look to the material Point Sprite which we are using for the particles and a make some small additions. Creating a Color Map for the material by using circular Ramp TOP will refine the feedback loop result (previously a bit scattering).
The second part of today consists in creating an interactive Particle SOP system using the mouse input (Panel CHOP) while learning how to use the other inputs of Particle SOP, such as Collision and Force.
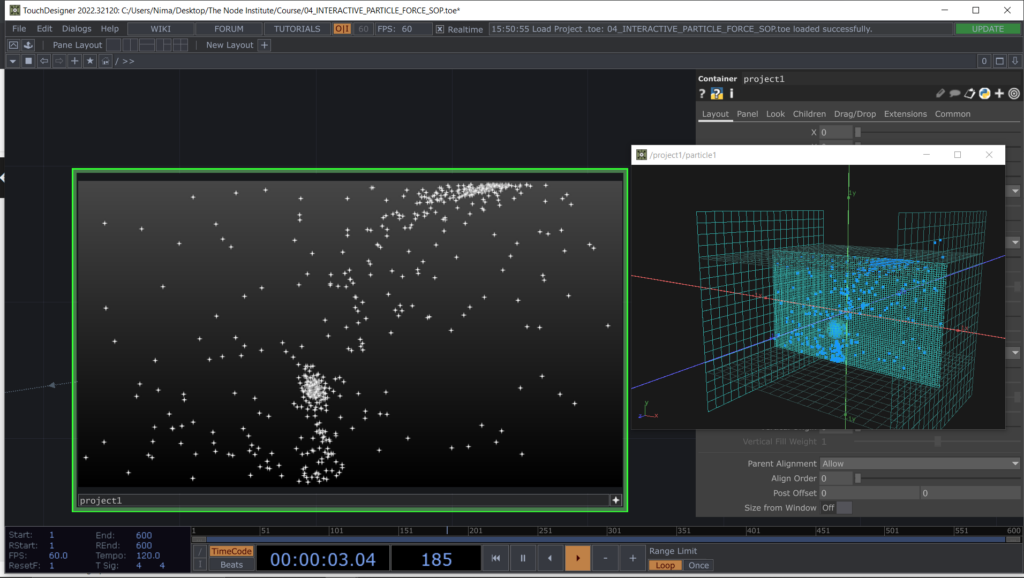
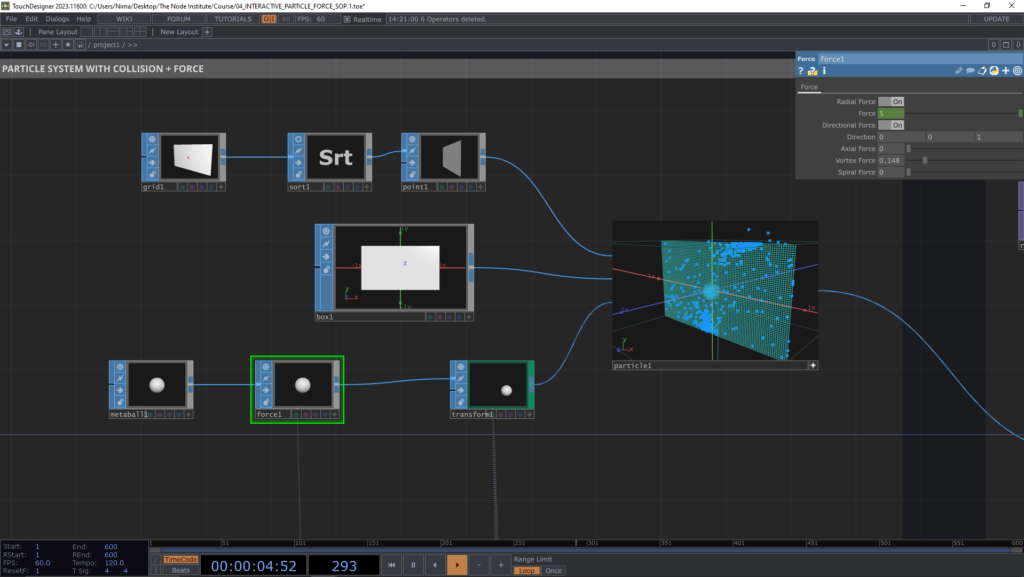
We start creating for the collisions behaviour, a cage using a Grid SOP and several Transform SOP. For the Force input instead we will create an interactive Metaball SOP which will move with the mouse inputs and scale up when clicking the left button. While it scales up it will also change the direction of the Radial force parameter inside Force SOP, so to generally attract the particles and push them away with a click.
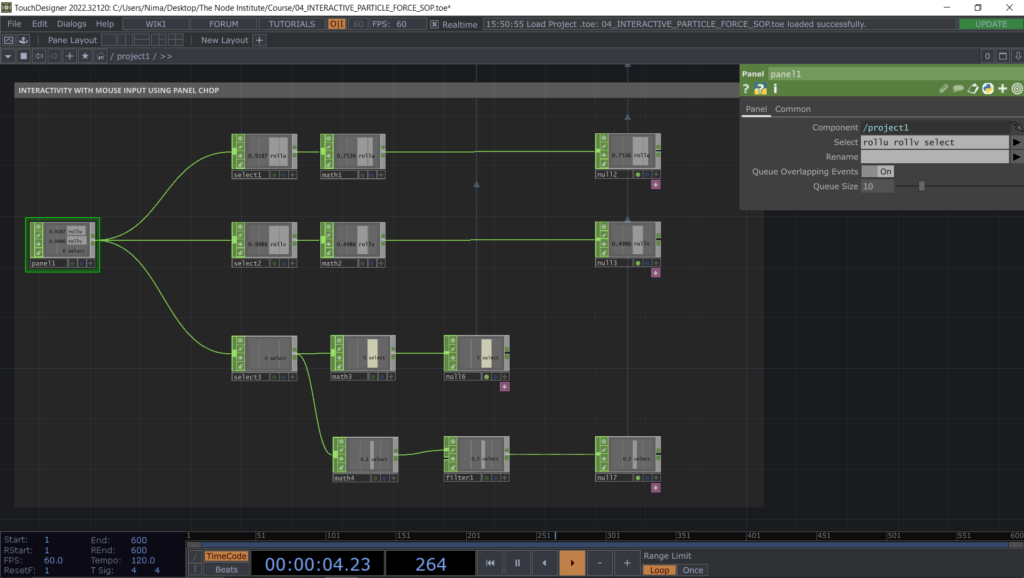
Finally to interact with the mouse input we use Panel CHOP selecting 3 channels: rollu, rollv, select
Then with a series of Select CHOP and Math CHOP we can start defining the range for the movement and for the radial Force field of the Metaball SOP.
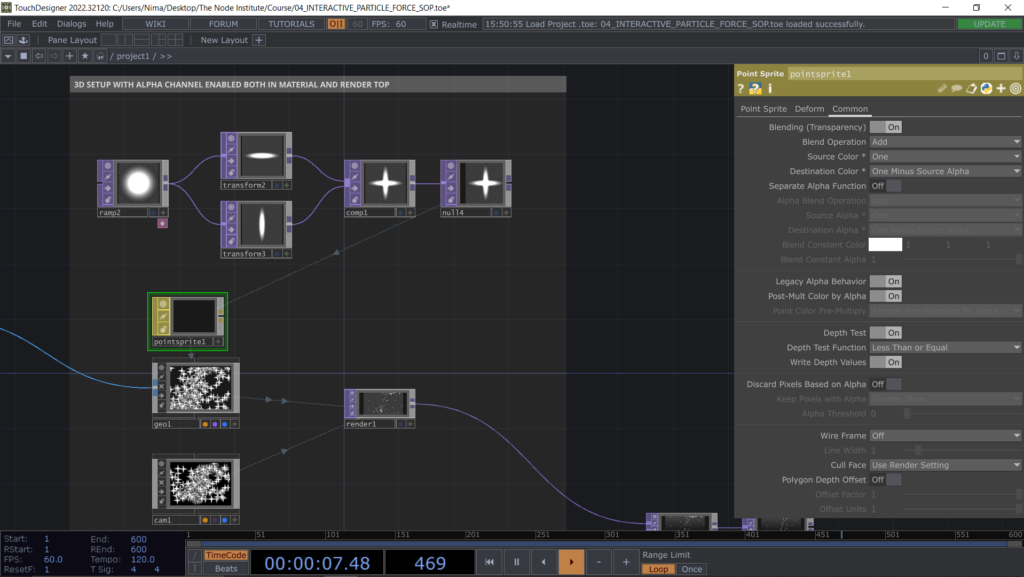
A final look to the Point Sprite MAT and a recap on which parameters to modify in order to enable transparency both in the Material and in the Render TOP.
Learning Outcomes
- understanding of the Points attributes and how to change ID and normals with Sort and Magnet SOP
- overview on Particle SOP exploring different parameters and the operator’s inputs
- learning the difference between Render as Lines and Render as Point Sprites
- creating multiple parallel Renders and assigning selected Geometries to each of them
- using the Audio Analysis component from the Palette and basic understanding of how it works
- selecting a channel coming from the Audio Analysis tool and assigning it to a different visual effect
- learning how to enable Transparency in a material by going in its Common Page parameter
- using a Metaball SOP and Force SOP as an input of Particle SOP for setting up interactive behaviours
List of Nodes
- Magnet, Sort, Point, Particle, Metaball, Force SOP
- Audio File In, Audio Device Out, Select, Math, Lag CHOP
- Point Sprite MAT
- Audio Analysis, Bloom COMP from the Palette
Get Support
To get support outside of the live session, please join our discord server with this invite:
https://discord.gg/F7cXRMYUK7
