TDSI_Immersive_collect1
Starting with a speculative stage design featuring multiple LED surfaces, we will learn how to generate UV maps that serve two key purposes: enabling real-time pre-visualization of content within the scene while working on it and laying the foundation for the pixel map used to deliver content to the media server. Additionally, we will explore how to embed not only image content but also lighting information within the same map.
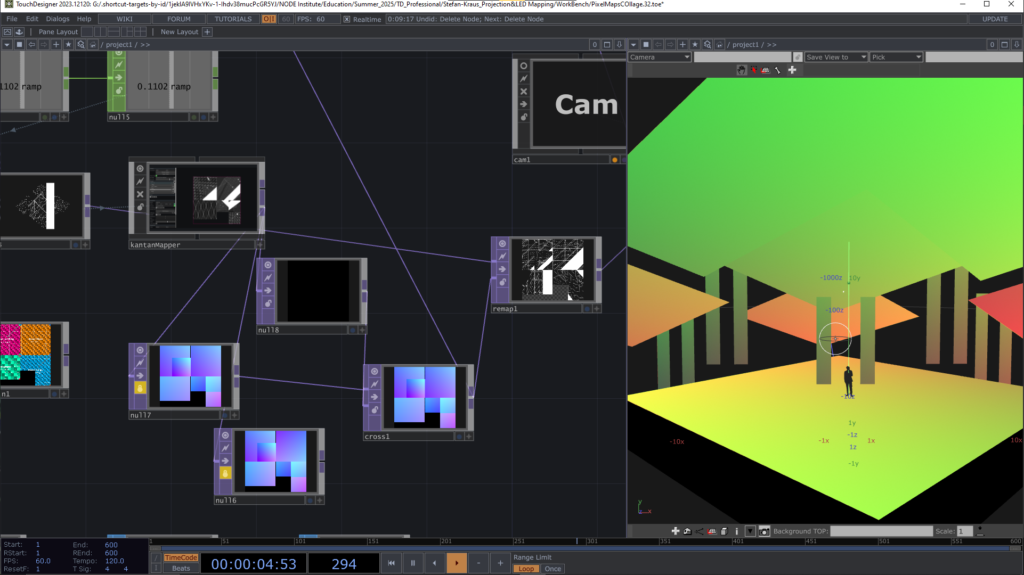
While this course focuses on LED tile-based surfaces, the workflow is equally applicable to projection setups. Since the placement of media surfaces within pixel and UV maps defines their orientation and relationship to one another, we will experiment with different arrangements optimized for various animation techniques and content needs. To achieve this, we will utilize the remapTOP operator to dynamically remap our maps and prepare pixel-accurate sources.
As a byproduct of this process, we will create simple masks and shapes that can be used for animation or adapting existing footage to a multi-screen environment. We will further get to know a couple of little tricks that the remapTOP can be used for and that aren’t obvious.
This course is ideal for anyone looking to adapt content to different setups on the fly, prepare visuals for a stage, or produce content for an existing pixel map.
The inspiration:
Case Study : Stage Visuals Project
Introduction to UV(W) Maps:
Describe any Position within a Texture with UV Coordinates
Example Project:
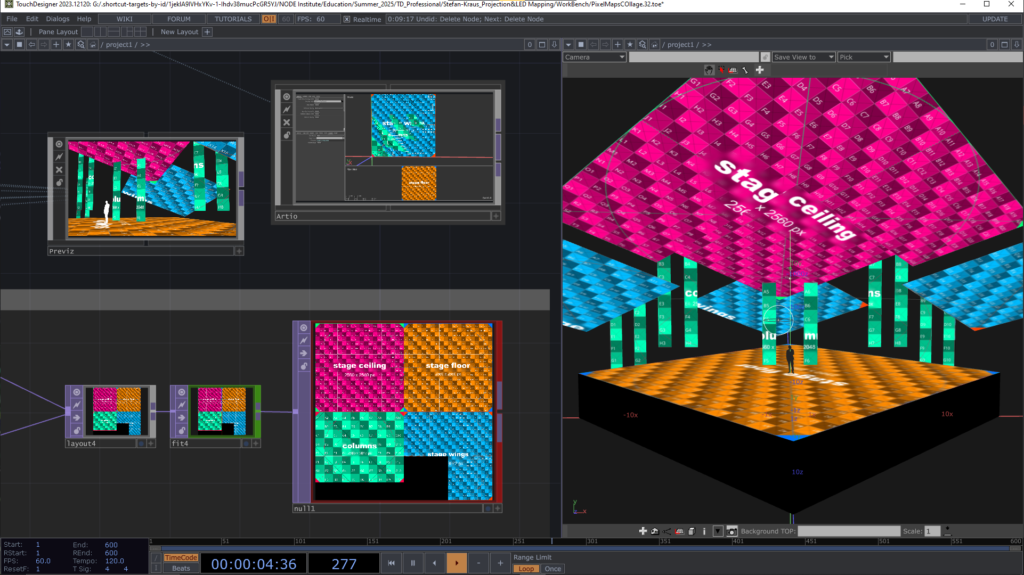
Create Pixlemaps with Artio and map them in Blender
Set up a Previz / Render Pipeline
Content Creation
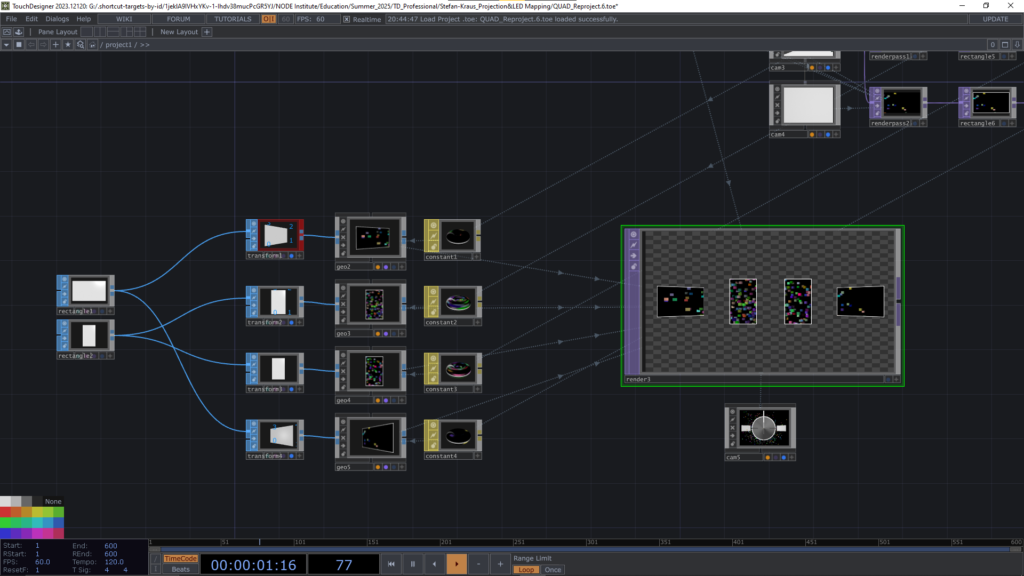
Quad Reprojection
Other Use Cases:
More Use Cases for the Remap TOP
https://github.com/theexperiential/Artio
Artio – A Pixel Mapping Toolkit for TouchDesigner Projects by Dylan Roscover / tec.design
Blender
Blender is a free and open source 3D creation suite. It supports the entire 3D pipeline—modeling, rigging, animation, simulation, rendering, compositing and motion tracking, even video editing and game asset creation. Blender Script language is python, which makes it an ideal companion for TouchDesigner.
These tutorials demonstrate further uses for uv maps and uv math:
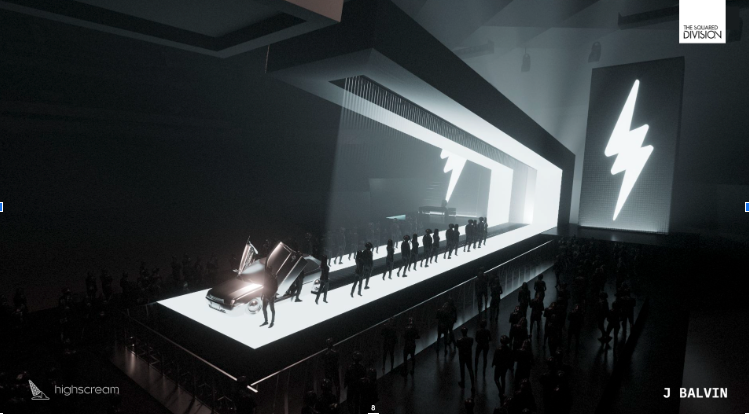
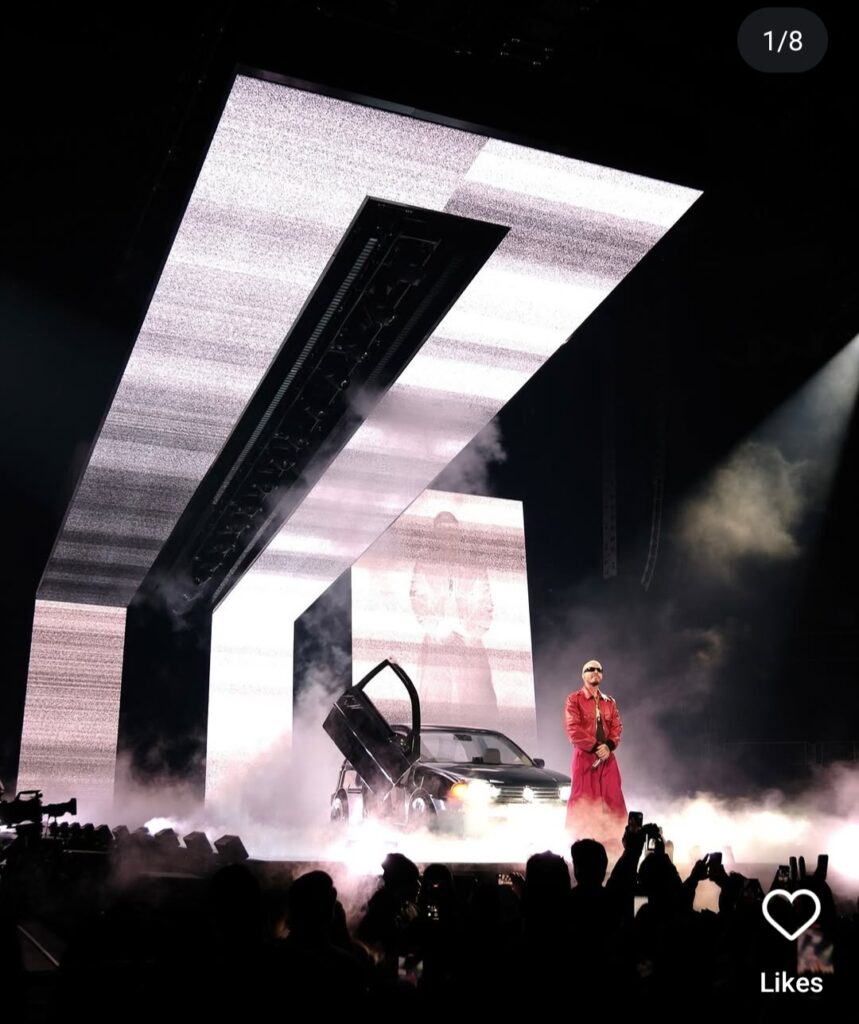
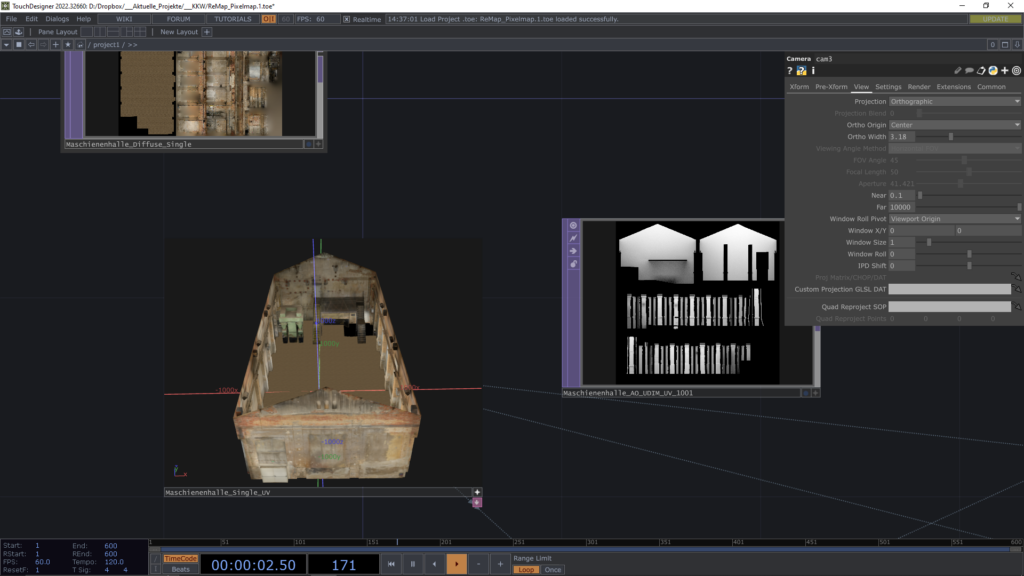
The inspiration for this course come from a recent production I joined with a team of Berlin TouchDesigneurs for a U.S. company that creates visuals for touring artists. We were provided with a 3D Model of the stage – or to be more precise the LED surfaces involved and a Pixelmap.
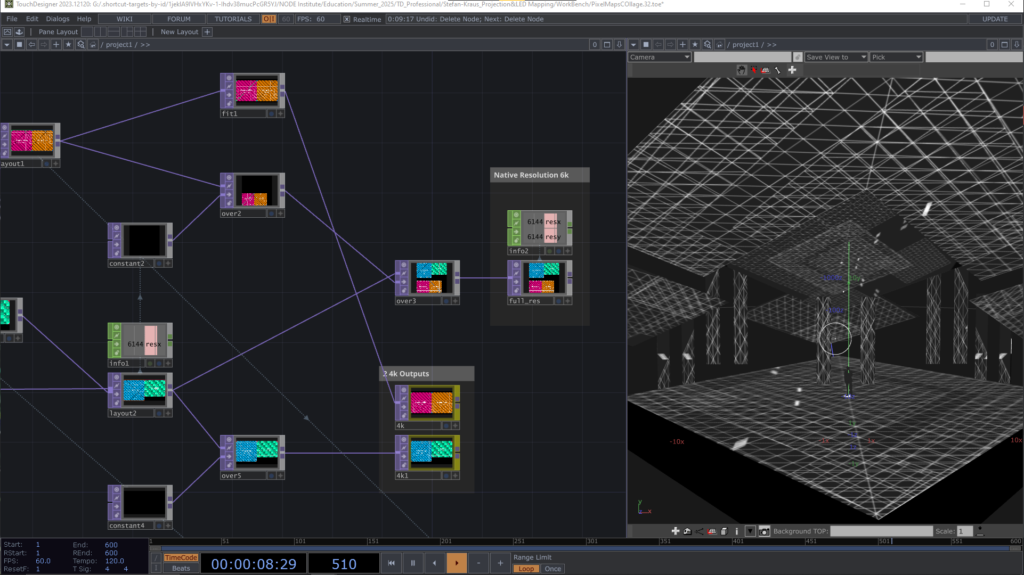
Even though our scenes didn’t have to run in real-time, the desired output resolution, as defined by the pixelmap was way to high to be worked on comfortably with TouchDesigner. Even to render it out. Further, the arrangement of the surfaces in the pixelmap didn’t take their real life dimensions and positioning into account, which created the need to create a process, that allowed us to re-use existing networks and work within the resolutions that the different computers could handle.
The inspiration for this course come from a recent production I joined with a team of Berlin TouchDesigneurs for a U.S. company that creates visuals for touring artists. We were provided with a 3D Model of the stage – or to be more precise the LED surfaces involved and a Pixelmap.
Even though our scenes didn’t have to run in real-time, the desired output resolution, as defined by the pixelmap was way to high to be worked on comfortably with TouchDesigner. Even to render it out. Further, the arrangement of the surfaces in the pixelmap didn’t take their real life dimensions and positioning into account, which created the need to create a process, that allowed us to re-use existing networks and work within the resolutions that the different computers could handle.
Imagine unfolding a 3D model (like a cube or sphere) into a flat 2D pattern. UV coordinates are like the coordinates of each point on that unfolded pattern, allowing you to map a 2D texture onto the 3D model.

UV coordinates are two-dimensional texture coordinates used to map 2D textures onto 3D models. They define the position of a vertex on the 2D texture, allowing you to specify which part of the texture should be applied to which part of the 3D model.
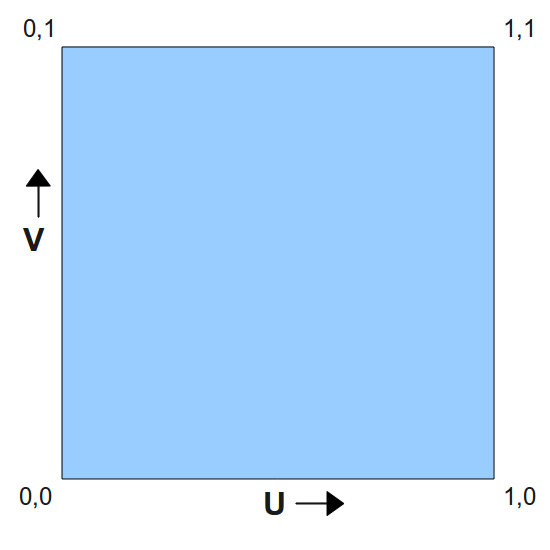
UV coordinates are normalized to a range of 0.0 to 1.0, where (0, 0) is the bottom-left corner of the texture and (1, 1) is the top-right corner.
Each vertex on the 3D model has associated UV coordinates. These coordinates determine which pixel on the 2D texture will be applied to that specific vertex.
UV coordinates can also be used for other purposes like vertex colors, controlling surface flow, and other effects.
TIP: By using a Point SOP, you can swap the position and the texture coordinates. This allows you to model the “texture space”. Another Point SOP allows you to swap the position and texture back to their original locations.
Describe any Position within a Texture with UV Coordinates
Create Pixlemaps with Artio and map them in Blender
Set up a Previz with Camera VIewport
Content Creation
In my experience, there is never just one pipeline to create content, especially when working on pre-rendered content. Lets never forget, that we can use all kinds of tricks to get to the content we want and we can use all kind of compositing and editing to achieve what we want, which means it’s ok to do it oin several steps and it is ok to have quite uneffective networks (with many renders etc. as long as they run at an acceptable speed for working. All rendering is happening in non real-time mode and thus forgiving.
Quad Reproject
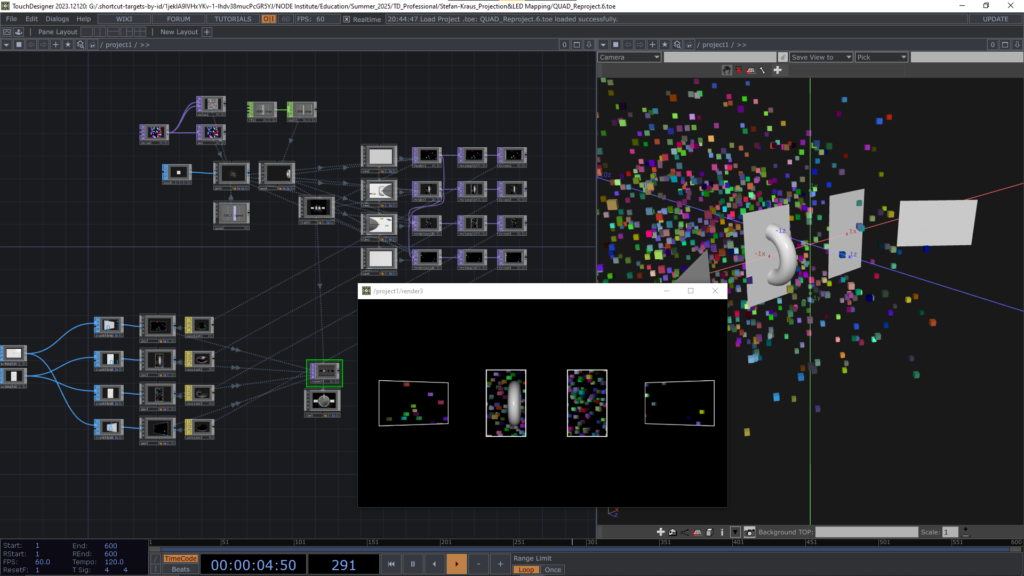
Quad Reproject is a technique that allows us to render sweet spot / anamorphic animations for flat display devices (TVs, Monitors, LED Walls).
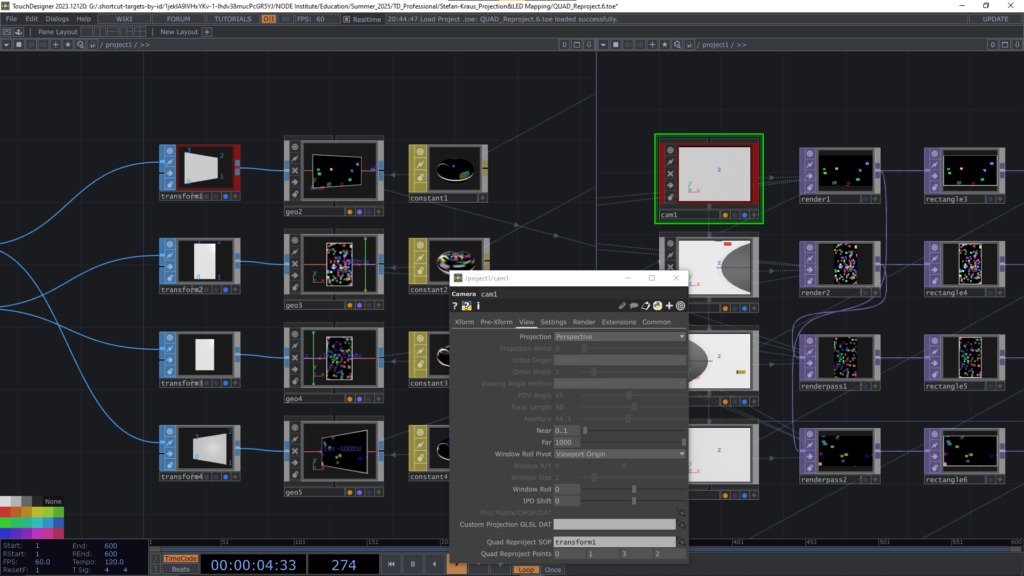
It allows us to render a 3D scene from one viewpoint (camera) and map that onto multiple screens in a spacial arrangement. You might also think of that 3D scene as another convinient tool to animate content for those screens.
Links
https://youtu.be/UBK9JD3lEM4?si=muyBYAzoQZ8DoJ_P
Lovely tutorial by B2BK is a good introduction to Quad Reproject.
https://derivative.ca/UserGuide/Quad_Reprojection
Related files
Find them in the “tox” folder in the lesson files