11 – Texture Instancing / Recording of January 21st, 2025
Course Files
Lesson Overview
Today’s module is about introducing the technique called Texture Instancing. As usual in the first part of the lesson I’m giving an overview about the first exercise. By using a simple Grid SOP we can act via Instancing on the point attributes: Translate, Scale, Rotate and also Texture!
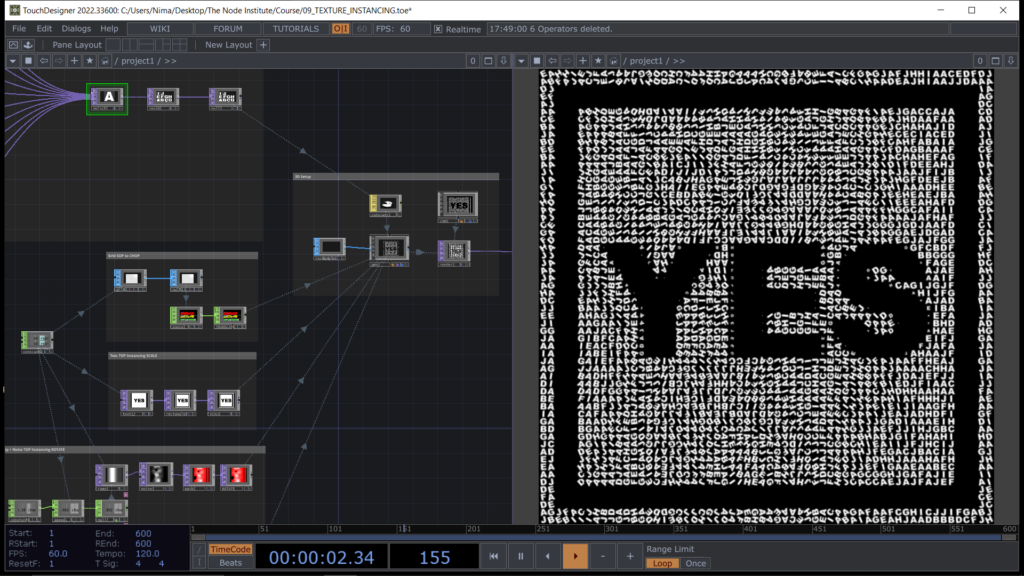
Later on when we’ll finish the exercise you can try to play with some attributes like the Scaling logic or the Rotation pattern and try your own mods to the network!
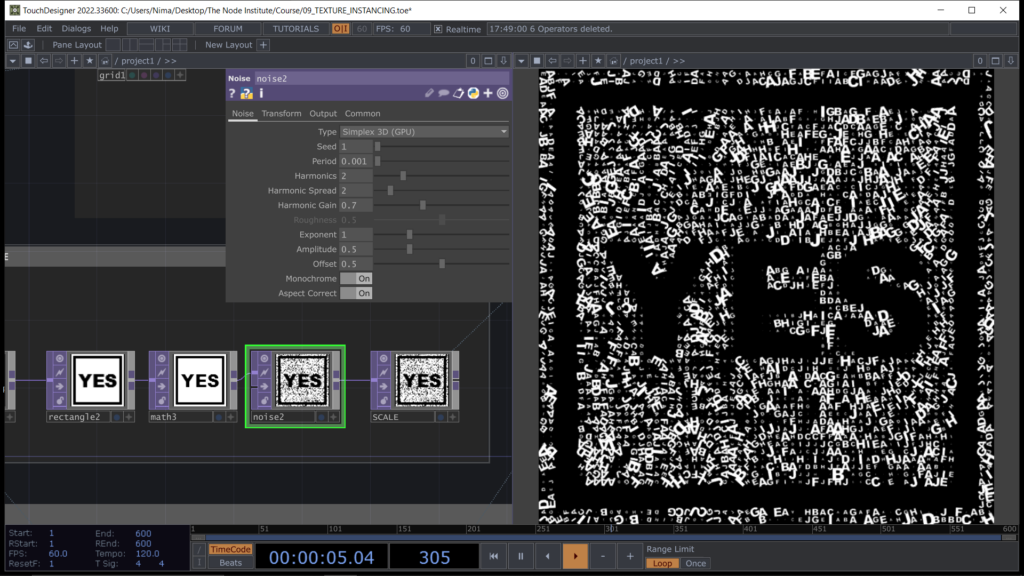
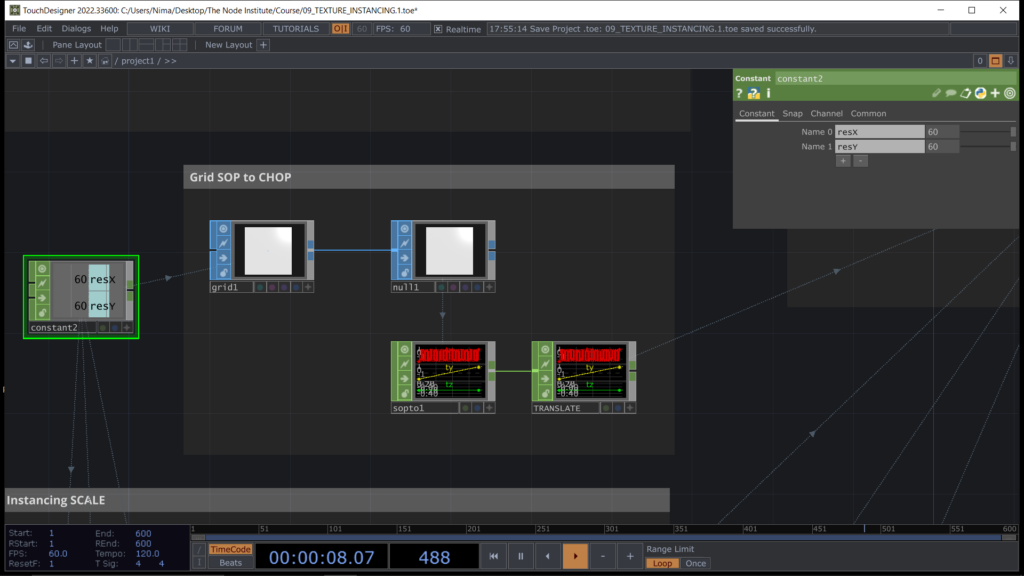
But let’s start from the beginning!!! As usual to keep things simple we start by creating a Grid SOP and converting it into CHOPs. You will notice in this project that we will use all different possible conversion for the Instancing process, so that you can practice with them all.
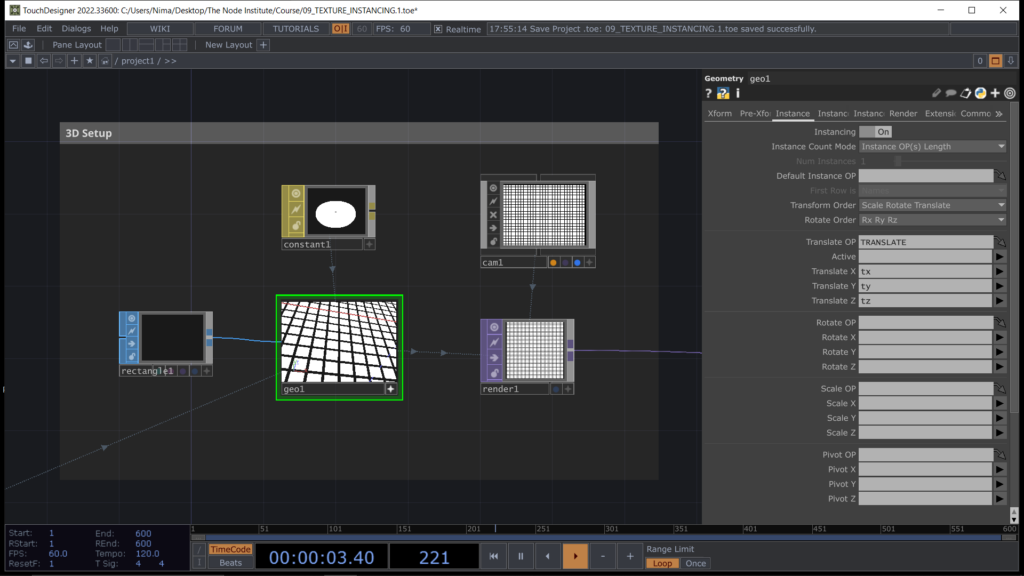
After creating the Point Position with our Grid SOP we can already set up the 3D scene with a Rect SOP.
Now we can create a Text TOP with the same resolution we used for the Rows and Columns of the Grid SOP. Then to add the borders we can use a Rect TOP. Obviously you can create multiple textures TOP, or use you own webcam with the Video Device In TOP and mix them together with a Switch TOP.
You will see that you can create very smooth scaling effect in the Instancing 3D process.
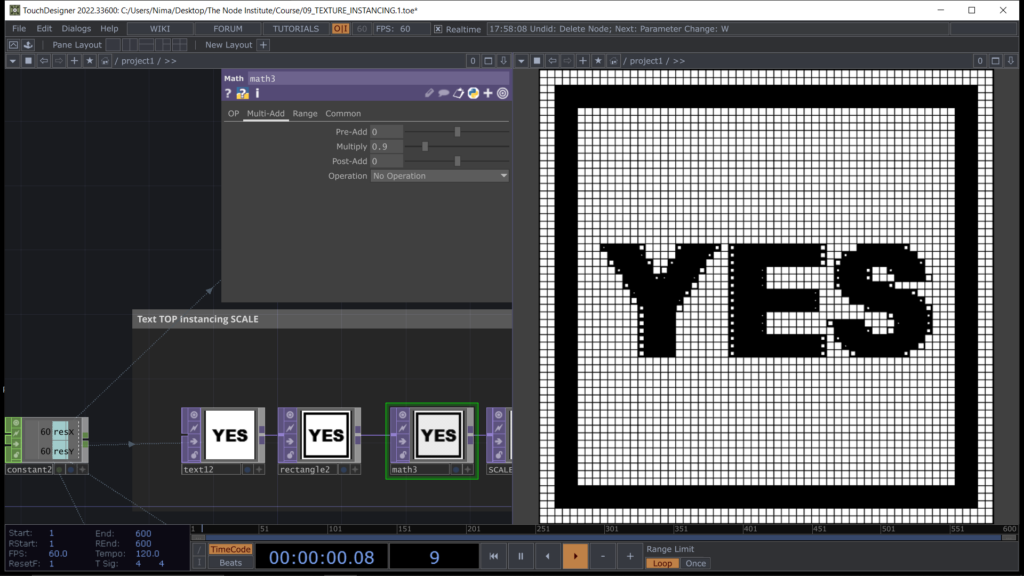
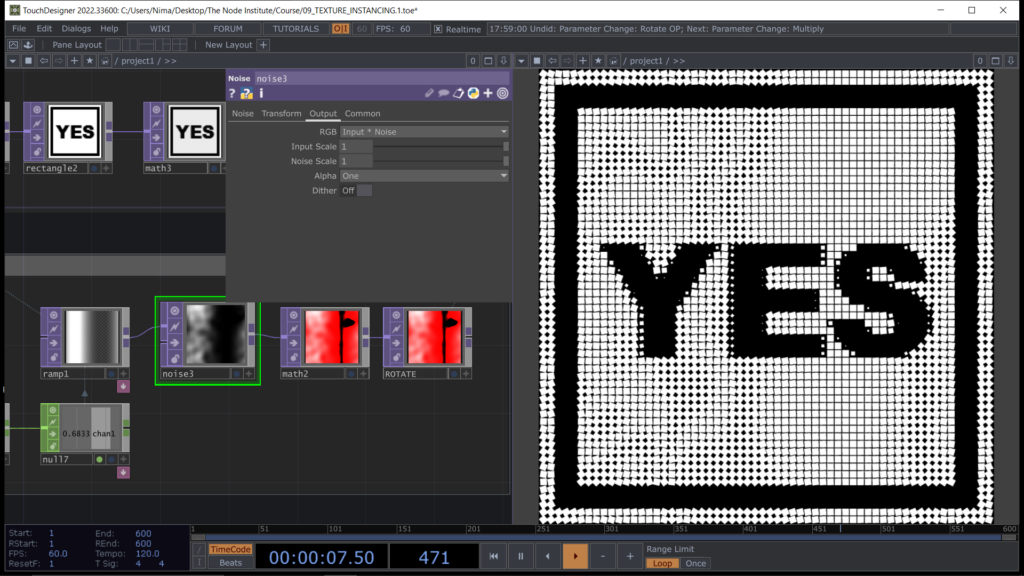
Let’s now create an effect or a pattern made with textures in order to rotate those rectangles. We can try to simulate sea waves by using a Ramp TOP multiplied by a Noise TOP to obtain such effect. Then we can convert those black and white pixels to some higher numbers that we can use it for the rotation.
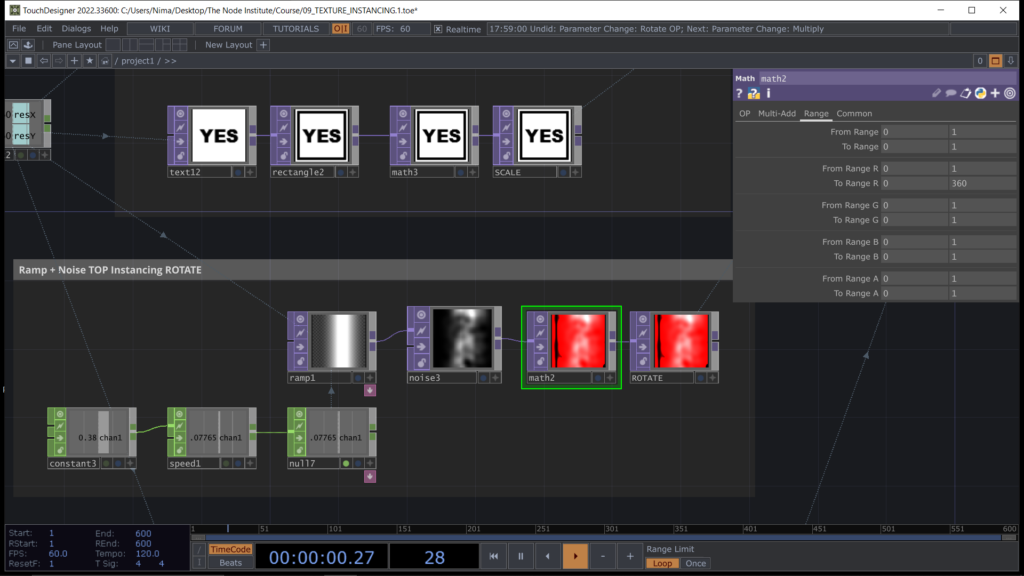
We can now assign the TOP to the Rotation Attribute of the Instancing process and play a bit with the textures while watching the end result.
Time to change topic and jump into the Texture Instancing method. First of all we need to get familiar with the concept of 2D Texture Array and also learn how to fabricate a texture array using the operator 3D Texture TOP. You will notice during this part of the lesson that you can create many different texture array for different purpose. I will try to show you some of the most used tricks with this technique by browsing some Instagram posts shared by other Touchdesigner users.
First of all let’s create a list of letters using DATs so that later we can use this list to create some textures.
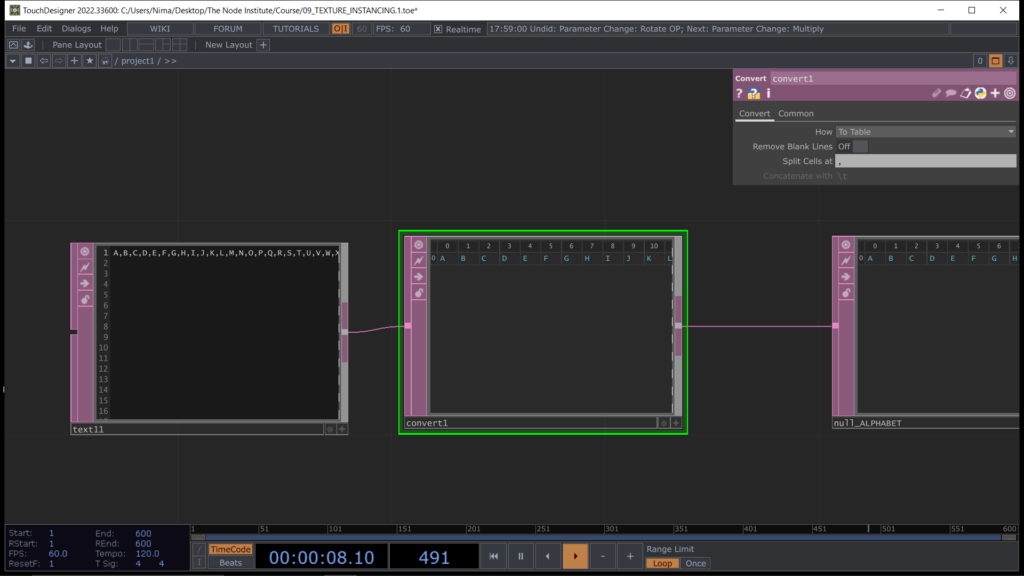
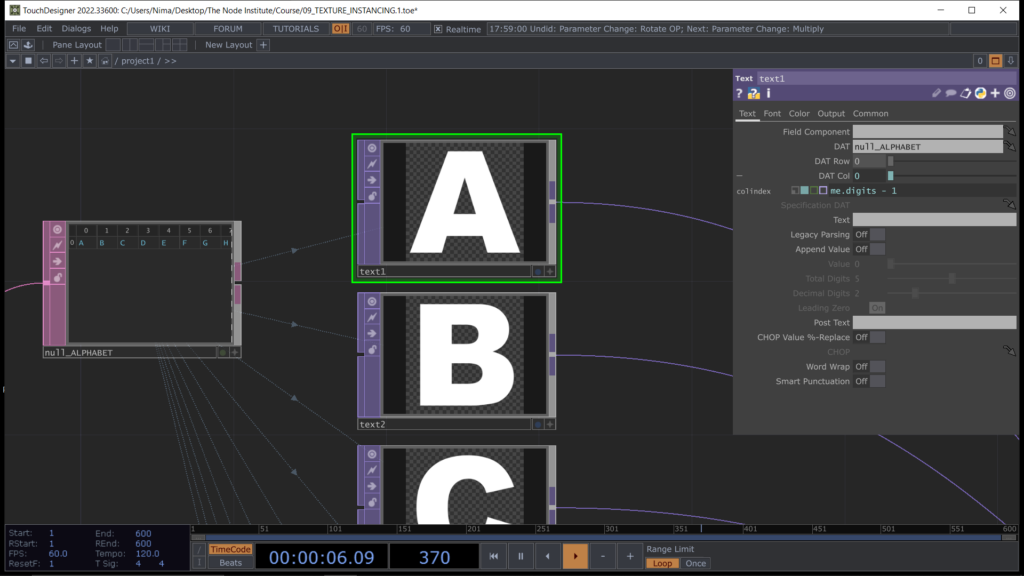
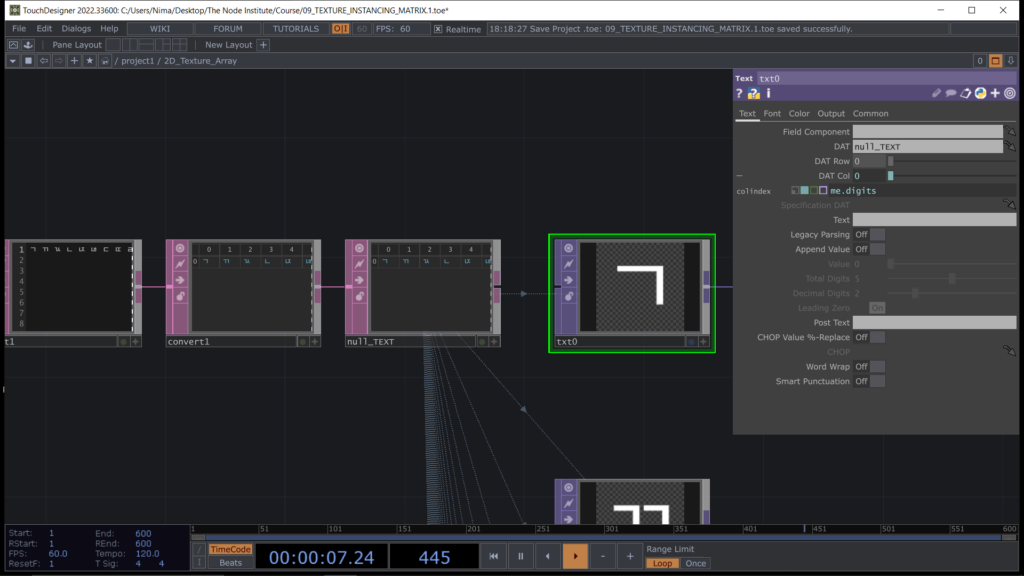
After converting the string of letters into a Table DAT we can use the Text TOP and input in the parameters the table of contents we just built with DAT operators. By using a python command “me.digits” we can use the suffix number placed automatically after the name of the operator and link it to the selection of the Column in the table DAT we are using for the Text TOP.
By doing this every new Text TOP copy pasted from the original will then change the Column to select.
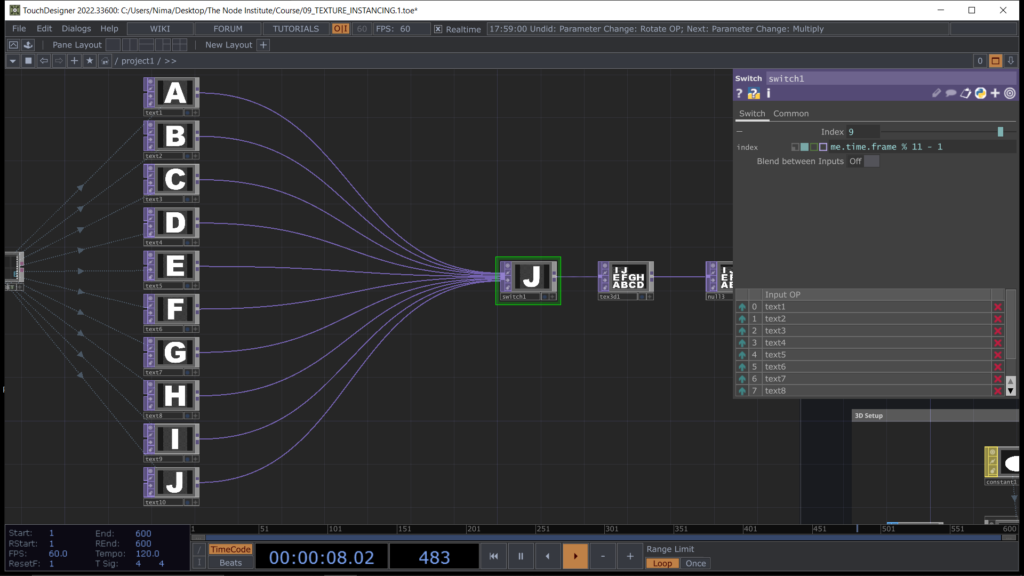
Now we can feed them all to the Switch TOP and use another python expression to change index every frame and loop that number between 0 and 10 (from A to J) “me.time.frame % 11 – 1”
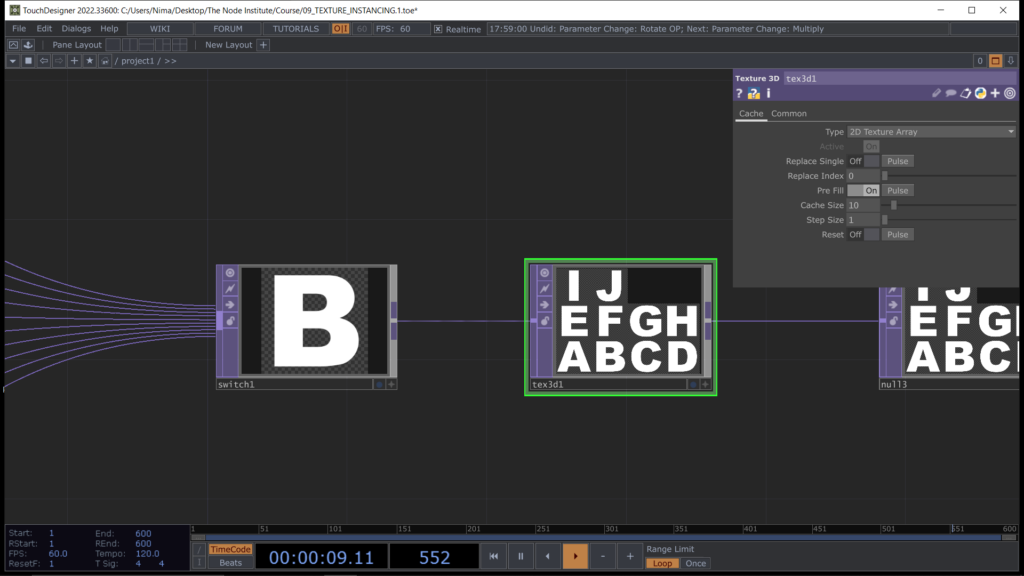
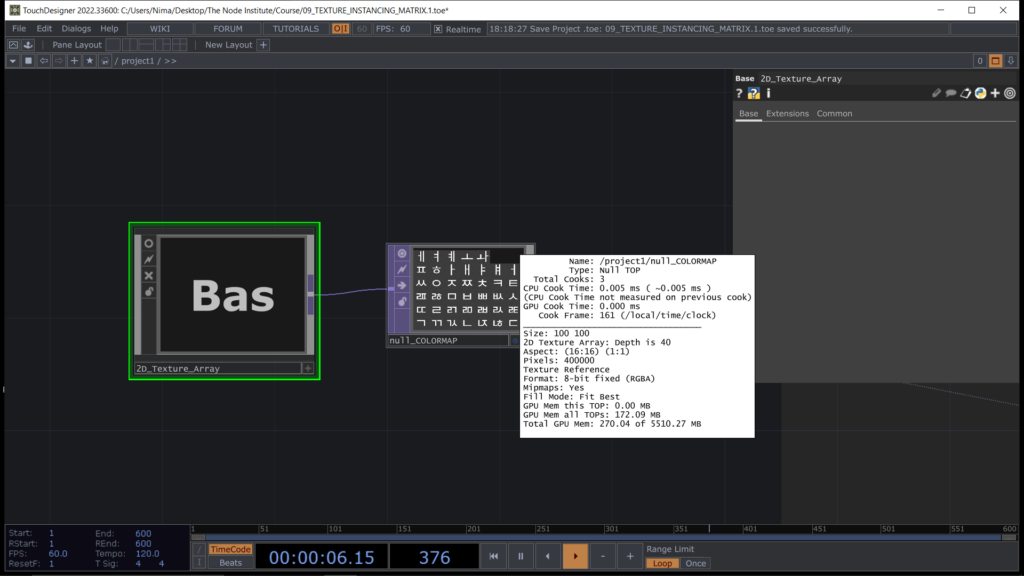
We can create type of image called 2D Texture Array by using the node 3D Texture TOP going in the parameters to first change type and then setting how many frames of the input video we want to store in the parameter called Cache size. Finally by hitting the Pre-Fill toggle button, Touchdesigner will fill the first 11 index starting to count from the first frame. The result should appear like the entire alphabet until the letter J included.
Now we can use this 2D Array of images in the Color Map of the Material used in the Instancing, simply by assigning the texture to the parameter inside the Constant MAT. You can also collapse the entire logic into a BASE component if you want to keep you network clean and easy to browse.
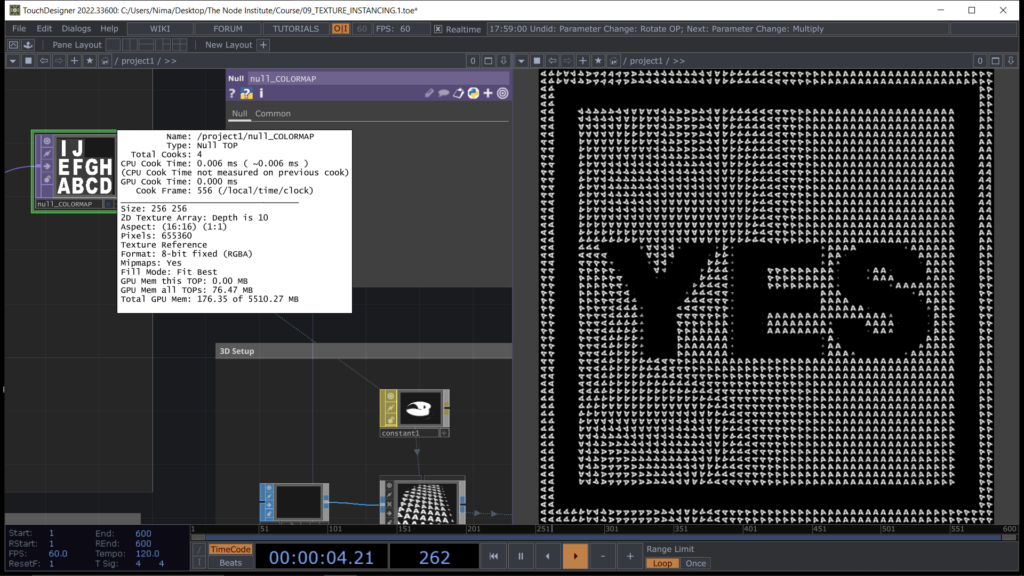
The letter appearing on all the rectangles should be always the same one, the first of the 2D Tex Array, in our case the letter “A”. In order to assign different letters to different rectangles of the instancing we can act with numbers, like we were doing with the scale and rotate attribute. We just need to understand that each texture has an ID the letter “A” has the ID number 0 and the letter “J” has the ID number 10.
So if we build a texture with a random Noise TOP we can assign random textures to the rectangles.
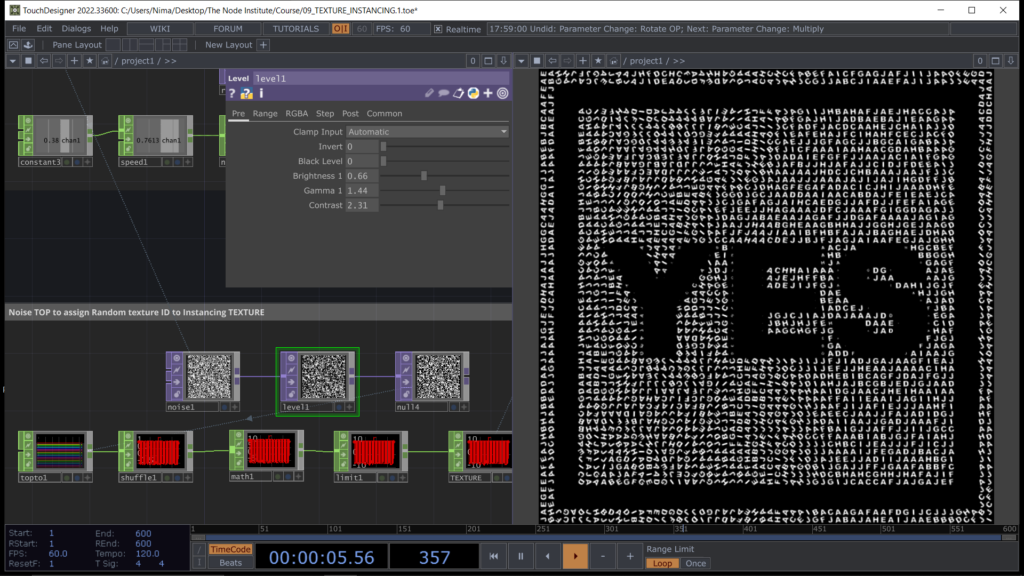
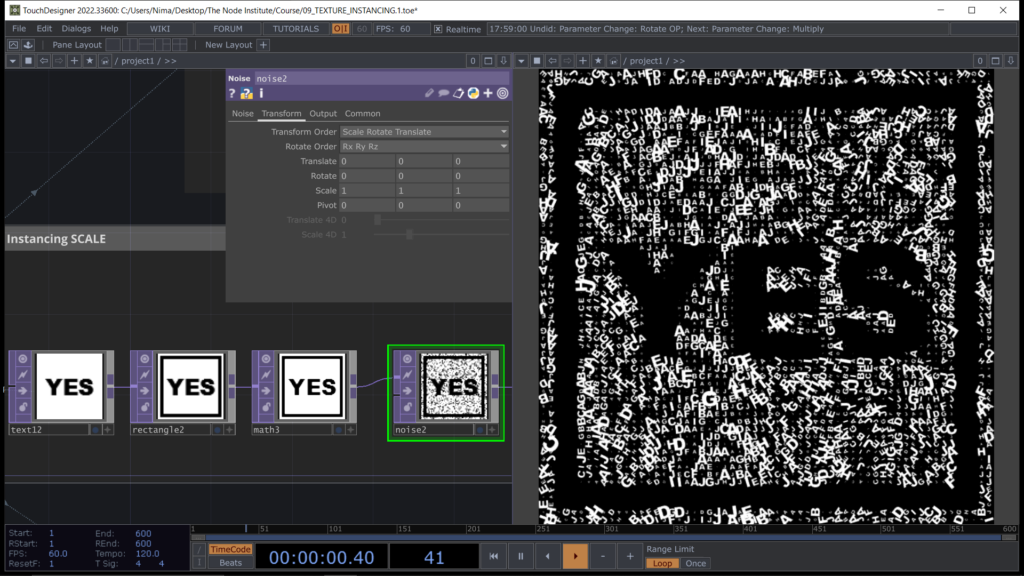
Each pixel generates a different level of grey that can converted in numbers and amplified with Math CHOP or directly through textures operators like Math TOP. In the same time you might want to play with the dimension in scale for each rectangle, let’s add a Noise TOP to the chain that defines SCALE.
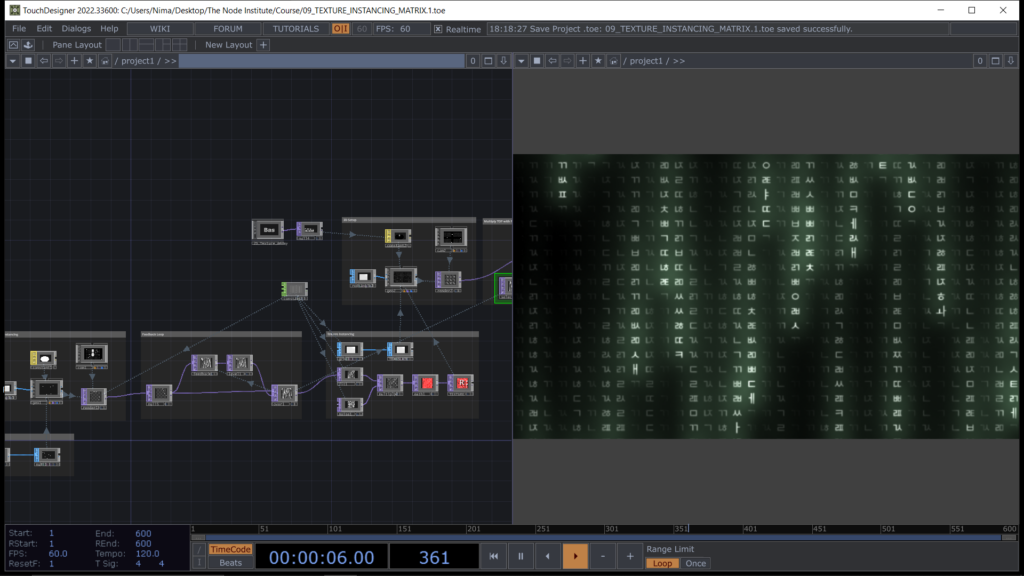
The second exercise of today’s session is about building an animation like the Matrix rain using a combination of techniques such as Feedback Loop and Texture Instancing.
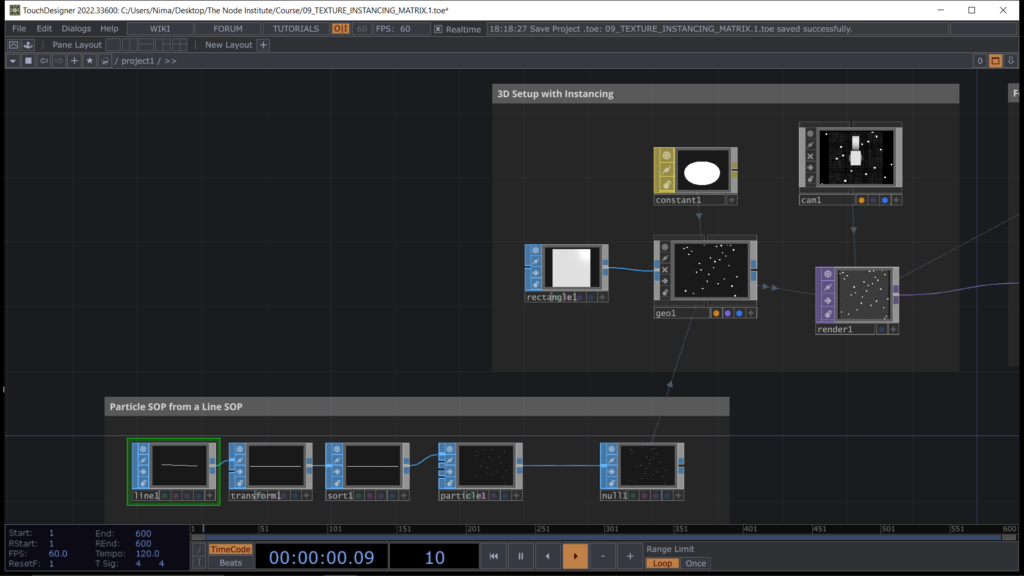
Let’s start by creating a Particle system that simulates a rain of 35 rectangles falling from the top of the texture to the bottom.
Now let’s create the trails of these rectangles by using a simple feedback loop process. We will use later this texture result to change the texture of a fixed grid of rectangles.
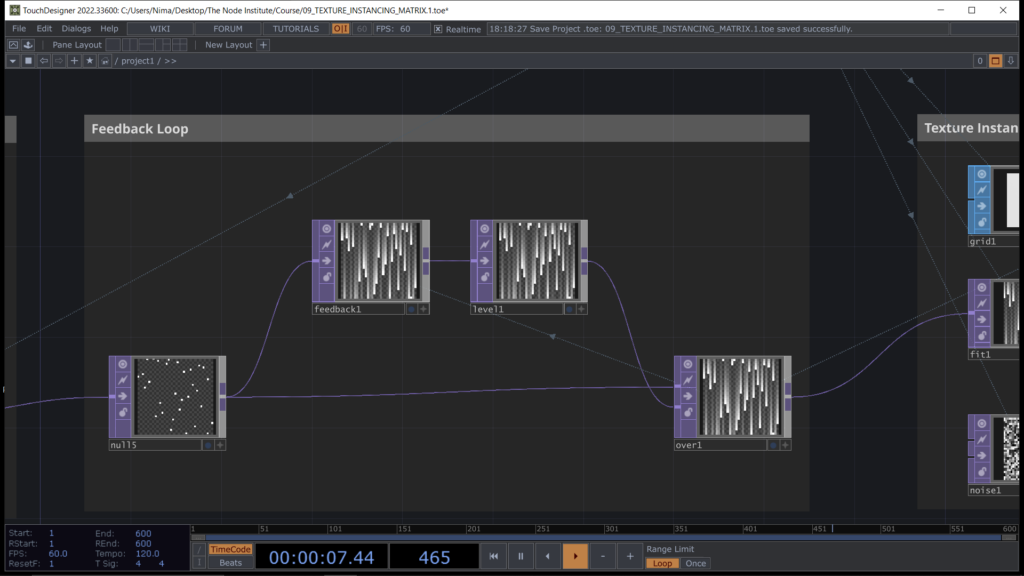
Let’s build our grid of rectangles by using Instancing and a Grid SOP as input for the point position.
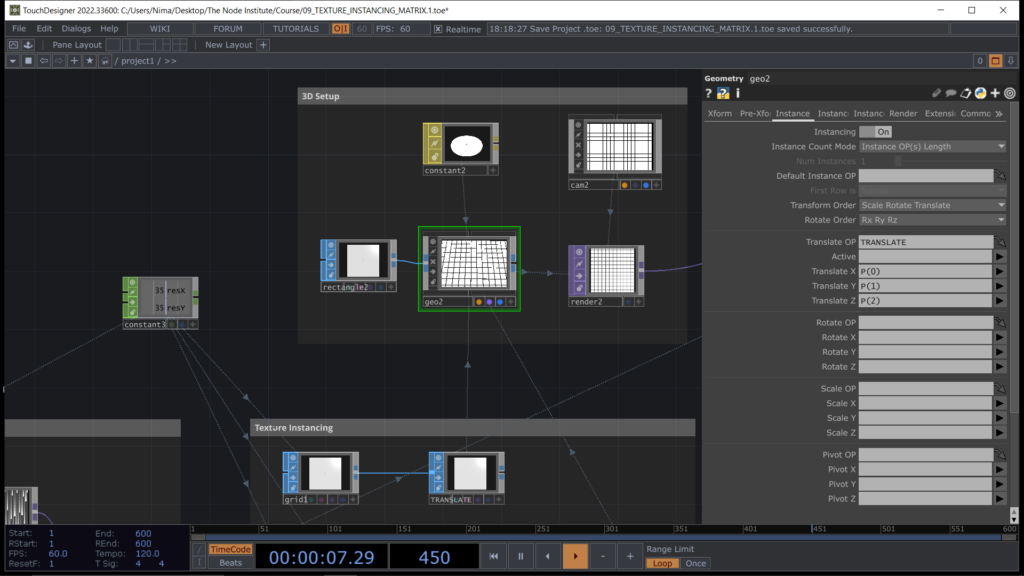
Now similarly to what we did before let’s create a list of characters to be used in our texture array. In my case I went online and search for korean alphabet. You can use the same or other characters.
Starting again from a Text DAT to import our characters we can then use a Convert DAT and split Cells ever ” ” (spacebar). In this way we can easily use the same method of copy pasting a Text TOP after properly have setted up the first one we the python expression “me.digits” in the parameter DAT Column.
Now feeding all the characters into a Switch TOP and input the python expression “me.time.rate%41 – 1” to loop between 0 and 40. Then using a 3D Texture TOP setting the type to 2D Tex Array, cache size to the maximum number of character to store 40 and Pre-Fill toggle button to ON.
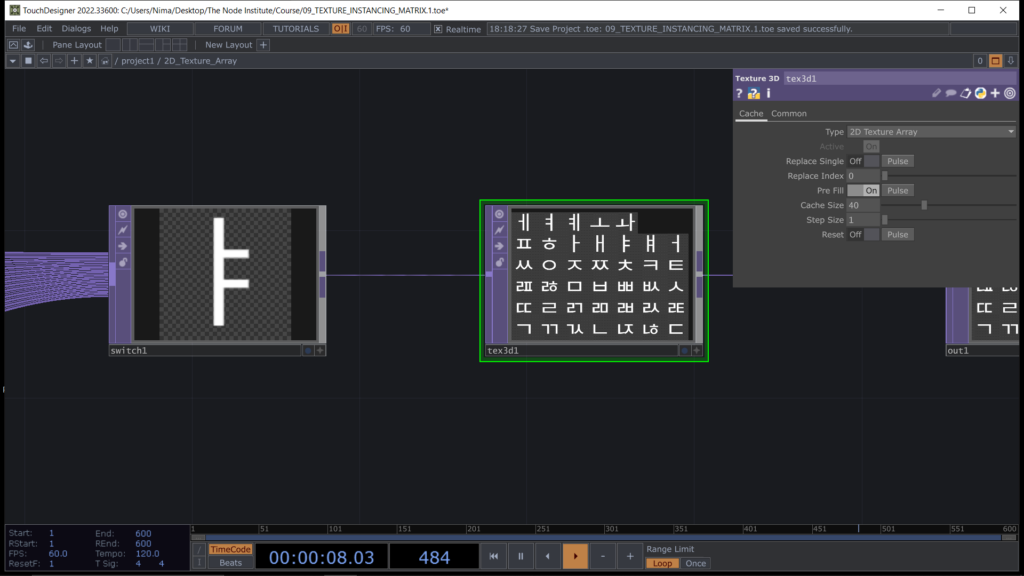
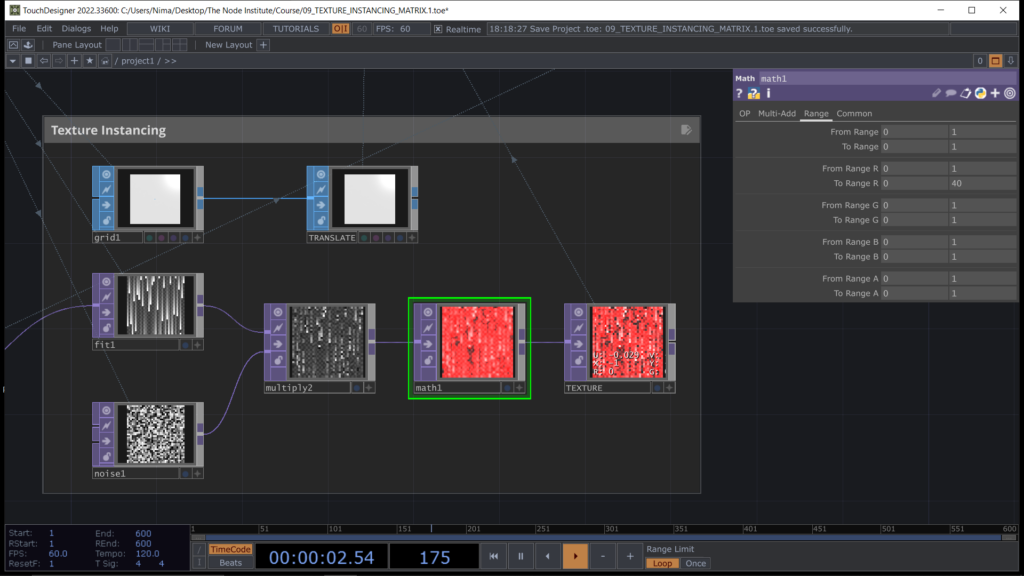
We can now go back to the Instancing process and build the logic to select each individual character to be assigned to each different rectangle of the Instancing. Let’s do it with the textures! Select your previous feedback loop result and mix it with random Noise TOP to obtain a new result to amplify with Math TOP and to assign to the attribute Texture of the instancing on the W channel.
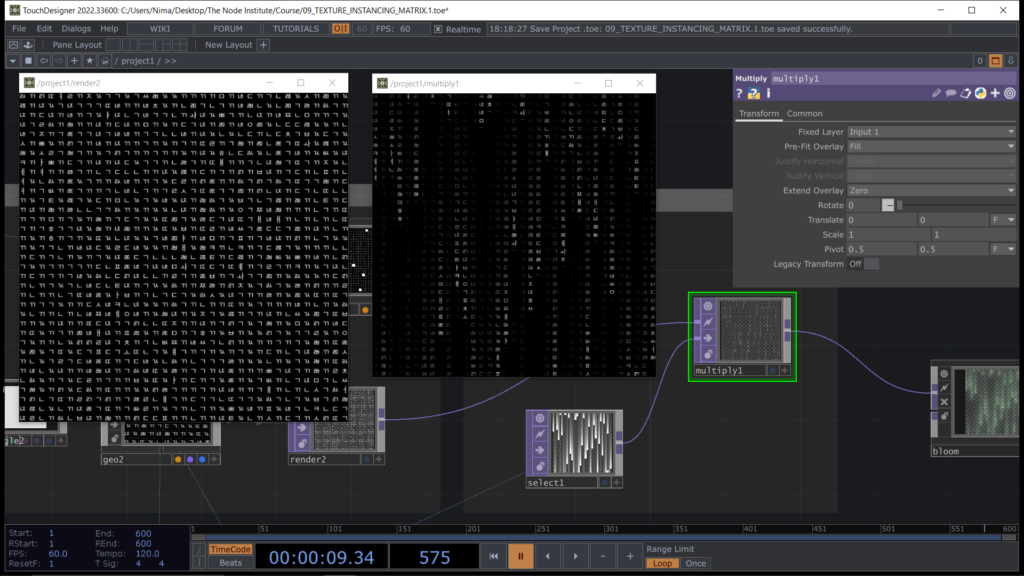
The end result in the Render TOP should appear like this image below and to reinforce the idea of a rain effect we can add multiply TOP and select in the second input the feedback loop texture.
The extra content related to this module shows how to use as input an image. Adjust its brightness and contrast while creating grayscale areas by using a combination of Limit TOP and Blur TOP, so to create groups of grey that can be used separately and transformed into selectable textures.
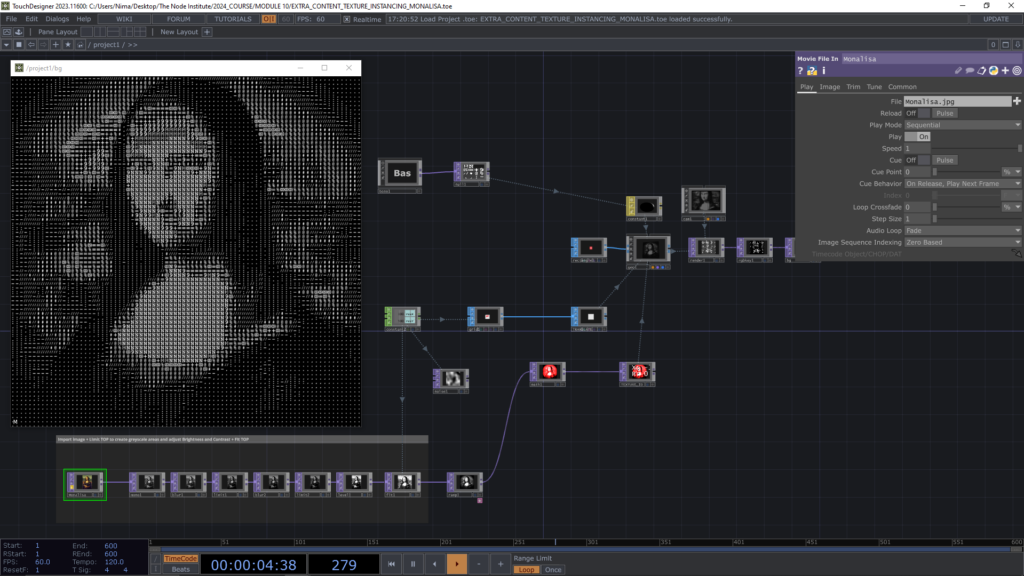
The secret relies on the selection of the characters that compose the Array of textures. By choosing characters in a sequence that starts from the “darkest” (eg. a point or a comma) until arriving to the brightest (eg. an hashtag, a bold character or a composition of multiple characters).
In this way you’ll be able to reproduce the luminance of a certain image or video by substituting each pixel brightness with a proper texture. Textures can be also created externally and imported as .png files to then build the 2D array inside Touchdesigner.
Learning Outcomes
- Texture Instancing is a powerful technique
- Understanding how to change textures inside an Instancing by using TOPs
- Know how to create a 2D Texture Array by using 3D Texture TOP
- Know how to convert a video into a 2D Texture Array and how to use it for different purposes
- Learned how to mix techniques and take advantage from each of them
List of Nodes
- Text, Rectangle, Noise, Multiply, 3D Texture, Switch, Math, Render TOP
- Grid, Rect, Line, Particle, Sort SOP
- Constant, Speed, Limit, Math CHOP
- Geo, Base, Cam, Container COMP
Get Support
To get support outside of the live session, please join our discord server with this invite:
https://discord.gg/F7cXRMYUK7
